
In my last post, I covered some of the difficulties of working with custom neural networks in Lens Studio. This time, I’ll show you what it looks like, with a step-by-step guide for building and implementing your own custom neural network in a Snap Lens.
By the end of this post, you’ll know how to:
- Train your own custom segmentation model using Fritz AI Studio. I used face masks for my example, but you can pick whatever target object(s) you want.
- Incorporate your model into a Lens Studio project via an ML Component.
- Visualize real-time predictions from the model.
- Make a color overlay and an interactive color slider to change the appearance of the segmented object.
Part 1: Building a model with Fritz AI Studio
Image segmentation models (like other computer vision models) require a lot of labeled data for training. We could always collect and manually annotate data, but that can be incredibly time consuming, since we’d need to do this for thousands of images.
Fortunately, we can get started with a much smaller number of images, thanks to the synthetic data generation tool in Fritz AI Studio. This tool allows users to:
- Easily upload and manually label a set of seed images.
- Automatically apply image augmentation techniques that are specifically targeted for mobile devices.
- From those seed images, programmatically generate ready-to-train datasets of thousands of images with accurately-labeled keypoints, bounding boxes, class labels, or segmentation masks — in a matter of minutes.
For my face mask model, I ended up labeling around 50 seed images for the final version seen in this post—but I was able to get a passable prototype with only 10 labeled images!
Seed Images
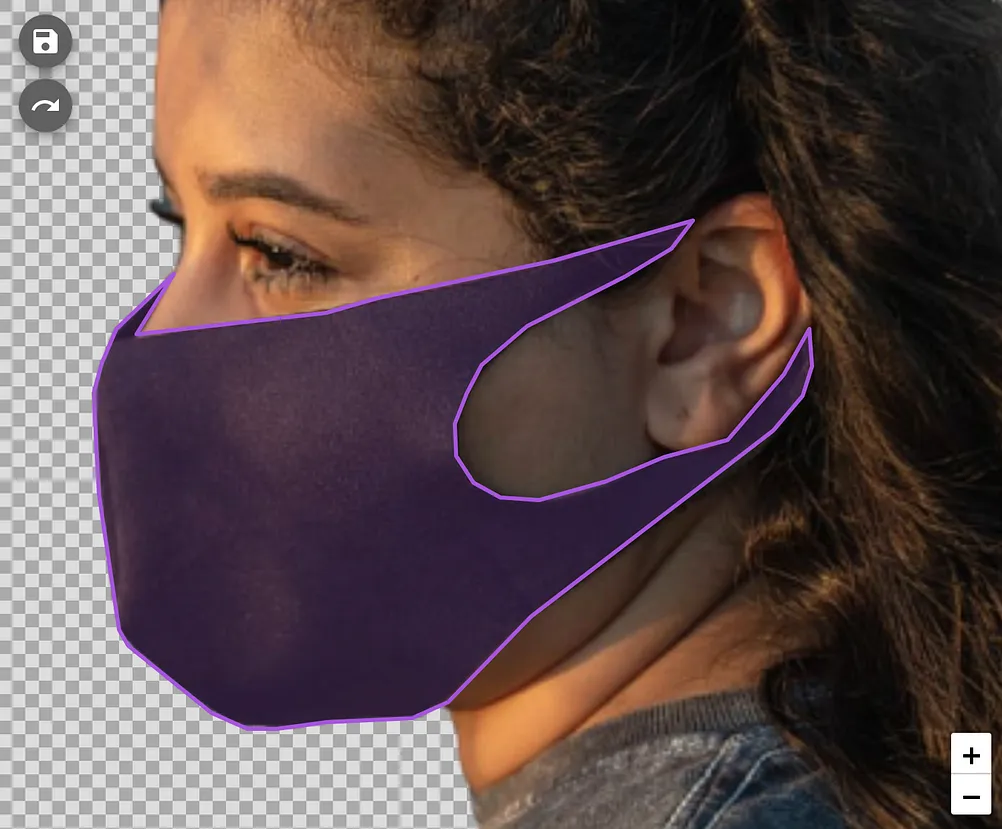
To generate a dataset in Fritz AI Studio, we start out by uploading and manually labeling a collection of seed images. A seed image is a .PNG of the object of interest (in my case, a face mask) with a transparent background. I used the free tool remove.bg to remove the backgrounds for my images, but you can also do so manually with image editing software like Photoshop.
For a face mask detector, you could make seed images of just the face mask itself, but I ended up including the subject’s head and shoulders, as well. As a consequence, the model learns what a face mask looks like in the context of a human face/head, so a mask sitting on a table, for example, would not be detected. The seed images I used were all close to 500×500 pixels.
A group of seed images is called an Image Collection in Fritz AI Studio. Once I finished annotating these seed images with segmentation masks, I used the dataset generation tool to turn my 50 manually-labeled images into 4,000 automatically-labeled images in only a few minutes.
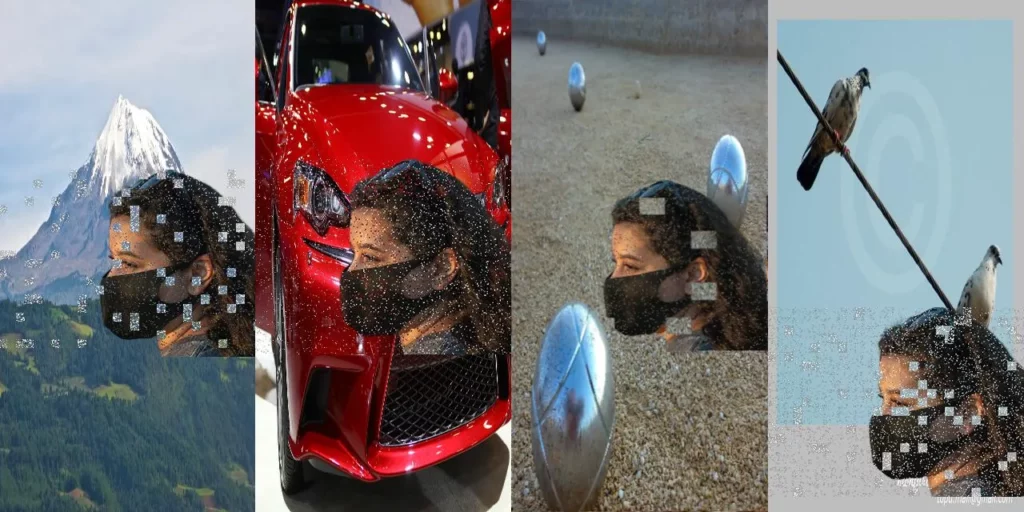
The dataset generation tool works by taking seed images and pasting them onto random backgrounds after applying some image augmentation. The generated images look a little funky, but as far as model training is concerned, they work just fine! This generated group of labeled, synthetic images is called a Snapshot in Fritz AI.
Fritz AI Studio also lets you control some of the aspects of dataset generation by editing the “Advanced Options” configuration when creating a Snapshot.
The Foreground Scale option lets you tweak the relative size of the seed images when they’re superimposed onto the background images to suit your needs. You can also adjust the Blank Ratio, which is the fraction of images that are left blank (no seed image is pasted on the background), and the Aspect Ratio, which controls the ratio of the width to height of the generated images.

Training a Model
Now that I have a large-enough labeled dataset, I’m ready to train my face mask segmentation model. I can do that in Fritz AI studio, too — I just need to configure a new training job (no code involved!) by selecting the Snapshot I generated and the model type (i.e. Image Segmentation), as well as my training budget (I went with 5 hours of training time — recommended as a default). Note that if model training finishes early, users will not be charged for the unused training time.
After I finished labeling my 50 seed images and configured and kicked off my training job, I had a trained model ready to go in about 3 hours — including both the dataset generation and model training!
Before you read further, note that we recently implemented functionality for Lens Studio/SnapML projects that lets you skip the following steps, which would otherwise be needed when working with your own custom neural networks:
- Converting a Keras model to TensorFlow protobuf format (.pb)
- Setting up a Lens Studio Project with an ML Component (Part 2)
- Building the Mask Lens (Part 3)
During model training, Fritz AI Studio automatically converts the model to .pb format, which makes it compatible with Lens Studio. You’ll be able to download this model file and a template Lens Studio project to help you start building your Lens quickly.
If you’re bringing your own model to the party, make sure you refer to Snap’s documentation on exporting your model to a Lens Studio-friendly format. This can be a tricky process, since not all neural network layer types are supported by Lens Studio.
The rest of this tutorial will assume that you have a trained model saved in the .pb format. Feel free to read on if you’re interested in the nitty-gritty of building Lenses with custom machine learning!
Part 2: Setting up a Lens Studio Project with an ML Component
To get started, go ahead and open up Lens Studio and click on the New Project button. There are lots of useful template projects, but we’ll start with an empty project for now to keep things simple.
Let’s first delete the default Camera and Lighting Objects under the Objects panel (which is on the upper left side by default), and the Echopark folder under the Resources panel (which is on the lower left side by default), since we won’t be needing those. Keep in mind that you can go to Window > Panels at any point if you can’t find the panel you are looking for.
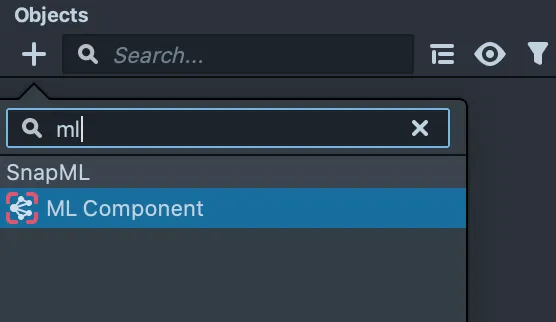
To make use of our model, we need to add an ML Component to the project. To do that, click the + sign at the top of the Objects panel, search for “ML”, and select the ML Component.
Next, in the system dialogue that pops up, we need to select our trained model .pb file to load it into the ML Component. Lens Studio provides RGB images with values ranging from 0–255 as input, and expects outputs in the range of 0–255 as well (for segmentation models), so you may need to adjust the scale and bias parameters to match your model’s expected inputs and outputs.
If you downloaded the .pb file from Fritz AI, the normalization is already baked into the model, so you can leave the scale and bias parameters in Lens Studio at their default values. If you’re doing this manually (possibly with a model you trained yourself), check out my last post for some tips on integrating the normalization into your model.
If the ML Component appears under a Perspective Camera, move it to the root of the object hierarchy and delete the Perspective Camera.
Once you import the model, it will show up under the Resources panel. Before we go any further with the model, though, let’s add some preview images (or videos) so we can visualize the model’s predictions once we connect the various pieces of the lens.
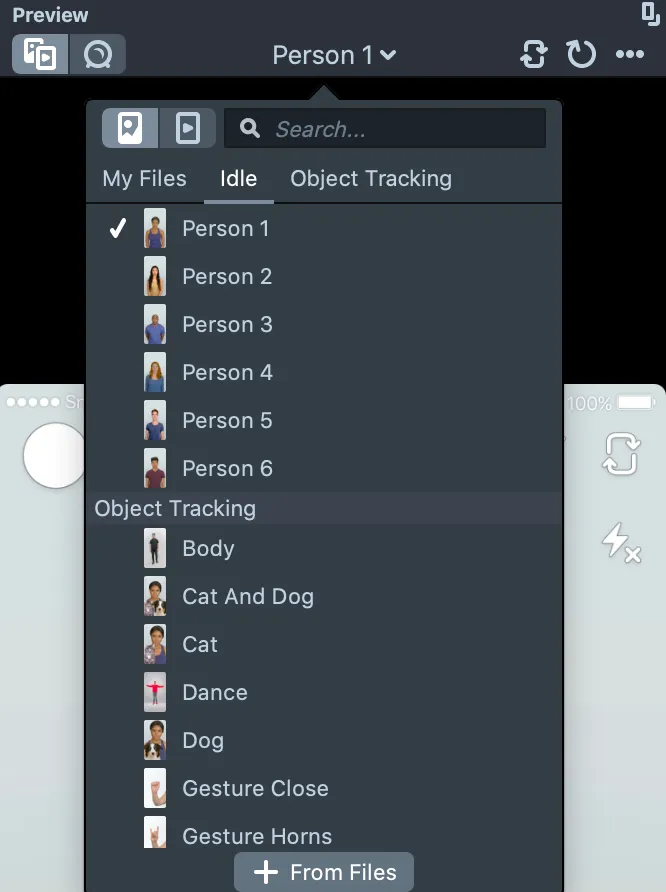
To do that, click on the top middle part of the Preview panel (on the right side in the default layout) where it says “Person 1”, click on the “+ From Files” button, and select your image file. Once the file is added, it should appear in the dropdown list where you can select it to use as your preview image.
Now that we have our trained model and a test image loaded into Lens Studio, let’s hook everything up so we can pass our image through the model, generate predictions, and visualize the results.
Part 3: Building the Mask Lens
Part 3.1: Visualizing mask predictions
In this section, I’ll show you how to make a basic, non-interactive version of the face mask coloring lens.
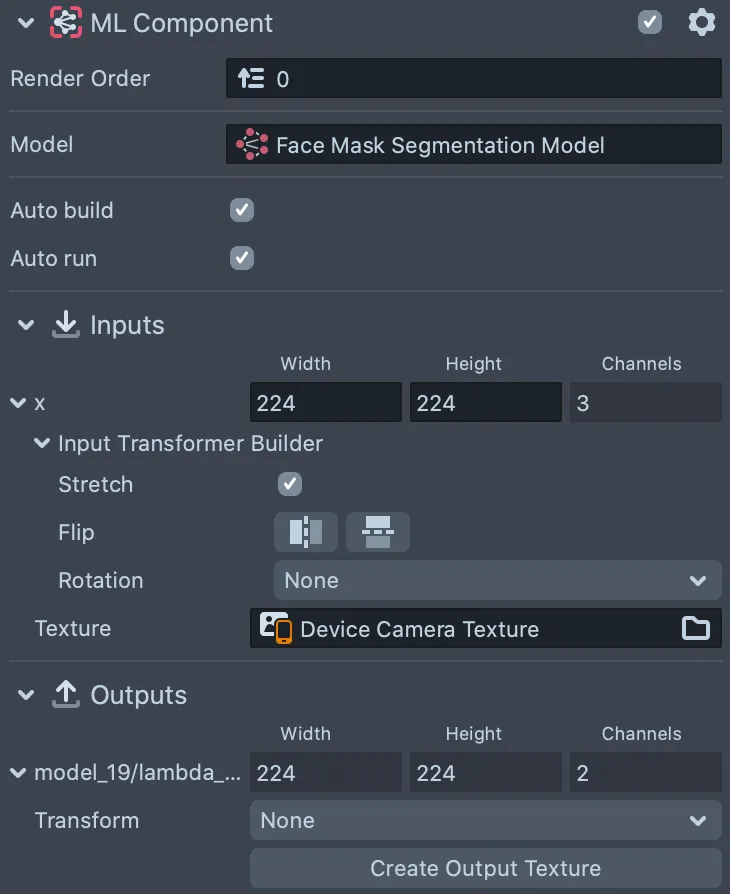
1. Configure ML Component input and output textures. Select the ML Component in the Objects panel, and it should appear in the Inspector panel (located to the left of the Preview panel). Near the bottom of the Inspector panel, set the input texture to Device Camera Texture. At the bottom of the panel, click the Create Output Texture button. This texture will now be available in the Resources panel (bottom left). Feel free to rename it — I’m calling mine Face Mask Model Output Texture.
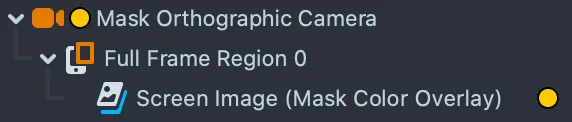
2. Add a Screen Image object. Next, we need to add a Screen Image object (the same way we added the ML Component — click the + sign in the Objects panel). That should appear nested under an Orthographic Camera object, which we’ll rename to Mask Orthographic Camera, because we’ll need another Orthographic Camera object later, for the UI.
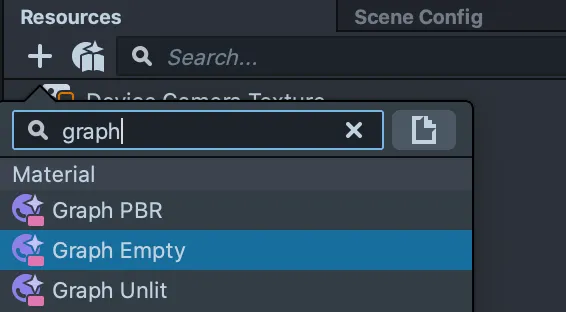
3. Create a material in the Material Editor. To process the model output, we need to make a material in the Material Editor. The material will let us control where a solid color overlay is displayed on the screen. We’ll use the model’s prediction at each pixel to determine the transparency of the color overlay: it will be more opaque where the model is more confident, and more transparent where the model is less confident. To get started, add a Graph Empty material in the Resources panel:
Double click on your new Graph Empty material to open it in the Material Editor. Feel free to check out the Lens Studio Material Editor documentation for an in-depth explanation of the underlying concepts, but the basic idea is that we’re making a graph (you can think of it as a function) whose inputs are:
- The segmentation model output
- The color of the color overlay
- The maximum alpha (opacity) value
The output of the graph is a shader node, which in our case controls the color and transparency of every pixel in our color overlay.
To add nodes to the graph, click the + button and search for the node type:

Here is the complete structure of the graph:
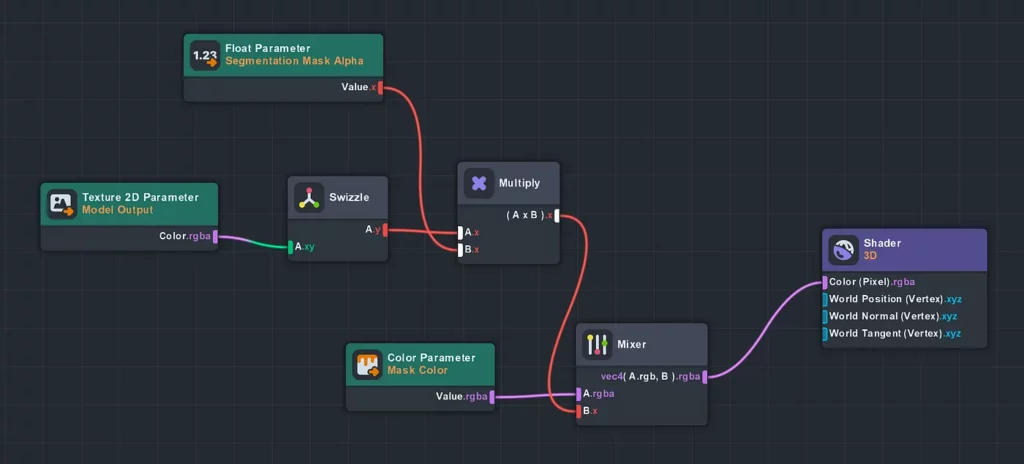
There’s quite a bit going on here—probably enough for a separate blog post— but for now I’ll go over the essential parts and give you a link to download the material (link initiates a download) and drop it into your project so you don’t have to make it from scratch.
The Float Parameter node controls the maximum opacity of the color overlay. Setting this value to 0.6–0.7 worked well for my use case because it allows for some of the details of the face masks to come through.
The Texture 2D Parameter node takes in the model output. My model has two output channels: one for a background class, and one for face masks. Having two channels is redundant for segmenting a single class of objects, but Fritz AI Studio produces models with a background class because it offers the flexibility of training models that can segment multiple classes of objects separately.
So, for our material, we just need to grab the second channel of the model output using a Swizzle node. Finally, the Color Parameter node takes in a color as input. For now, we’ll have to select a color manually, but eventually we’ll hook this up to the color slider UI element.
Both the Texture 2D Parameter and Color Parameter nodes are exposed to custom scripts — more on that in Step 3 of the next section.
4. Connect the model output texture. Now that we have the material graph set up, we need to connect the model output texture. Select the material in the Resources panel, and you should see Graph Parameters in the Inspector panel. Under Graph Parameters, set the Model Output parameter as the model output texture created in Step 1 above.
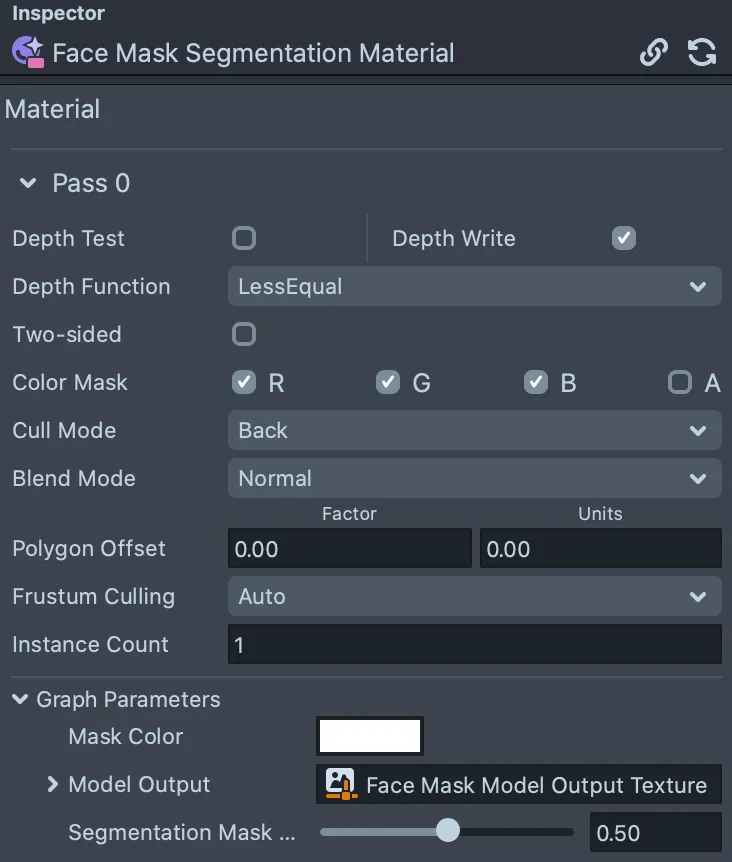
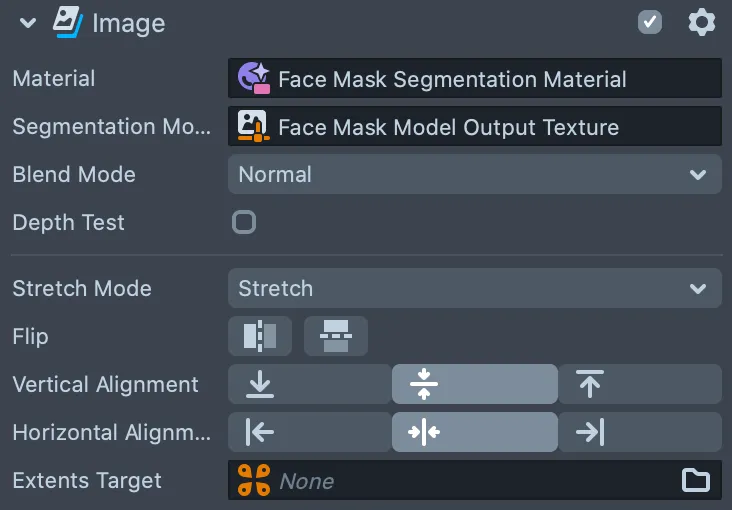
5. Configure the Screen Image component. Set the Material as the segmentation material from Step 3, set the Texture to the model output texture from Step 1, and set the Stretch Mode to Stretch.
At this point, you should be able to see your model’s predictions! Try selecting the mask material in the Resources panel and playing with the Mask Color and Segmentation Mask Alpha parameters (which control the transparency of the color overlay) in the Inspector panel.
Part 3.2: Adding a Color Slider
Let’s spice things up a bit and add an interactive UI element that will let users pick the color of the face mask overlay.
1. Create another Orthographic Camera. The easiest way to do this is to duplicate the Mask Orthographic Camera (right click > Duplicate) and then delete the Full Frame Region 0 under the new camera. Let’s rename it to Slider Orthographic Camera while we’re at it.
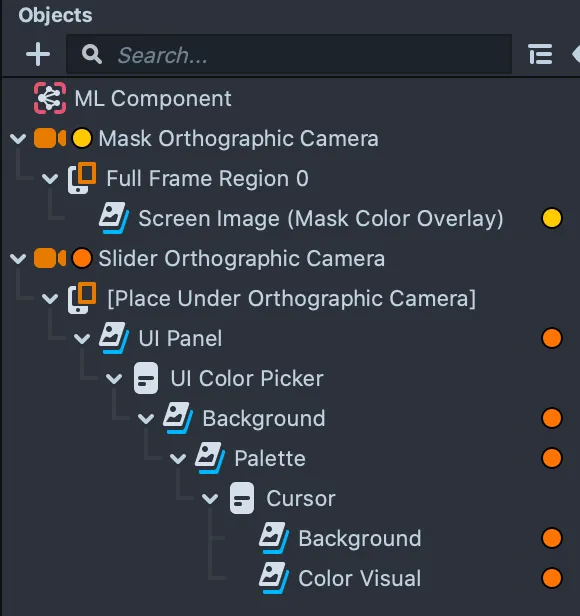
2. Implement the Slider. Follow the instructions here (make sure to use the Slider Orthographic Camera from Step 1) to get UI elements into your project. Once you have the UI pieces in your project, you can delete the Tap Hint and everything nested under UI Panel, except for the UI Color Picker. Your object hierarchy should look like this:

3. Modify the UI Color Picker component. Open the UIColorPicker script found in the Resources panel under UI > Resources > Scripts, and change line 48 from
//@input Component.MeshVisual colorRecipient
to
//@input Asset.Material colorRecipient
And change line 652 from
script.colorRecipient.mainPass.baseColor = currentColor;
to
script.colorRecipient.mainPass.maskColor = currentColor;
Note that maskColor is the name we gave to the Color Parameter input node in the Face Mask Segmentation Material graph from Step 3 of the previous section.
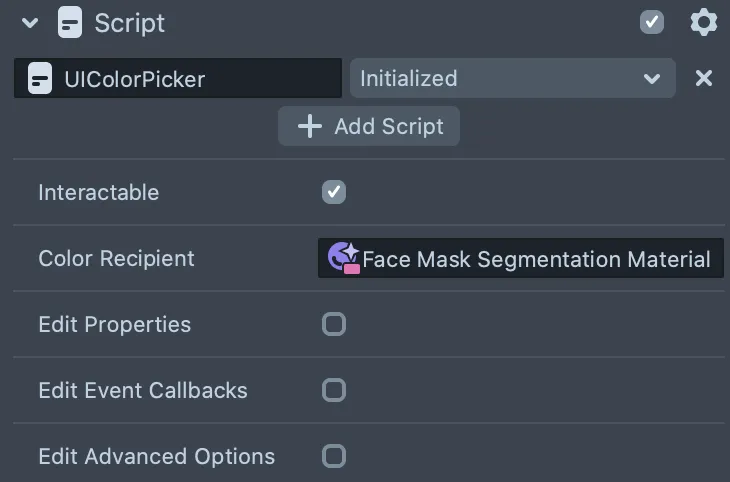
These code changes enable us to connect the color slider to our face mask color overlay. Select the UI Color Picker in the Objects panel and assign the segmentation material from Step 3 in the previous section:
4. Organize the various components into two layers. Let’s put the color overlay components in one layer and the color slider components in another layer, so we can control when those layers appear in our Lens. This allows us to display the color overlay at all times and only show the color slider in capture mode. Everything under Mask Orthographic Camera should go in a layer called “Mask”, and everything under the Slider Orthographic Camera should go in a layer called “Slider”.

Make sure you expand the UI Panel component and assign everything under that to the “Slider” layer, as well:
5. Organize render targets in the Scene Config. This step enables us to display the color slider UI element in live mode when recording a Snap, but have it disappear in capture mode before sending the snap. We’ll set this up in the Scene Config panel. The Scene Config panel lives behind the Resources panel in the lower left. Click on Scene Config so it’s visible.

In the Scene Config, click on the Render Target button to the right of Capture Target. In the window that pops up, rename Render Target to Capture Render Target, and make a new Render Target called Live Render Target.

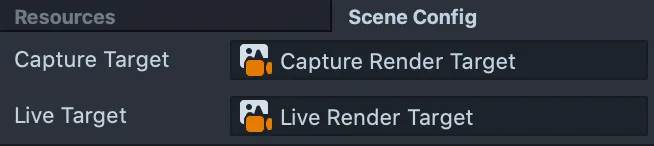
Back in the Scene Config, set the Capture Target to Capture Render Target, and set the Live Target to Live Render Target.
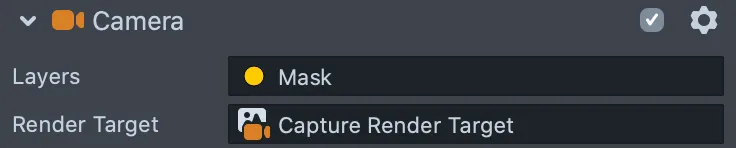
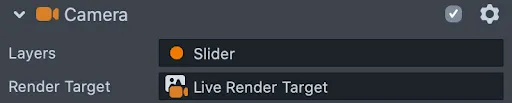
Make sure that the render target for the Mask Orthographic Camera is set to Capture Render Target, and that the render target for the Slider Orthographic Camera is set to Live Render Target.
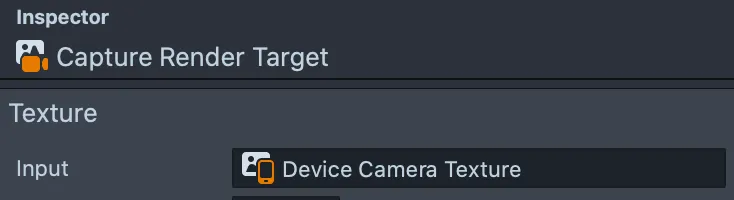
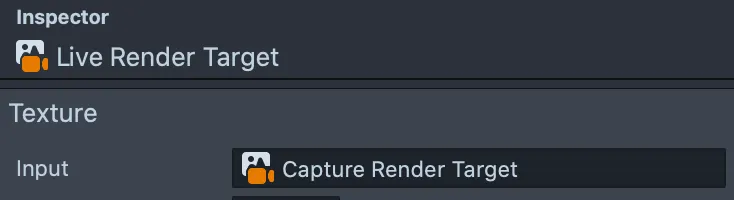
Finally, set the input texture of the Capture Render Target to be the Device Camera Texture, and set the input texture of the Live Render Target to be the Capture Render Target.
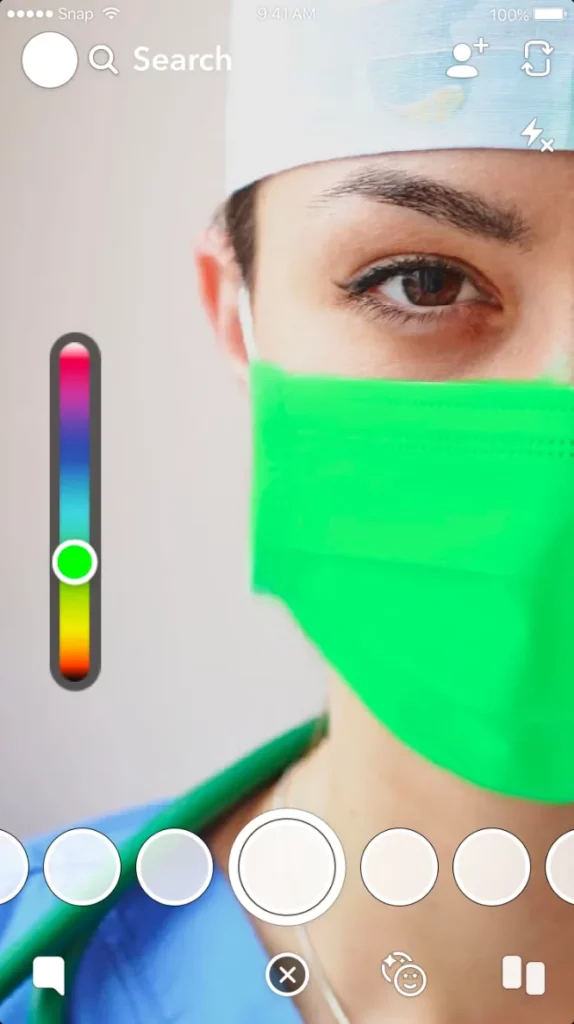
Let’s test out our new lens on a phone! You can easily pair your device with Lens Studio and preview lenses on Snapchat. Here’s what the face mask colorizer looks like in action:
Conclusion
And that’s it! We just built our very own face mask color changer Lens with a custom neural network, implemented in a Lens project via SnapML. We worked with a few different processes and tools, so let’s quickly recap:
- In Fritz AI Studio, starting out with only 50 manually-labeled seed images, we generated a data Snapshot of 4000 automatically-labeled images that we used to train our custom face mask segmentation model. We exported this Lens Studio-compatible model and an accompanying project template.
- And for those who wanted to explore the nitty gritty of working with Lens Studio, we also worked through a step-by-step of the Lens building process, with special attention paid to working with custom neural networks.
Stay tuned for more as our team continues to experiment with Lens Studio and Snap ML. And if you’re interested in building custom ML models to use directly in Lenses, let us know!

Comments 0 Responses