
Provide intelligence to mobile apps
Most of the time, when we start working with machine learning, we tend to use models that are readily available online so that we don’t have to spend time and effort creating and training them on our own. But this comes at a cost, as these models don’t usually fit our requirements exactly as expected. Fortunately, Apple has provided Create ML to address those issues, and in this article we’ll learn how to use our own data and categories to train our models.
Intro to Create ML
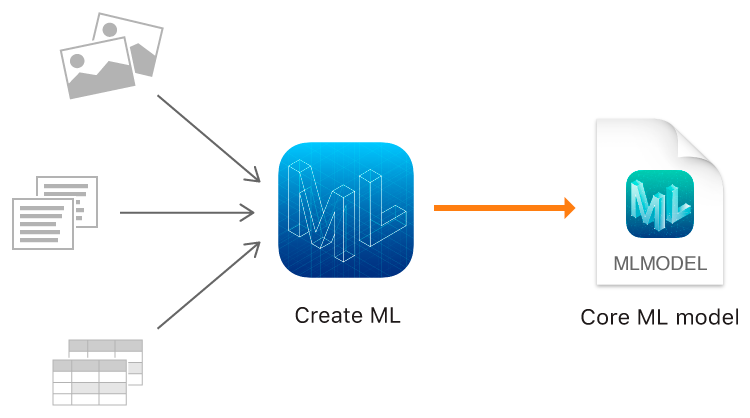
We can use Create ML to train models to perform tasks like recognizing images, extracting meaning from text, or finding relationships between numerical values.
System Requirements
To get started, we need a minimum macOS version 10.14 Mojave or later to use Create ML. In macOS 10.15 Catalina, Create ML has been upgraded to be a standalone app. But in this article, we’ll use Create ML in an Xcode playground instead.
Data Requirements
Before we can train a model, we need data. Since we’re building an image classifier as discussed in the previous article Introduction to Machine Learning for iOS Developers, our training data will consist of images.
In our example for this article, we’ll use images of ten healthy snacks and ten unhealthy snacks. You can download the dataset from this link. The dataset has almost 7000 images split into different categories with 350 images each.
Once we have the trained model, we can easily plug into working code and see it in action.
Getting started with the Playground
We can now create an empty macOS playground using Xcode (name it anything you want), and since we will use Create MLUI for this tutorial, we’ll import it.
With CreateMLUI imported, we can create an ImageClassifierbuilder as shown below:
Once you hit run on the playground, you’ll see the following view:
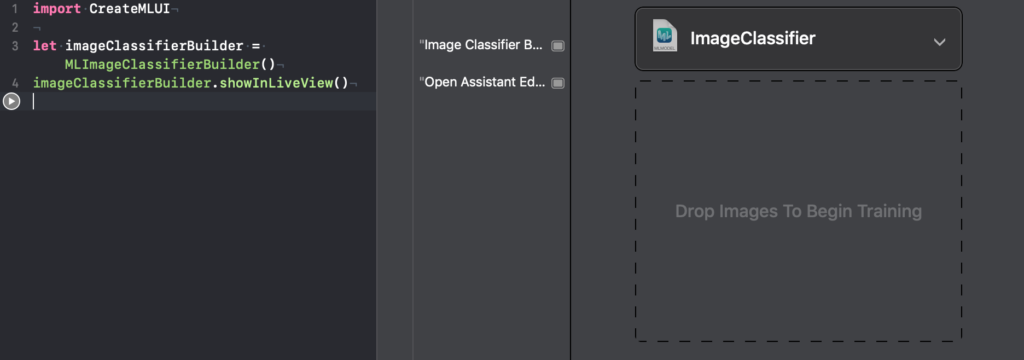
The playground is now telling you where to drop the images.
In order to start training, we can drop the training folder from our dataset into the playground, and the training process will start. We can have a look at the process inside the tabular layout, as shown below:
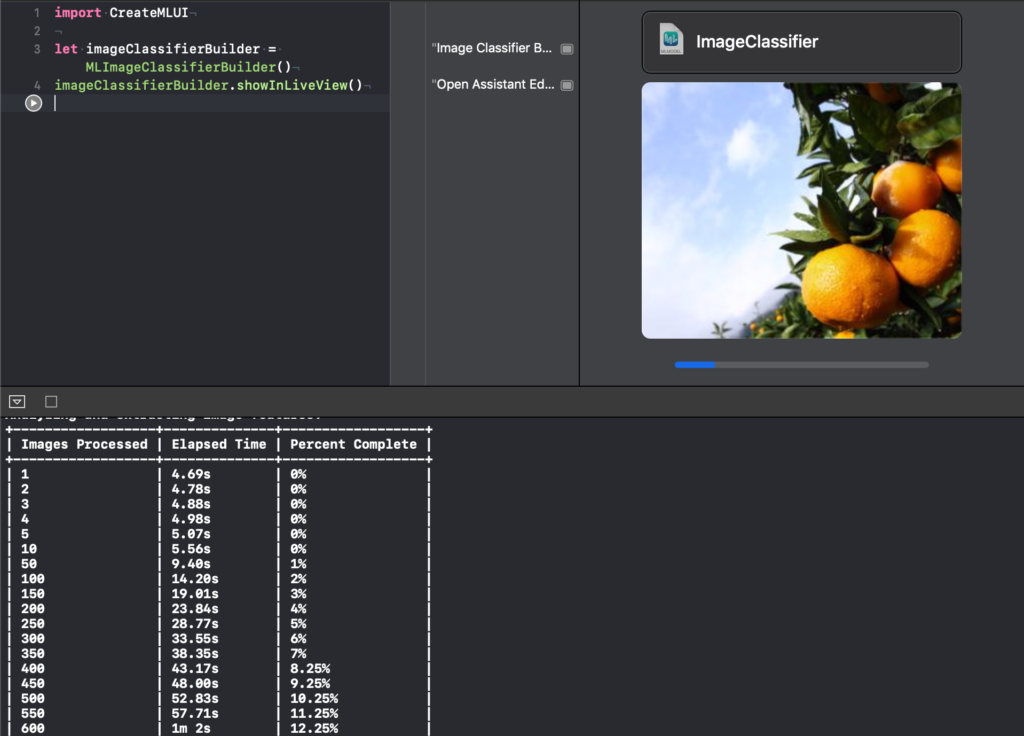
Depending on the machine configuration, training times may vary.
Vision Feature Print Scene
Create ML uses VisionFeaturePrint_Scene as its underlying model. It’s a model that was designed by Apple, and according to it’s official introduction:
VisionFeaturePrint_Scene was pre-trained on a huge dataset to recognize a number of classes, and it did this by looking for specific features in an image (yields a 2048 float feature vector) and by learning to combine those features to classify an image.
Training process
- Almost all the training time for our dataset is spent extracting 2048 features from our images. These features include low-level edges, mid-level shapes, and task-specific high-level features.
- Once the features have been extracted, Create ML spends a tiny amount of time separating the given images into 20 classes.
Since VisionFeaturePrintScene has already seen a lot of images of similar items, it already has knowledge about the kinds of images that we’ll be using. At the moment, it doesn’t know about our very specific 20 types—because of this, we cannot use it directly. Instead, we can use it as a feature extractor.
Defining a Feature
For example, pixels of an image can be used as features, but the individual values of RGB don’t provide enough information. VisionFeaturePrint_Scene transforms the pixel features into features that are much more descriptive of the objects in the images. For each input image, the output that’s produced consists of 2048 numbers, as mentioned previously. These numbers represent the content of the image at a high level.
You can think of it as a 2048 dimensional space where each image is defined by a point on this space. In this space, images with similar properties are nearby each other.
An example of one these dimensions could represent the color of the food item. In this case, lemons and bananas would have very similar values. Another feature can represent the length of the object—in this case bananas, carrots, and hotdogs will have higher values compared to lemons. However, lemons, oranges, and apples would score higher when it comes to roundedness (shape).
Models don’t clearly define these features in normal human words. Instead, these 2048 features describe much more information than just the pixel, color, location etc. You might be thinking that since its a 2048 dimensional space, it might be simple to just draw a results plane through the space to get required results, but that isn’t possible. This is because VisionFeaturePrint_Scene wasn’t trained on our own dataset. It was trained on ImageNet, which is a collection of 1000 classes, not 20.
In order to be able to classify our images, we need to transform the data one more time into the 20 dimensional space that we can interpret as the probability distribution over our 20 types of food items.
Create ML uses Multinomial Logistic Regression to do that.
Training and Evaluation
Create ML uses only uses 95% of the training dataset for training. Once the training is complete, we can have a look at the console logs to see the following highlighted message:

As described by the message, the remaining 5% of the dataset will be used as a validation set for evaluating performance of the model on non-training set data.
Once training is complete, we can check the playground console logs to see the iterations as follows:
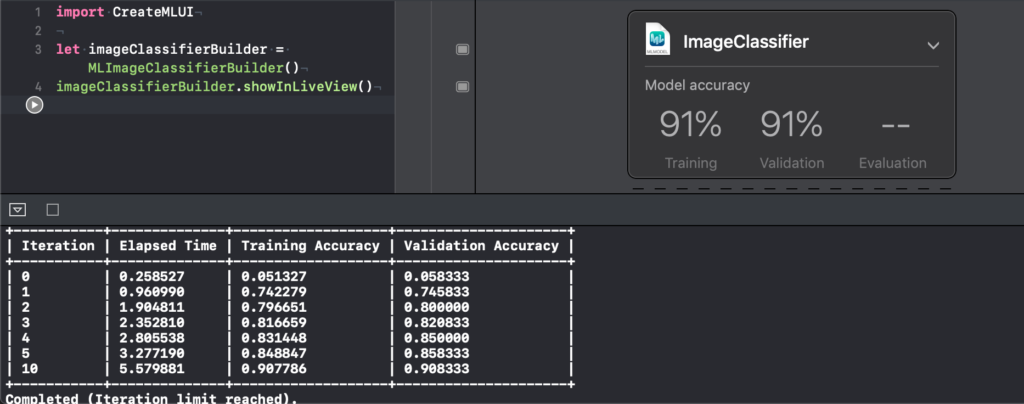
After all the iterations are complete, we can see that the model has a training and validation accuracy of about .91. This means that the classifier is correct on about 91 out of 100 images.
We can improve the accuracy of the model by increasing the iterations but, that will require more time and resources to train. We can do that by modifying certain attributes in the playground and supplying the model with a separate validation dataset (we’ll go over this process in upcoming articles).
For now, we can go ahead and save the trained model by clicking the disclosure symbol. Once training is complete, a new interface will appear, as shown below:
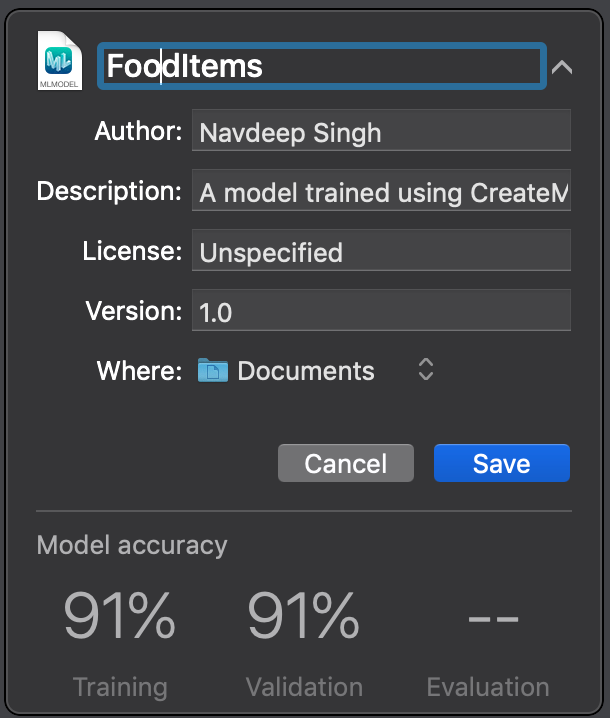
We can now change the name of the model and click save to save it to the selected folder. The resulting file will only be a few hundred KiloBytes.
For other updates you can follow me on Twitter on my twitter handle @NavRudraSambyal.
Thanks for reading, please share it if you found it useful 🙂

Comments 0 Responses