
Pneumonia is an inflammatory condition of the lung affecting the alveoli. Typically, symptoms include some combination of productive or dry cough, chest pain, fever, and trouble breathing. According to UNICEF pneumonia remains the leading infectious cause of death among children under five, killing approximately 2,400 children a day.
Early diagnosis of this treatable condition is very important, as it could facilitate earlier treatment and hopefully result in improved clinical outcomes. There are several tests used to confirm diagnoses, including analysis of chest X-ray images.
To aid physicians and expedite the diagnosis of pediatric pneumonia using chest X-ray images, deep learning could be very useful; as we know, it’s super-skilled at classifying images.
In this tutorial, I’ll try to develop an image classifier iOS app to see how I can use Apple’s ML tools to detect pediatric pneumonia.
This tutorial is an experiment limited to my know-how, rather than an attempt at providing a real aid system for physicians—so take it with a grain of salt.
Introduction to Apple’s Machine Learning Tools
Before jump into training an image classifier, let’s have a look at the brief history of the machine learning tools that Apple provides. At WWDC 2017, Apple announced the Core ML framework. This framework was Apple’s alignment to the fast-developing machine learning world.
Via Core ML, developers could integrate third-party machine learning models into their apps. A Python framework called coremltools was also made available to convert deep learning models from popular frameworks like Keras, Caffe and Scikit-learn, to Core ML format.
To use coremltools, one needs to know Python. This created a learning barrier for iOS developers. To lower this barrier, Apple announced a simpler machine learning tool called Create ML in WWDC 2018.
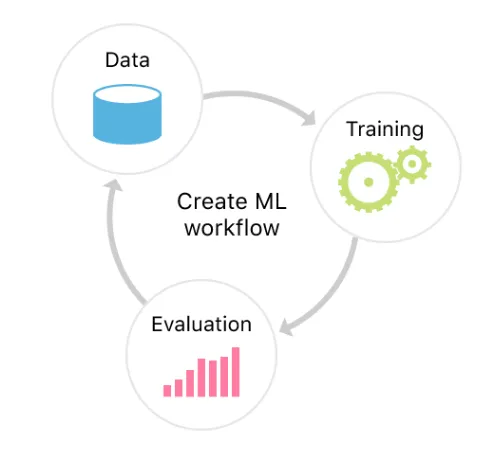
Thanks to this tool, iOS developers have fewer excuses for not developing smart iOS apps right now. Create ML is an end-to-end machine learning solution that can be used in the Playground. So developers can create their solutions all in Apple’s ecosystem with Swift and Xcode Playground.
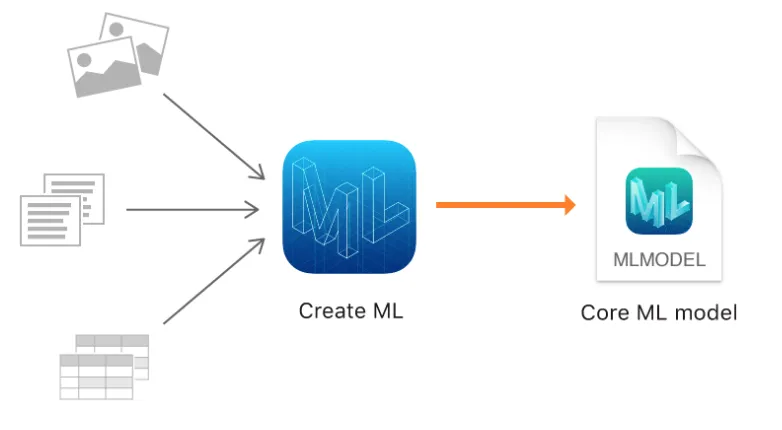
With Create ML, iOS developers can create image classification models easily. Any developer can now classify flowers, dog breeds, objects, and even help doctors classify Pneumonia from Chest X-Ray Images.
Create ML makes it easy to train models with large image datasets and then test those models with images they haven’t seen before. When you finish with training and testing, you can even drag-and-drop your trained model from Create ML into your Xcode Project.
Create ML uses built-in machine learning models in iOS 12. Therefore, models trained within Create ML are trained faster and requires less space on a disc. This technique is called transfer learning. This method generally takes a pre-trained model on a different but similar dataset and only trains the last layer with a custom dataset. So instead of training a model for weeks, developers can use a pre-trained model and make use of its learned features to detect similar images.
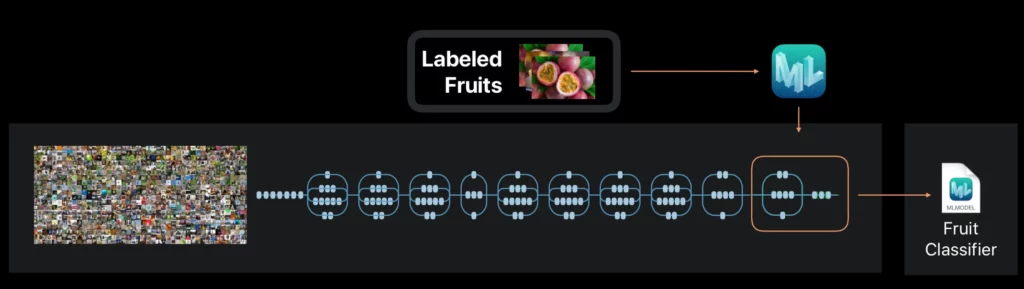
Apple includes this pre-trained model in iOS 12. Therefore, it can be re-used for other custom models that developers have trained. Since custom-trained .mlmodel files only preserve the last logistic regression model which is trained on the output of this built-in model, (2048 float feature vector of VisionFeaturePrint) it requires less space on a disc.
The Dataset
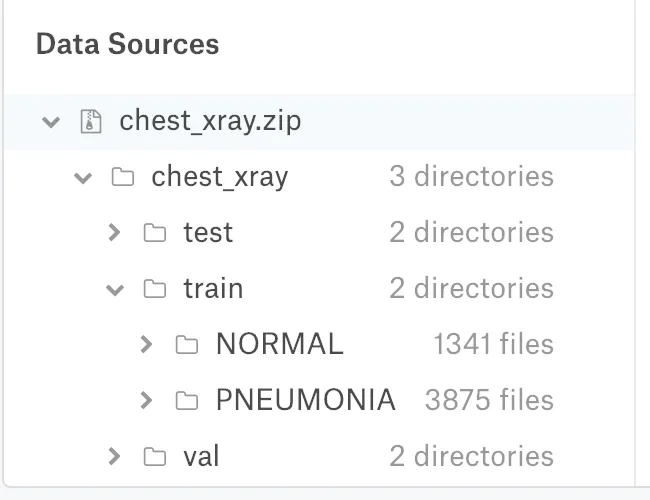
I will be using the Chest X-Ray Images (Pneumonia) dataset (1gb) from Kaggle. The dataset is organized into 3 folders (train, test, val) and contains subfolders for each image category (Pneumonia/Normal).
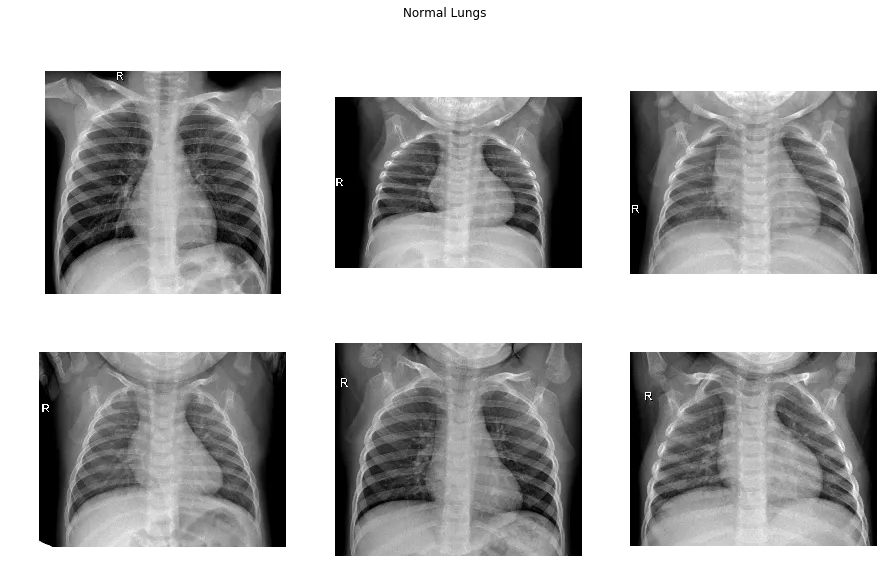
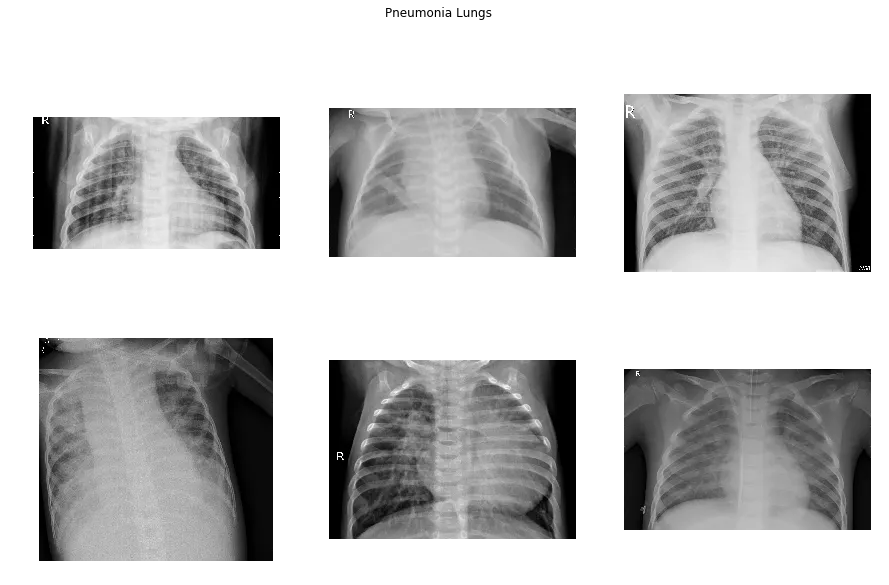
Chest X-ray images (anterior-posterior) were selected from retrospective cohorts of pediatric patients of one to five years old from Guangzhou Women and Children’s Medical Center.
There are several types of pneumonia: Bacterial, viral, mycoplasma, fungal. This dataset consists of samples belonging to the types of bacterial and viral.
The dataset is unbalanced, with 1341 normal, 3857 pneumonia samples. It’s difficult to have high accuracy on such a dataset, but let’s download and see what we can do.
Let’s Try Create ML
Create ML is available in Playground. Let’s first create an empty MacOs Playground.
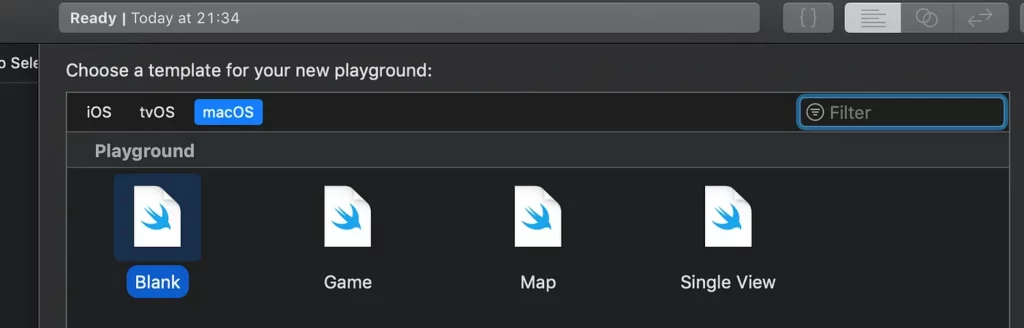
MLImageClassifier builder is an Xcode playground UI that we’ll be using to train our model. In order to use it, we need to import the CreateMLUI framework, as shown below. We create an instance and call the showInLiveView method to show the image classifier builder in the assistant editor.
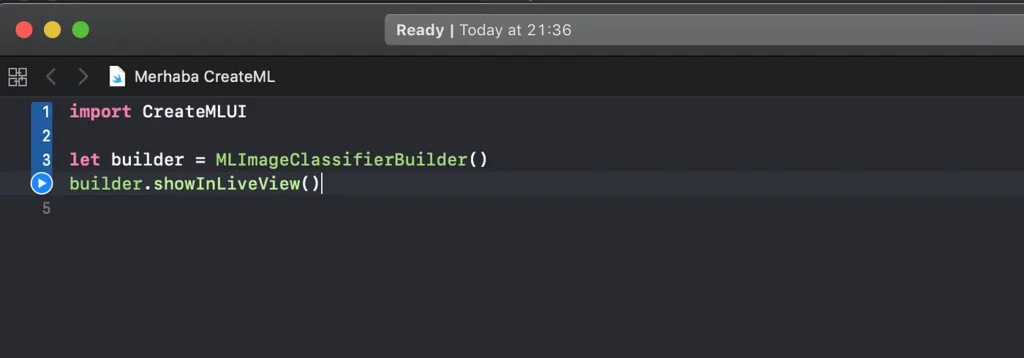
Hit the play button or use the shortcut (shift+command+enter) to run the code. This live view will be shown below.
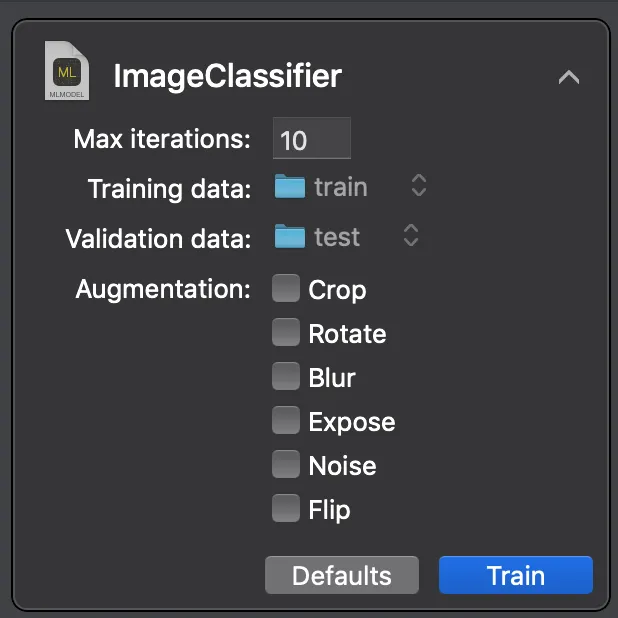
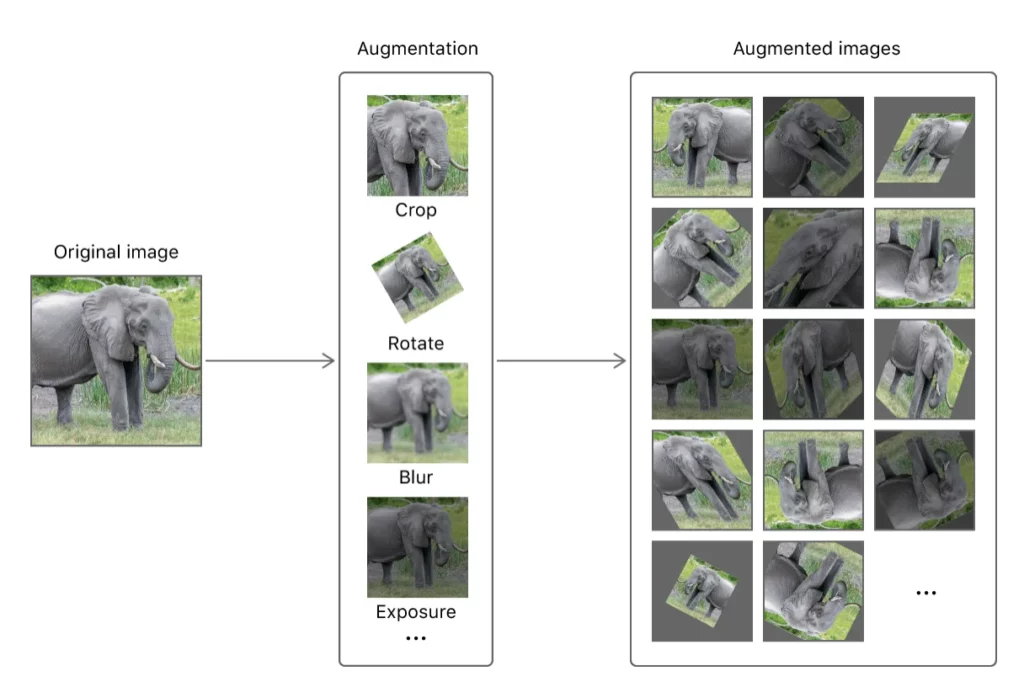
On this view, you can change the number of epochs (iterations) for training. Specify the folders for your training and validation data. Also, if you need to augment your images to increase your training samples, you can use augmentation which creates cropped, rotated, blurred and exposed images automatically. Data augmentation helps in reducing overfitting and gives better results.
Hit the train button in the live view to start training.
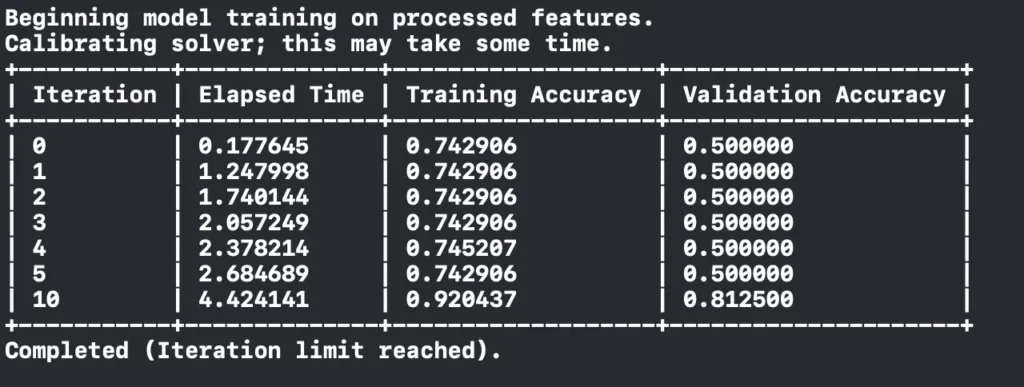
First, it will extract image features from the data. It took 20m 1s to extract image features of the training data (5215 images). It took 3.6s for validation data (15 images).
You can track the status of the training process in the bottom panel.
When you’ve finished training, you can just drag and drop your test folder to test your model with the images it hasn’t seen before.

Testing starts immediately after dragging.
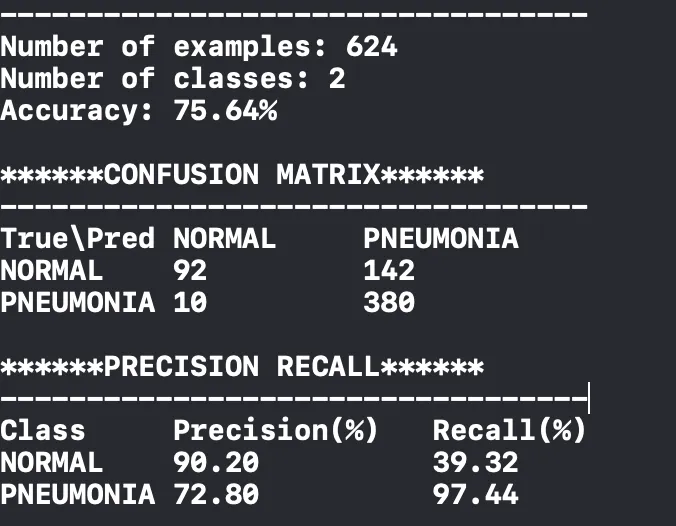
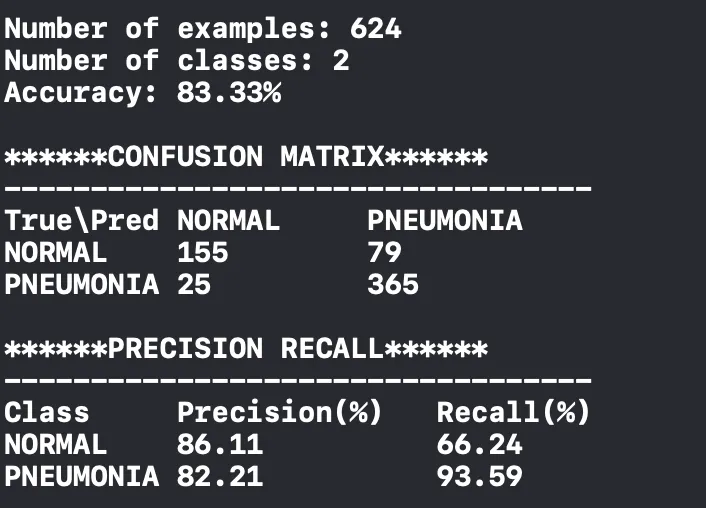
The results of your test are shown (as below) with a confusion matrix and precision-recall. In this case, the most important thing is not missing the pneumonia patient—incorrect classifications that classify the pneumonia patient as normal must be kept to a minimum.
Here we see in the confusion matrix that we misclassified 10 patients who have pneumonia. We successfully classified 380 of 390 patient who have pneumonia. And we misclassified 142 normal people as pneumonia patients.
This is probably the result of our unbalanced dataset, as mentioned earlier. Since it has more samples for pneumonia it may tend to classify more images as having signs of pneumonia.
Improving the Accuracy
To increase this model’s accuracy, we can balance the dataset, increase the samples, or increase the number of iterations. In this post, Apple gives some recommendations for increasing accuracy.
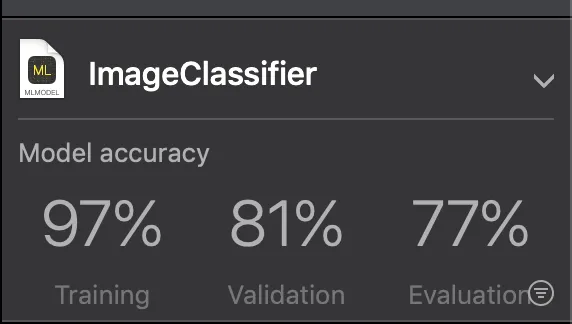
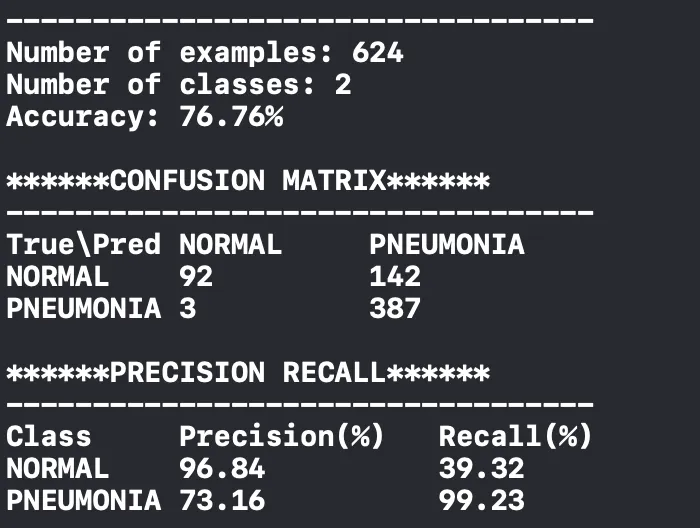
For another experiment, I increased the number of iterations to 20. More iterations increased the training accuracy from 92% to 97%.
Also, this decreased the number of misclassified patients to 3, but the model still isn’t good at detecting normal images. We need to increase the recall of the normal class.
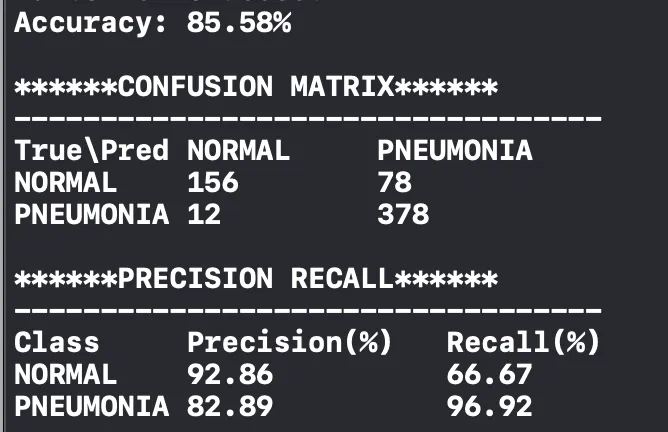
Another experiment—I deleted some photos randomly from the pneumonia folder in the training data to balance the dataset. So now each folder has 1341 images. I trained with this dataset for 10 iterations and the results on the validation dataset is below. Finally, the recall of the normal class increased.
In the last experiment, I trained a model on this balanced dataset with 20 iterations. The results improved.
To keep this tutorial compact, I’ll continue with this trained model.
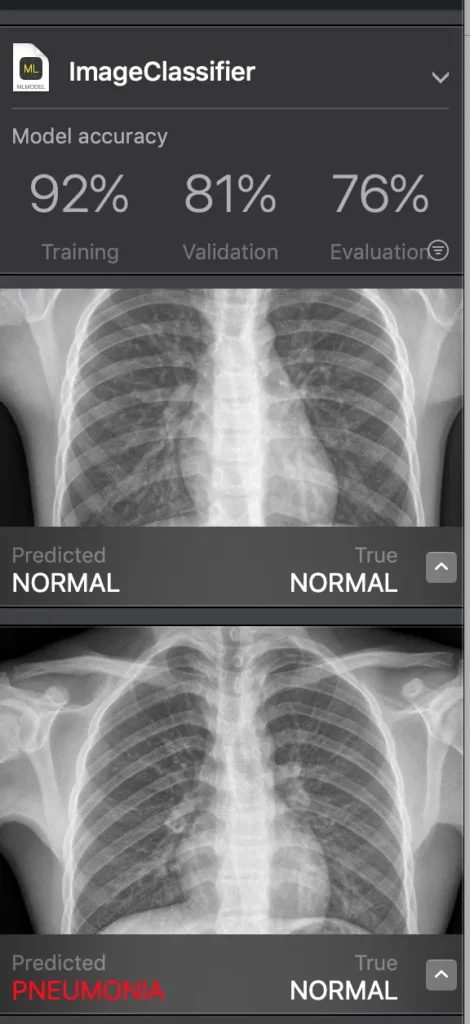
When testing is finished, you can also see evaluation accuracy, which shows the accuracy on the test dataset. Images on the test dataset are shown below, so you can see which images are misclassified.
When your model is ready, you can rename it and save from this view.

It’s also possible to directly drag-drop your model into your Xcode project.
Let’s Use the Trained Model in an iOS App
Apple shared a sample project on GitHub to use Core ML for image classification. Download this project if you want to try your trained model on a device. This project uses the MobileNet model—I deleted this model and drag-dropped the model I trained.
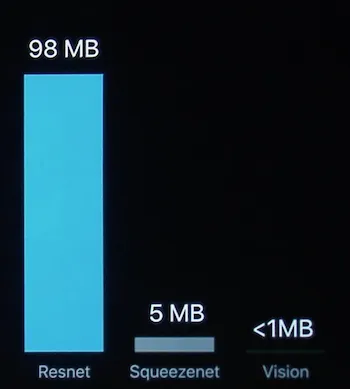
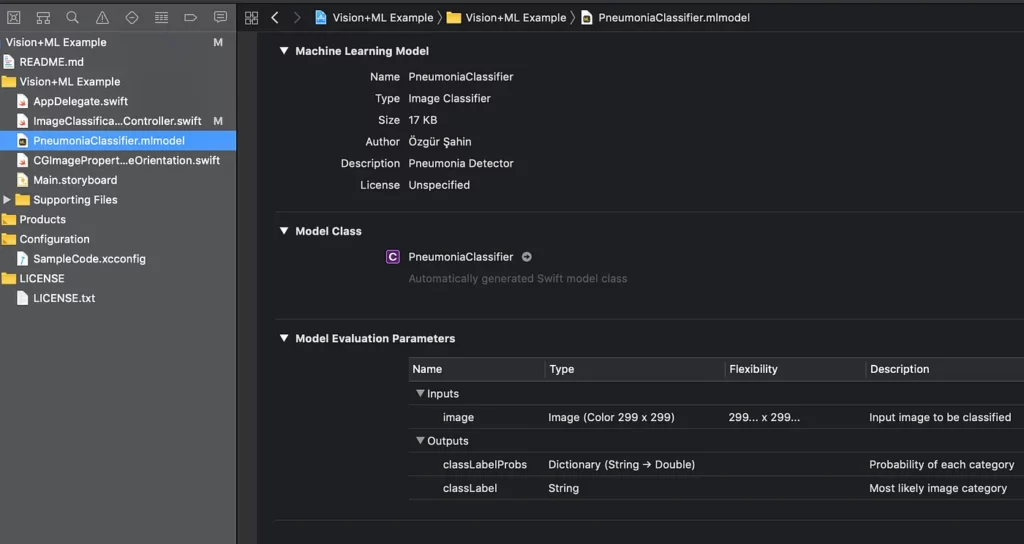
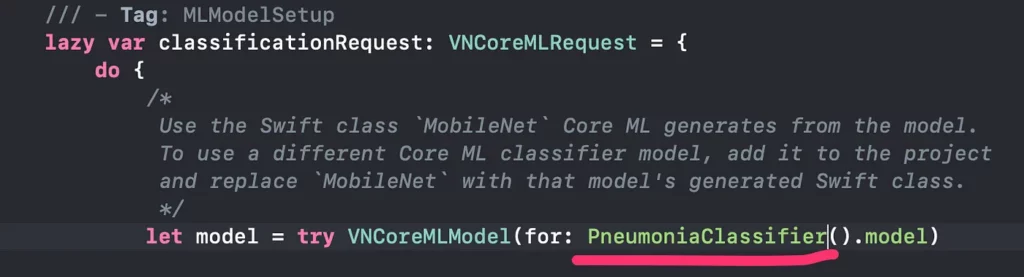
In Xcode, you can see your model specifications when you select the file. As you can see, the model I trained is only 17kb (Here’s another example of a tiny ML model optimized for mobile). Xcode automatically creates the PneumoniaClassifier class so we can use it directly to make an inference.
In ImageClassificationViewController, we need to write our model name to use it.
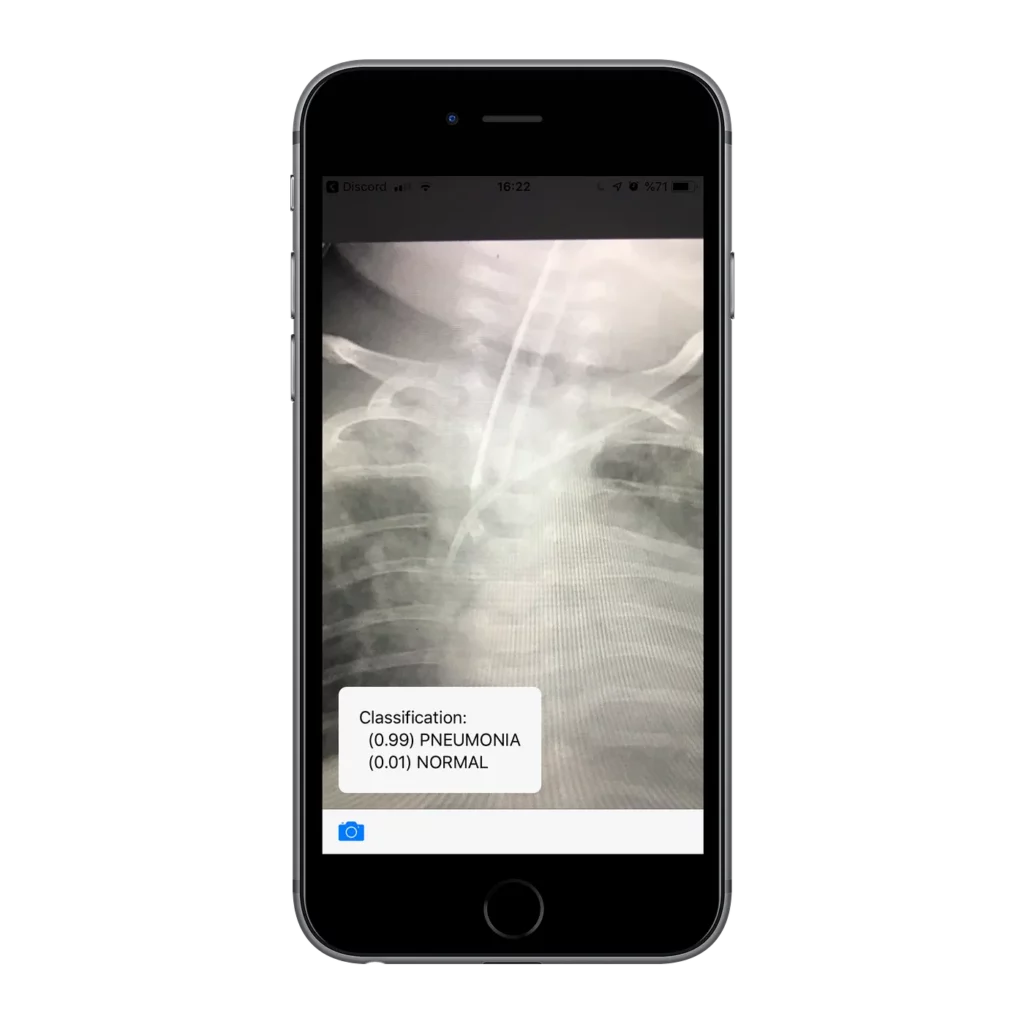
Just run the project and take a picture with your iPhone and check the results.
Thanks for reading! If you liked this story, you can follow me on Medium and Twitter. You can contact me via e-mail.
Konya, January 2019
Discuss this post on Hacker News

Comments 0 Responses