
Flutter has a rich pool of packages and widgets. You can achieve most things by either using the rich widget pool that Flutter offers or by using a package.
However, sometimes you might find yourself in situations that demand you write native Java code*.
In this fourth installment of our Flutter series, we’ll look at how you can write Java code that communicates with your Flutter application.
The Basics
Flutter allows messages to be sent between different platforms via a platform channel. The message is sent to the host operating system, which then sends the response to Flutter. In this transaction, Flutter is the client and the native code is the host. This transaction works asynchronously and returns a Future as we’ll see in a moment.
On the client-side (Flutter), we have to define a MethodChannel whose purpose is to communicate with platform plugins using asynchronous method calls. The name given this channel is the same channel we should declare in the Java code. Otherwise, the communication will fail.
In Java, we declare it as CHANNEL. It’s important to note that Flutter and Java have different data types. The process of passing the data serialization and deserialization of the data types is done automatically.
Calling Android Code Using Platform Channels
With the basics out of the way, let’s work through two examples that will show you how you can call Android code using platform channels. The first example we’ll work on is calling the PowerManager to display power-specific attributes. Thereafter, we’ll see how you can launch the camera in Flutter using Android code.
Android Power Manager
Let’s implement the PowerManager class that gives you control of the device’s power state. The class can be found here:
As of this writing, the default language for the MainActivity file is Kotlin. Therefore, when creating your application, you’ll have to explicitly declare that you’d like to use Java.
flutter create -i objc -a java native_code

The function we’re going to implement is isDeviceIdleMode, which returns true if the device is in idle mode.
In order for this to work, we’ll need to import the services and async packages:
Next, we define the MethodChannel. You can choose any name, just make sure you use the same name as in the Java code:
Let’s now define the function that will handle the communication between the host and Flutter. As mentioned earlier the process is async, and so we define a function that returns a Future.
We wrap that function in a try-catch statement so that we can catch any errors that may occur. Next, we need to invoke a method that will sit in our Android code. We do this using platformMethodChannel.invokeMethod:
We’ll run this function when the power icon on the app is pressed:
We’ll then display the response we receive as text:
Here’s the full Dart file for your reference:
import 'package:flutter/material.dart';
import 'package:flutter/services.dart';
import 'dart:async';

void main() {
  runApp(MaterialApp(
    theme: ThemeData(
      primaryColor: Colors.teal,
      fontFamily: 'Lato',
      textTheme: ThemeData.light().textTheme.copyWith(
            title: TextStyle(
              fontSize: 20,
              fontFamily: 'Lato',
              fontWeight: FontWeight.bold,
            ),
          ),
    ),
    home: Scaffold(
      appBar: AppBar(
        title: Text(
          'Doing Native Stuff!',
          style: TextStyle(
            color: Colors.teal,
          ),
        ),
        backgroundColor: Colors.white,
      ),
      body: NativeStuff(),
    ),
  ));
}

class NativeStuff extends StatefulWidget {
  @override
  NativeStuffState createState() {
    return NativeStuffState();
  }
}

class NativeStuffState extends State<NativeStuff> {
  static const platformMethodChannel =
      const MethodChannel('heartbeat.fritz.ai/native');
  String nativeMessage = '';


  Future<Null> _managePower() async {
    String _message;
    try {
      final String result =
          await platformMethodChannel.invokeMethod('powerManage');
      _message = result;
    } on PlatformException catch (e) {
      _message = "Can't do native stuff ${e.message}.";
    }
    setState(() {
      nativeMessage = _message;
    });
  }

  @override
  Widget build(BuildContext context) {
    return Container(
      color: Colors.teal,
      child: Column(
        crossAxisAlignment: CrossAxisAlignment.stretch,
        children: <Widget>[
          Padding(
            padding: const EdgeInsets.only(left: 8.0, right: 8.0, top: 102.0),
            child: Center(
              child: FlatButton.icon(
                icon: Icon(
                  Icons.power_settings_new,
                  size: 100,
                ),
                label: Text(''),
                textColor: Colors.white,
                onPressed: _managePower,
              ),
            ),
          ),
          Padding(
            padding: const EdgeInsets.only(left: 8.0, right: 8.0, top: 102.0),
            child: Center(
              child: Text(
                nativeMessage,
                style: TextStyle(
                    color: Colors.white,
                    fontWeight: FontWeight.w500,
                    fontSize: 23.0),
              ),
            ),
          )
        ],
      ),
    );
  }

}
The Android Side
In mainActivity.java, define the CHANNEL with the same name as the one in Flutter. mainActivity.java is found in the Android folder:
Next, define the MethodChannel and set a MethodCallHandler. Note the conversion of boolean to string to avoid type errors on the Flutter side:
We then have to implement the powerManager function that will be invoked:
Here’s the full mainActivity.java code:
package com.example.native_code;

import androidx.annotation.NonNull;
import io.flutter.embedding.android.FlutterActivity;
import io.flutter.embedding.engine.FlutterEngine;
import io.flutter.plugins.GeneratedPluginRegistrant;
import io.flutter.plugin.common.MethodChannel;

import android.content.ContextWrapper;
import android.content.Intent;
import android.content.IntentFilter;
import android.os.PowerManager;
import android.os.Build.VERSION;
import android.os.Build.VERSION_CODES;
import android.os.Bundle;

public class MainActivity extends FlutterActivity {
  private static final String CHANNEL = "heartbeat.fritz.ai/native";

  @Override
  public void configureFlutterEngine(@NonNull FlutterEngine flutterEngine) {
    GeneratedPluginRegistrant.registerWith(flutterEngine);

    new MethodChannel(flutterEngine.getDartExecutor().getBinaryMessenger(), CHANNEL)
        .setMethodCallHandler((call, result) -> {
          if (call.method.equals("powerManage")) {
            boolean deviceStatus = getDeviceStatus();

             String myMessage =  Boolean.toString(deviceStatus);
              result.success(myMessage);


          }

        });
  }

  private boolean getDeviceStatus() {
    boolean deviceStatus = false;
    if (VERSION.SDK_INT >= VERSION_CODES.LOLLIPOP) {
      PowerManager powerManager = (PowerManager) getSystemService(POWER_SERVICE);
      deviceStatus = powerManager.isDeviceIdleMode();

    }

    return deviceStatus;

  }
}
Launching the Camera with Native Code
Let’s now see how we can use our newly-acquired skillset to launch the camera using native code.
Our main Dart file will remain the same. We’ll just make slight changes to variable names and the icon:
import 'package:flutter/material.dart';
import 'package:flutter/services.dart';
import 'dart:async';

void main() {
  runApp(MaterialApp(
    theme: ThemeData(
      primaryColor: Colors.teal,
      fontFamily: 'Lato',
      textTheme: ThemeData.light().textTheme.copyWith(
            title: TextStyle(
              fontSize: 20,
              fontFamily: 'Lato',
              fontWeight: FontWeight.bold,
            ),
          ),
    ),
    home: Scaffold(
      appBar: AppBar(
        title: Text(
          'Launch Camera!',
          style: TextStyle(
            color: Colors.teal,
          ),
        ),
        backgroundColor: Colors.white,
      ),
      body: NativeStuff(),
    ),
  ));
}

class NativeStuff extends StatefulWidget {
  @override
  NativeStuffState createState() {
    return NativeStuffState();
  }
}

class NativeStuffState extends State<NativeStuff> {
  static const platformMethodChannel =
      const MethodChannel('heartbeat.fritz.ai/native');
  String nativeMessage = '';


  Future<Null> _launchCamera() async {
    String _message;
    try {
      final String result =
          await platformMethodChannel.invokeMethod('takePhoto');
      _message = result;
    } on PlatformException catch (e) {
      _message = "Can't do native stuff ${e.message}.";
    }
    setState(() {
      nativeMessage = _message;
    });
  }

  @override
  Widget build(BuildContext context) {
    return Container(
      color: Colors.teal,
      child: Column(
        crossAxisAlignment: CrossAxisAlignment.stretch,
        children: <Widget>[
          Padding(
            padding: const EdgeInsets.only(left: 8.0, right: 8.0, top: 102.0),
            child: Center(
              child: FlatButton.icon(
                icon: Icon(
                  Icons.photo_camera,
                  size: 100,
                ),
                label: Text(''),
                textColor: Colors.white,
                onPressed: _launchCamera,
              ),
            ),
          ),
          Padding(
            padding: const EdgeInsets.only(left: 8.0, right: 8.0, top: 102.0),
            child: Center(
              child: Text(
                nativeMessage,
                style: TextStyle(
                    color: Colors.white,
                    fontWeight: FontWeight.w500,
                    fontSize: 23.0),
              ),
            ),
          )
        ],
      ),
    );
  }

}

In the MainActivity, we’ll define the channel with the same name as the one we defined in the Dart file. We’ll then create the MethodChannel and setMethodCallHandler:
Next, we define the function that will launch the camera. We use Intent to launch the camera.
At this point, you might get this error:
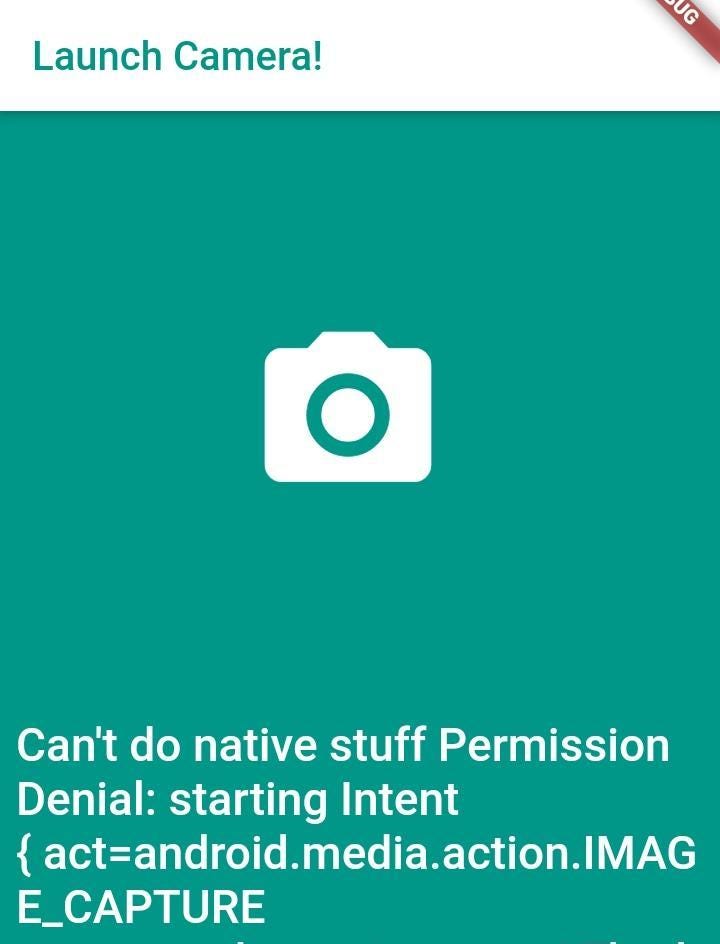
This issue can be addressed by setting the right permissions in the Android Manifest file.
Source Code
Here’s the repo with the source code:
Final Thoughts
In this piece, we’ve seen how to write native Java code in your Flutter applications. Writing Swift, Kotlin, and Objective-C code takes a similar approach.
For a complete guide on all platforms, check out the official documentation.

Comments 0 Responses