
In this third installment of our Flutter series, we’ll look at how you can use native device features. Specifically, the features we’ll look at are designed for working with a device’s camera and gallery.
By the end of this piece, you’ll be able to build an app that takes images via the camera or gallery and stores it on the device. We’ll also see how you can use the Provider package to store images in a way that enables you to send them to a backend server.
If this is your first encounter with Flutter, please check our last couple of articles first (Flutter Architecture; Flutter Best Practices). This will enable you to get the basics out of the way. That notwithstanding, if you’d rather proceed, don’t let me stop you. Dive in!
Application
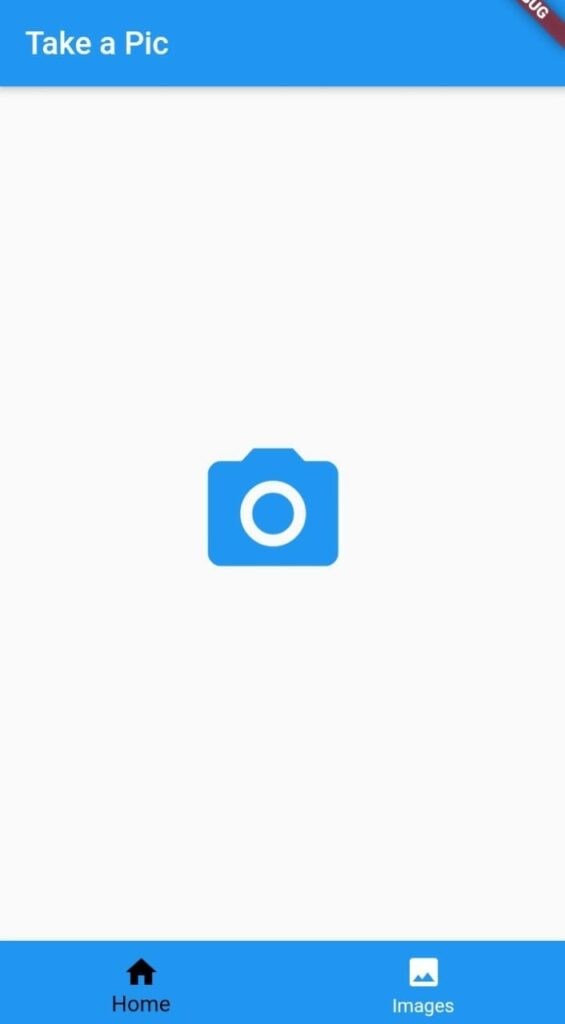
The application we’ll build will look like the following:

Folder Structure
To get started, create a project using flutter create project_name. Give it a name of your choice.
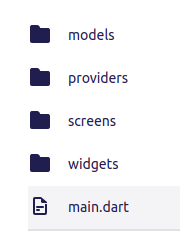
We’ll use the folder structure below, but you’re free to choose a different structure:
- The models folder will contain the data structure of the images. In this case, we’ll only have the image model. However, you might want to add other details such as the image description.
- The providers folder will contain files for managing the application-wide state.
- The screens folder will host the screens of the application.
- We’ll put widgets in the widgets folder in order to reduce the size of our widget tree in the screens.
Main Dart File
We’ll start by creating a MaterialApp so that we can leverage all the benefits that it offers. We’re also importing the tabs screen, the picture model, and the pictures screens. Additionally, we’ll be using the provider package, so you’ll need to add that to your pubspec.yaml file. Below are all the packages we’ll use for this project. More on them individually later.
When using the provider package, we usually declare our providers at least one level above where we’d like to use them. For example, in this case, we’re defining the provider in our main Dart file, but we’ll actually use it on the screen for taking and selecting images from the gallery. We’re using MultiProvider to show how to declare multiple providers; however, in this case we just have one provider.
We’ve then defined our routes with the tab screen as the home screen.
import 'package:flutter/material.dart';
import 'package:provider/provider.dart';

import './screens/take_pic_screen.dart';
import './screens/tabs_screen.dart';
import './providers/pictures.dart';
import './screens/view_images.dart';
void main() => runApp(MyApp());

class MyApp extends StatelessWidget {
  @override
  Widget build(BuildContext context) {
    return  MultiProvider(
        providers: [
           ChangeNotifierProvider<Pictures>(create: (_) => Pictures()),
      ],
      child: Container(
      child: MaterialApp(
        title: 'Camera & Gallery Tutorial',
        theme: ThemeData(
          primarySwatch: Theme.of(context).primaryColor,
          accentColor: Colors.teal,
          fontFamily: 'Lato',
          textTheme: ThemeData.light().textTheme.copyWith(
                title: TextStyle(
                  fontSize: 20,
                  fontFamily: 'Lato',
                  fontWeight: FontWeight.bold,
                ),
              ),
        ),
        routes: {
          '/': (ctx) =>  TabsScreen(),

          TakePicScreen.routeName: (ctx) => TakePicScreen(),
          ViewImages.routeName: (ctx) => ViewImages(),

        },
      ),
    ),);
  }
}
Tabs Screen
The tabs screen will be a stateful widget that will allow us to define the logic for switching between our two screens. We define the Scaffold and AppBar on this screen; hence, we don’t need to define them on other screens. _pages contains a list of our two pages and their titles. We then use them when defining the bottom navigation using bottomNavigationBar
import 'package:flutter/material.dart';

import './take_pic_screen.dart';
import './view_images.dart';
class TabsScreen extends StatefulWidget {
  @override
  _TabsScreenState createState() => _TabsScreenState();
}

class _TabsScreenState extends State<TabsScreen> {
  final List<Map<String, Object>> _pages = [
     {
      'page': TakePicScreen(),
      'title': 'Take a Pic',
    },
    {
      'page': ViewImages(),
      'title': 'Your Images',
    },


  ];
  int _selectedPageIndex = 0;

  void _selectPage(int index) {
    setState(() {
      _selectedPageIndex = index;
    });
  }

  @override
  Widget build(BuildContext context) {
    return Scaffold(
      appBar: AppBar(
        title: Text(_pages[_selectedPageIndex]['title']),
        backgroundColor: Theme.of(context).primaryColor,
      ),
      body: _pages[_selectedPageIndex]['page'],
      bottomNavigationBar: BottomNavigationBar(
        onTap: _selectPage,
        backgroundColor: Theme.of(context).primaryColor,
        unselectedItemColor: Colors.white,
        selectedItemColor: Colors.black,
        currentIndex: _selectedPageIndex,
        items: [
            BottomNavigationBarItem(
            backgroundColor: Theme.of(context).primaryColor,
            icon: Icon(Icons.home),
            title: Text('Home'),
          ),

          BottomNavigationBarItem(
            backgroundColor: Theme.of(context).primaryColor,
            icon: Icon(Icons.image),
            title: Text('Images'),
          ),
        ],
      ),
    );
  }
}
The Picture Model
Let’s define a picture model that we’ll use when storing the images. The model has one field; however, you can add more fields—for example, the image description.
Of importance here is the use of ChangeNotifier. This enables us to subscribe to changes on the Picture model. dart:io is used to enable us to declare the expected picture to be of type File. @required this.picName ensures that a Picture can’t be created without a picName.
import 'package:flutter/material.dart';
import 'dart:io';
class Picture with ChangeNotifier{
  final File picName;

  Picture({
    @required this.picName,
  });
}
Take Pics Screen
In order to obtain images from the device, we’ll need a couple of packages that allow us access to native features. Using image_picker, we can access the camera to take a picture or the gallery to select an image. For this, you’ll need to use a real device and not an emulator.
Since you’re accessing native device features, you’ll need to request permission to do so. On Android, you’re set once you’ve installed the package. However, for IOS, a couple of configurations are needed:
In order to manipulate the image and obtain its name, we’ll use the path package.
The path_provider package will be useful in accessing the location where our application is saving its files, such as images.
import 'package:flutter/material.dart';
import 'dart:io';
import 'package:image_picker/image_picker.dart';
import 'package:path/path.dart' as path;
import 'package:path_provider/path_provider.dart' as pPath;
import 'package:provider/provider.dart';
import '../models/picture.dart';
import '../providers/pictures.dart';
import './view_images.dart';

class TakePicScreen extends StatefulWidget {
  static const routeName = '/take-pic';

  @override
  _TakePicScreenState createState() => _TakePicScreenState();
}

class _TakePicScreenState extends State<TakePicScreen> {
  File _takenImage;
  Future<void> _takePicture() async {
    final imageFile = await ImagePicker.pickImage(
      source: ImageSource.gallery,
    );
    if (imageFile == null) {
      return;
    }
    setState(() {
      _takenImage = imageFile;
    });
    final appDir = await pPath.getApplicationDocumentsDirectory();
    final fileName = path.basename(imageFile.path);
    final savedImage = await imageFile.copy('${appDir.path}/$fileName');

    var _imageToStore = Picture(picName: savedImage);
    _storeImage() {
      Provider.of<Pictures>(context, listen: false).storeImage(_imageToStore);
    }

    _storeImage();

  }

  @override
  Widget build(BuildContext context) {
    return Container(
      child: Center(
        child: FlatButton.icon(
          icon: Icon(
            Icons.photo_camera,
            size: 100,
          ),
          label: Text(''),
          textColor: Theme.of(context).primaryColor,
          onPressed: _takePicture,
        ),
      ),
    );
  }
}
First, create a FlatButton with a camera icon. With this in place, a user can take an image or select one from the gallery once the button is clicked. Hence, we point onPressed to the function that will do just that.
Using the image_picker package, accessing the device’s gallery is done as shown below.
Accessing the camera and taking photos is done in a similar way.
Since this process is asynchronous, we return a Future and await for the image to be taken. Once that is done, we copy the image to the device’s storage and add it to our list of images.
File _takenImage;
  Future<void> _takePicture() async {
    final imageFile = await ImagePicker.pickImage(
      source: ImageSource.gallery,
    );
    if (imageFile == null) {
      return;
    }
    setState(() {
      _takenImage = imageFile;
    });
    final appDir = await pPath.getApplicationDocumentsDirectory();
    final fileName = path.basename(imageFile.path);
    final savedImage = await imageFile.copy('${appDir.path}/$fileName');

    var _imageToStore = Picture(picName: savedImage);
    _storeImage() {
      Provider.of<Pictures>(context, listen: false).storeImage(_imageToStore);
    }

    _storeImage();

  }
We first declare the Picture object and use the provider package to add it to the list of images. We set listen: false because we aren’t listening to any changes.
The Pictures Provider
Next, we have to wire the functionality that will enable us to display the images on the images screen. For that, we’ll use the provider package to append an image to our images list.
We first declare an empty list and define a getter that we’ll use to obtain the images.
We also use ChangeNotifier so that we’re able to subscribe to changes in our images screen.
Next, we defined the storeImage function that adds the image to our list of images. The function expects the pickedImage . At this point, you can send the image to a backend server in order to persist the images. Finally, we notifyListeners() so that our images screen is updated with the new images.
import 'package:flutter/widgets.dart';
import '../models/picture.dart';

class Pictures with ChangeNotifier{
List<Picture> _items = [];

  List<Picture> get items {
    return [..._items];
  }
   storeImage(
  Picture pickedImage
  )  {

    final newImage = Picture(
      picName: pickedImage.picName,
    );
    _items.add(newImage);
    notifyListeners();


  }

}
The Images Screen
In the images screen, we define a container that will host the images. We’ll move the images list to a separate widget so as to keep this file concise.
The Images List View
First, we use provider to get the images by calling the items getter that we defined in the pictures provider file. We leave listen as the default — true since we’d like to update the page with new images when they’re added.
Next, we use ListView.builder to display the images on the screen. Using the builder function is good practice especially when using an infinite list. It helps in performance because the images are loaded on demand — that is, as they come into view.
We then use ChangeNotifierProvider to access the images and define the length. images.length helps the builder know how many images to expect. We outsource the child of the itemBuilder to a separate file so that we can keep this file as short as possible.
import 'package:flutter/material.dart';
import 'package:provider/provider.dart';

import '../providers/pictures.dart';
import './image_item.dart';

class ImagesGrid extends StatelessWidget {
  @override
  Widget build(BuildContext context) {
    final imagesData = Provider.of<Pictures>(context);
    final images = imagesData.items;
    return ListView.builder(
      padding: const EdgeInsets.all(10.0),
      itemCount: images.length,
      itemBuilder: (ctx, i) => ChangeNotifierProvider.value(
        value: images[i],
        child: images.length == 0  ? Text('Add some images'): ImageItem(),

      ),


    );
  }
}
The Image Item
In this widget, we display the individual images. First, we access the individual images using the provider we created, then display them in a container.
The container has some BoxDecoration and some margin at the bottom. We then set the child as an Image.file and have it fit into the container.
import 'package:flutter/material.dart';
import 'package:provider/provider.dart';
import '../models/picture.dart';

class ImageItem extends StatelessWidget {
  @override
  Widget build(BuildContext context) {
    final pic = Provider.of<Picture>(context, listen: false);

    return Container(
      decoration: BoxDecoration(
        color: Colors.white,
        boxShadow: const [
          BoxShadow(blurRadius: 20),
        ],
      ),
      margin: EdgeInsets.fromLTRB(0, 0, 0, 8),
      height: 250,
      child:  Image.file(
        pic.picName,
        fit: BoxFit.cover,
      ),
    );
  }
}
Final Thoughts
You should now be confident on many of the basics for using a device’s camera or gallery when building your apps in Flutter. For a full reference on the code, please see the repo below.
We can’t wait to see what you’ll build using your newly-acquired knowledge!

Comments 0 Responses