
With React Hooks growing in usage, the ability to handle a component’s state and side effects is now a common pattern in functional components. React Redux offers a set of Hook APIs as an alternative to the omnipresent connect() high order component.
In this tutorial, let’s continue building a simple React Native app where a user can save notes. In part 1, we used the Redux Hooks API to manage state. This post is in continuation of that previous post:
If you’re familiar with the basics of React Hooks and how to implement them with a basic navigation setup, you can skip the previous post and continue from this one.
You can find the complete code for this tutorial in this GitHub repo.
Table of Contents
- Installing Redux
- Adding action types and creators
- Add a reducer
- Configuring a Redux store
- Accessing global state
- Dispatching actions
- Running the app
- Conclusion
Installing redux
If you’ve cloned the repo from the previous example, make sure that the dependencies in the package.json file looks like below:
"dependencies": {
 "@react-native-community/masked-view": "0.1.5",
 "expo": "~36.0.0",
 "react": "~16.9.0",
 "react-dom": "~16.9.0",
 "react-native": "https://github.com/expo/react-native/archive/sdk-36.0.0.tar.gz",
 "react-native-gesture-handler": "~1.5.0",
 "react-native-paper": "3.4.0",
 "react-native-reanimated": "~1.4.0",
 "react-native-safe-area-context": "0.6.0",
 "react-native-screens": "2.0.0-alpha.12",
 "react-navigation": "4.0.10",
 "react-navigation-stack": "2.0.10",
 "react-redux": "7.1.3",
 "redux": "4.0.5"
 },
Next, install the following dependencies from a terminal window to integrate and use Redux to manage the state:
yarn add redux react-redux lodash.removeThe directory structure that I’m going to follow to manage Redux-related files is going to be based on the pragmatic approach called ducks. Here’s the link to a great post on using the ducks pattern in Redux and React apps. This post can help you understand the pattern and why it might be needed.
What the ducks pattern allows you to have are modular reducers in the app itself. You don’t have to create different files for actions, types, and action creators. Instead, you can define them all in one modular file; however, if there is a need to create more than one reducer, you can define multiple reducer files.
Adding action types and creators
When using Redux to manage the state of the whole application, the state itself is represented by one JavaScript object. Think of this object as read-only, since you cannot make changes to this state (which is represented in the form of a tree) directly. It requires actions to do so.
Actions are like events in Redux. They can be triggered in the button press, timers, or network requests.
To begin, inside the src/ directory, create a subdirectory called redux. Inside it, create a new file called notesApp.js.
So far, the application has the ability to let the user add notes. In the newly-created files, let’s begin by defining two action types and their creators. The second action type is going to allow the user to remove an item from the ViewNotes screen.
// Action Types

export const ADD_NOTE = 'ADD_NOTE'
export const DELETE_NOTE = 'DELETE_NOTE'
Next, let’s define action creators for each action type. The first one is going to trigger when saving the note, and the second will trigger when deleting the note.
// Action Creators

let noteID = 0

export function addnote(note) {
  return {
    type: ADD_NOTE,
    id: noteID++,
    note
  }
}

export function deletenote(id) {
  return {
    type: DELETE_NOTE,
    payload: id
  }
}
Add a reducer
The receiver of the action is known as a reducer. Whenever an action is triggered, the state of the application changes. The handling of the application’s state is done by the reducers.
A reducer is a pure function that calculates the next state based on the initial or previous state. It always produces the same output if the state is unchanged. It takes two inputs—the state and action—and must return the default state.
The initial state is going to be an empty array. Add the following after you have defined action creators. Also, make sure to import the remove utility from the lodash.remove npm package at the top of the notesApp.js file that was installed at the starting of this post:
// import the dependency
import remove from 'lodash.remove'

// reducer

const initialState = []

function notesReducer(state = initialState, action) {
  switch (action.type) {
    case ADD_NOTE:
      return [
        ...state,
        {
          id: action.id,
          note: action.note
        }
      ]

    case DELETE_NOTE:
      const deletedNewArray = remove(state, obj => {
        return obj.id != action.payload
      })
      return deletedNewArray

    default:
      return state
  }
}

export default notesReducer
Configuring a Redux store
A store is an object that brings and actions and reducers together. It provides and holds the state at the application level instead of individual components. Redux is not an opinionated library in terms of which framework or library should use it.
With the creation of reducer done, create a new file called store.js inside src/redux/. Import the function createStore from redux, as well as the only reducer in the app for now.
import { createStore } from 'redux'
import notesReducer from './notesApp'

const store = createStore(notesReducer)

export default store
To bind this Redux store in the React Native app, open the entry point file App.js and import the store as well as the high order component (HOC) Provider from the react-redux npm package. This HOC helps you pass the store down to the rest of the components of the current app.
import React from 'react'
import { Provider as PaperProvider } from 'react-native-paper'
import AppNavigator from './src/navigation'
import { Provider as StoreProvider } from 'react-redux'
import store from './src/redux/store'

// modify the App component
export default function App() {
  return (
    <StoreProvider store={store}>
      <PaperProvider>
        <AppNavigator />
      </PaperProvider>
    </StoreProvider>
  )
}
That’s it! The Redux store is now configured and ready to use.
Accessing global state
To access state when managing it with Redux, the useSelector Hook is provided. It’s similar to the mapStateToProps argument that’s passed inside connect(). It allows you to extract data from the Redux store state using a selector function.
The major difference between the Hook and the argument is that the selector may return any value as a result, not just an object.
Open the ViewNotes.js file and import this Hook from react-redux:
// ...after rest of the imports
import { useSelector } from 'react-redux'
Next, instead of storing a notes array using the useState Hook, replace it with the following inside the ViewNotes functional component:
const notes = useSelector(state => state)Dispatching actions
The useDispatch() Hook completely refers to the dispatch function from the Redux store. This Hook is used only when there’s a need to dispatch an action. Import it from react-redux along with the action creators addnote and deletenote from the redux/notesApp.js file.
import { useSelector, useDispatch } from 'react-redux'To dispatch an action, define the following statement after the useSelector Hook:
const dispatch = useDispatch()Next, dispatch two actions called addNote and deleteNote to trigger these events:
const addNote = note => dispatch(addnote(note))
const deleteNote = id => dispatch(deletenote(id))
Since the naming convention is exactly the same for the addNote action as from the previous post’s helper function, there’s no need to make any changes inside the return statement of the functional component for this. However, deleteNote action is new.
To delete a note from the list rendered, add a prop onPress to List.Item UI component from react-native-paper. This is going to add the functionality of deleting an item from the list when the user touches that item.
Here is the code snippet of List.Item component with changes. Also, make sure that to modify the values of props: title and description.
<List.Item
  title={item.note.noteTitle}
  description={item.note.noteValue}
  descriptionNumberOfLines={1}
  titleStyle={styles.listTitle}
  onPress={() => deleteNote(item.id)}
/>
The advantage useDispatch hook provides is that it replaces mapDispatchToProps and there is no need to write boilerplate code to bind action creators with this hook now.
Running the app
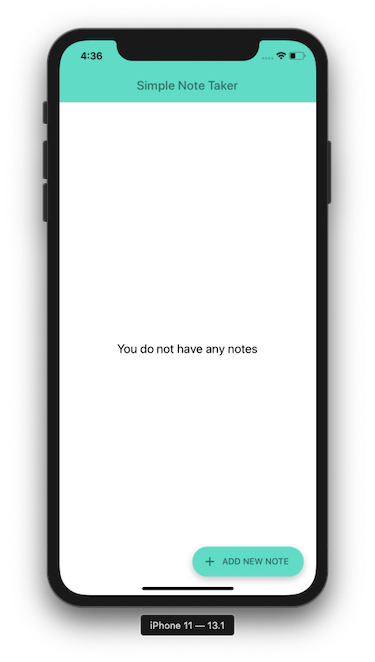
So far so good. Now, let’s run the application. From the terminal window, execute the command expo start or yarn start and make sure the Expo client is running on a simulator or a real device. You’re going to be welcomed by the following home screen that currently has no notes to display:
Here’s the complete demo that showcases both adding a note and deleting a note functionality.
For your reference, there are no changes made inside the AddNotes.js file, and it still uses the useState to manage the component’s state. There are quite a few changes made to ViewNotes.js file, so here’s the complete snippet of code:
// ViewNotes.js
import React from 'react'
import { StyleSheet, View, FlatList } from 'react-native'
import { Text, FAB, List } from 'react-native-paper'
import { useSelector, useDispatch } from 'react-redux'
import { addnote, deletenote } from '../redux/notesApp'

import Header from '../components/Header'

function ViewNotes({ navigation }) {
  // const [notes, setNotes] = useState([])

  // const addNote = note => {
  // note.id = notes.length + 1
  // setNotes([...notes, note])
  // }

  const notes = useSelector(state => state)
  const dispatch = useDispatch()
  const addNote = note => dispatch(addnote(note))
  const deleteNote = id => dispatch(deletenote(id))

  return (
    <>
      <Header titleText='Simple Note Taker' />
      <View style={styles.container}>
        {notes.length === 0 ? (
          <View style={styles.titleContainer}>
            <Text style={styles.title}>You do not have any notes</Text>
          </View>
        ) : (
          <FlatList
            data={notes}
            renderItem={({ item }) => (
              <List.Item
                title={item.note.noteTitle}
                description={item.note.noteValue}
                descriptionNumberOfLines={1}
                titleStyle={styles.listTitle}
                onPress={() => deleteNote(item.id)}
              />
            )}
            keyExtractor={item => item.id.toString()}
          />
        )}
        <FAB
          style={styles.fab}
          small
          icon='plus'
          label='Add new note'
          onPress={() =>
            navigation.navigate('AddNotes', {
              addNote
            })
          }
        />
      </View>
    </>
  )
}

const styles = StyleSheet.create({
  container: {
    flex: 1,
    backgroundColor: '#fff',
    paddingHorizontal: 10,
    paddingVertical: 20
  },
  titleContainer: {
    alignItems: 'center',
    justifyContent: 'center',
    flex: 1
  },
  title: {
    fontSize: 20
  },
  fab: {
    position: 'absolute',
    margin: 20,
    right: 0,
    bottom: 10
  },
  listTitle: {
    fontSize: 20
  }
})

export default ViewNotes
Conclusion
With the addition to hooks such as useSelector and useDispatch, we not only reduce the need to write plentiful boilerplate code, but also provide the advantage of using functional components.
For advanced usage of Hooks with Redux, you can check out the official documentation here.
You can find the complete code for this tutorial in the GitHub repo.
If you’d like to receive more React Native tutorials in your inbox, you can sign up for my newsletter here.

Comments 0 Responses