
When building an app, sometimes we find ourselves creating data just so we can see our UI start to come to life. Whether we’re adding a new feature, making a POC (proof of concept), or starting from scratch, it’s very easy to just put data together for the sake of it.
For instance, we’ve been building a Team Profiles app to learn SwiftUI. And, so far, we’ve managed to make a class for our Profiles, but even with just three instances, our UI code looks bulky. It takes up more space in our code than the actual UI code does in the ContentView!
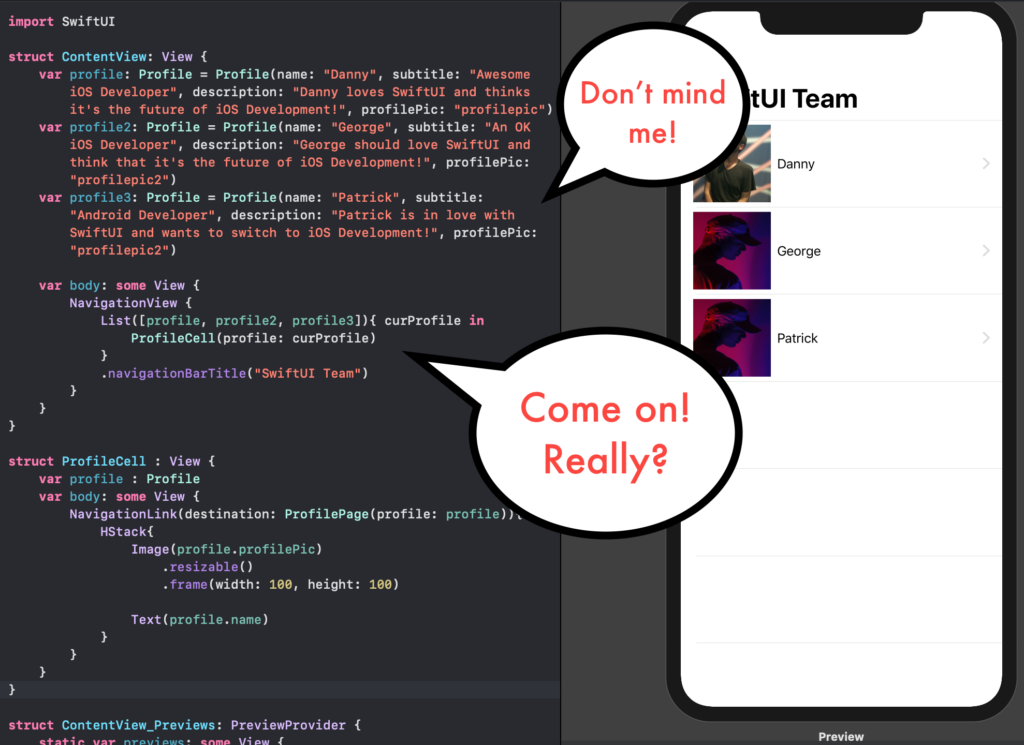
It’s also not very scalable. What happens if we want to add more profiles in the future (either in or out of the app)? Right now, our app is very dependent on instances of data alongside our UI code. Even if we were to place the code elsewhere in another Swift file, our code should be manipulating and presenting data, not storing it.
Storing Data in Data Solutions
In a production app, we’d turn to other sources for storing actual data, and then use our classes/structs to work with that data in code. Using a third-party database (Realm, SQLite, etc) or Core Data would be good examples of this. Another solution could be to reference a data file (such as a csv file) where data can be nicely formatted and easily parsed by code.
A very popular data file type are JavaScript Object Notation (also known as JSON) files. As the name implies, its origins can be found with JavaScript and the web. Today, it is widely popular all over the web and even in apps. As a matter of fact, that’s why Swift has a built-in Codable Type that automatically handles data to and from JSON to Swift classes/structs.
That’s what we’ll be leveraging in our app today as we learn how we can keep our data and code in their respective places, while making them work together seamlessly.
Setting Up Our JSON
First things first, let’s put our data into JSON. Create a new file in our project and call it profiles.json. Then, we want to model our data based off our Profile class, so we enter this:
The [] indicate that this is an array of objects, the {} wraps a single object, each value matches the properties in our class, and the comma allows you to add another object. To test this, you can go ahead and make a few more profiles now.
Decoding JSON Files
Now create another file—this time a Swift file named Data.swift. Here’s where we’ll put a function that will take in a filename, check if it exists, read it into a Data object, and then finally decode our objects in Swift. Let me give you the code before I walk us through it:
Section 1 is declaring our function called load, which has some interesting qualities. We see that it takes in a filename, but it also takes in a type (meaning, which class or stuct our function is going to be working with).
You’ll notice it’s set to T.type and T.self. That’s because we use something called Generics, which allow functions to be type-agnostic. No matter the type of data you want to use, it assumes it can handle it. We pass in the type by using <>. This tells the load that it will need to know what type we’re working with, and because it’s set as <T:Decodable>, the type must conform to Decodable, as well.
Section 2 safely grabs our file based on the filename we’re given.
Section 3 takes our file and turns it into a Swift Data object so we can manipulate it.
Lastly, Section 4 initializes a JSONDecoder, which we then use to pass in the type we want to decode for, along with the data to decode. We then return the output of that decoding, which should be of our type.
Placing Our JSON Data into the UI
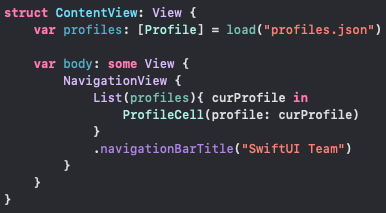
Now to put it all together…this part will be extremely satisfying. Replace all our mock profiles with just one simple line: var profiles: [Profile] = load(“profiles.json”)
Notice we don’t actually pass a type into load. Rather, knowing that it relies on Generics, load recognizes the type of the variable it will be returning into and references it. Since we expect to pull in multiple Profiles (if not now, then eventually), we set profiles to be an array with [Profile].
Lastly, replace our hardcoded array in our List with profiles. Load up our app in Live Preview or run it on an emulator/device and watch it go—except now it’s powered by JSON!
Next time, we’ll take a soft dive into bindable data by setting up a filter on our List!
Tip for the Road
You may be asking yourself “How did Danny make that JSON file? Did he really type it out himself?”. The answer is no, I didn’t. While I went over how to do it manually to teach/refresh JSON formatting, we don’t need to.
Since we built our app with the classes/structs we want to use along with mock data, we can simply flex Swift’s Codable Type to simply encode our objects into JSON! Let me show you my little shortcut.
Either in our current code or the last version of our code (where we still manually created three Profile objects), simply add this to the bottom of init in Profile:
This will set up a JSONEncoder, take our self (meaning this very instance of Profile), and then ask to print the String version of our JSON in our console.
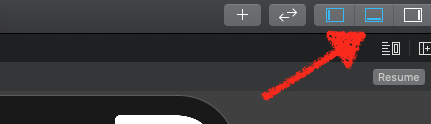
The console is where our app and the system outputs information behind the scenes, especially when we’re testing (debugging) our app. To make sure it’s visible, click the icon on the top-right of Xcode with the line on the bottom:
If we run our app using the play button on the top-left of Xcode, then when it loads up, we’ll see our JSON print this in the console:
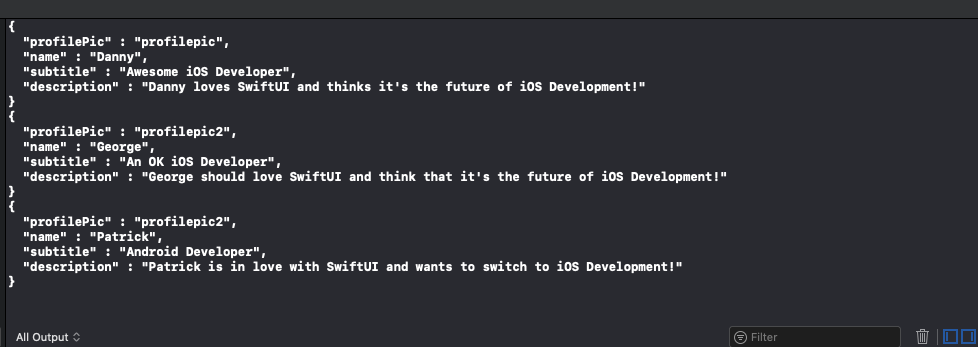
From that output , I created a new file in our project named profiles.json, pasted the output into that file, and then formatted it to be an array (add [] around the entire output and , after each profile). This ensured that my JSON file as formatted correctly and, when I decoded it, would match perfectly with my Swift class.

Comments 0 Responses