
No fancy GPU processor? No time to leave your machine crunching for endless hours on a single machine learning task? Problems installing the endless dependencies your model requires? No problem.
Google Colab Notebooks are Jupyter Notebooks that run in the browser, using $10/month cloud GPU infrastructure from Google. This article will show you why and how to use them, implementing a style transfer example.
TLDR: Work Your Way Through This Colab Notebook.
Why Would I Use Colab?
Two reasons:
They’re cheap
Training a style transfer model with satisfactory results might typically cost between $15-$20 on cloud GPU architecture for a single training job. Colab is $10 a month for all the training you can squeeze in.
They’re easier
Colab machines are fairly optimized for ML tasks. They make it easy to:
- Install the libraries you need
- Visualize the steps of your process through the Notebook interface
- Run a model training instance without bogging down the processor on your personal machine.
There are also lots of other Colab Notebooks out there to modify for your own purposes.
Why Wouldn’t I Use Colab?
A Colab Notebook stays active only as long as you’re active and will disconnect after a max of about 12 hours, regardless of your progress. If you’re working on anything that takes longer than that, you might find it frustrating to have to reconnect, re-mount, or install all of your dependencies again.
In that case, you might want to look at something like, Spell, Paperspace, or Google’s own AI Platform. But if you just want to experiment or learn, Colab is a great place to start.
/This guide will show you how to:
- Set up your own Colab notebook
- Install a TensorFlow fast style transfer model training instance
- Mount your own Google Drive for storing results
- Use Google’s high performance GPU (or TPU) processing and RAM
- Train your own style transfer model
- Use that model to perform real-time style transfer on webcam video
How Do I Use Colab?
Colab notebooks are essentially a Jupyter Notebook (Python). You run the code by pushing the play button next to each code block.
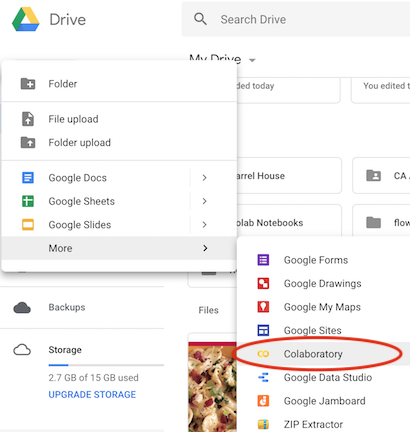
If you ever want to create a Notebook from scratch, you can do so within Google Drive from the File > New > More > Colaboratory link.
If you want to learn more, you can go through some sample tutorials from Google here.
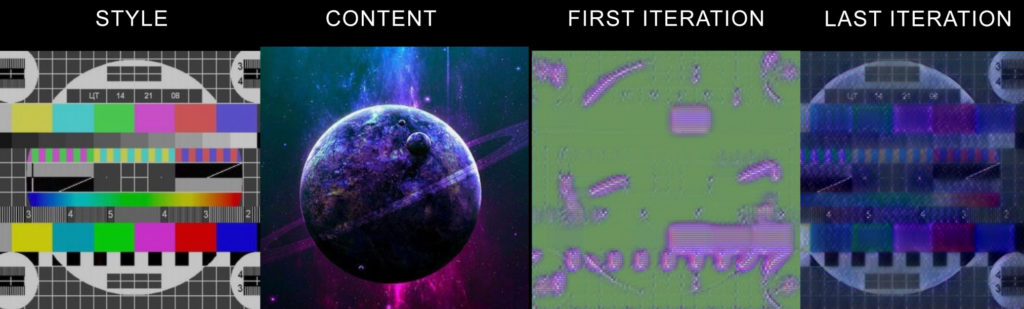
What is Style Transfer?
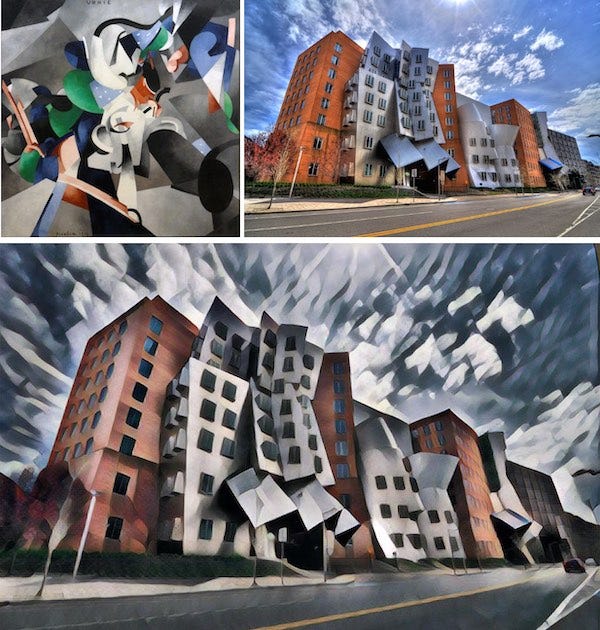
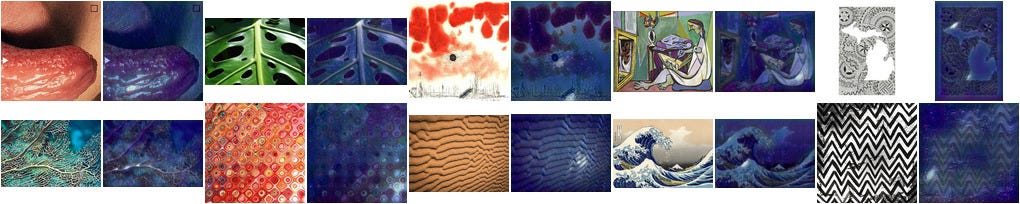
Style transfer is, simply put, very much like a photo filter. But unlike those that you might find in a program like Photoshop, which use specific algorithms to manipulate a photo, style transfer attempts to identify the style of a source image on its own, with various groups of neurons working together to identify specific feature sets. It then applies those learnings to the content image:
What if I want to train a different type of model?
You don’t have to use style transfer to use Colab’s GPUs and programming environments. You can write your own code, clone any GitHub repo, or make copies of existing Colab Notebooks and modify them.
Getting Started
To get started, you’ll be making a copy of this Colab Notebook. In addition to writing, running, and visualizing code, Colab Notebooks allow you to write detailed, formatted notes, so you can follow the entire set of directions for this article from within the Notebook itself, if you like — though this article will give you helpful additional instructions if you’re new to using Colab.
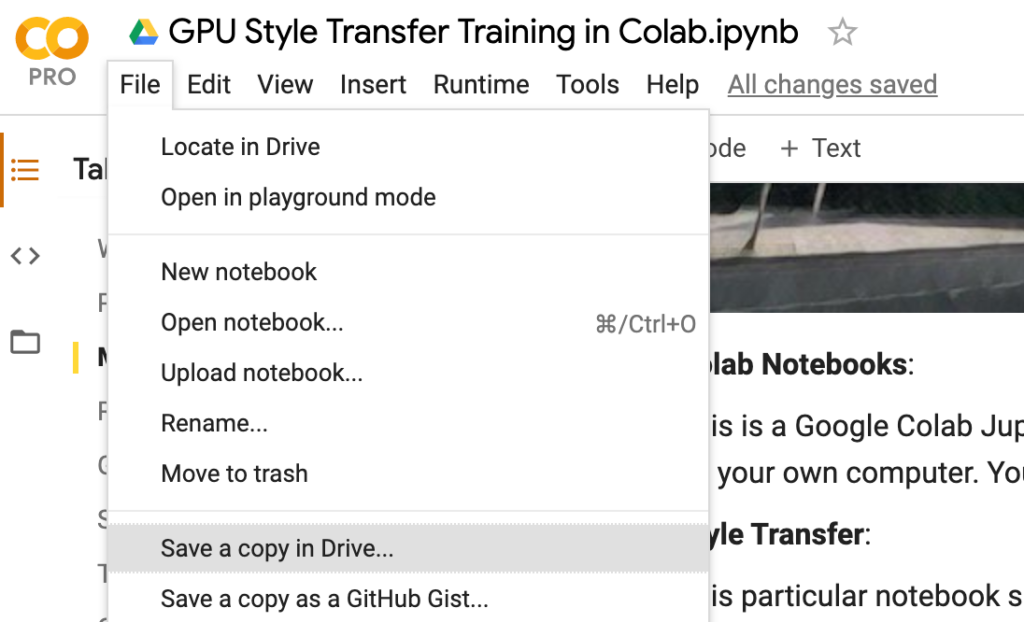
Click this link to open the Style Transfer Training Notebook, and choose File > Save a Copy in Drive. Make a directory for it called colab-files .
You’ll want two images, one whose style you want to be able to apply to other images (the style image) and one image that will receive the styling (the content image). Because style transfer runs exponentially slower the larger the image, try to keep these small—no bigger than about 600px— and name them style.jpg and content.jpg . If you just want a couple images to get started with, try these (right click and choose save to download):

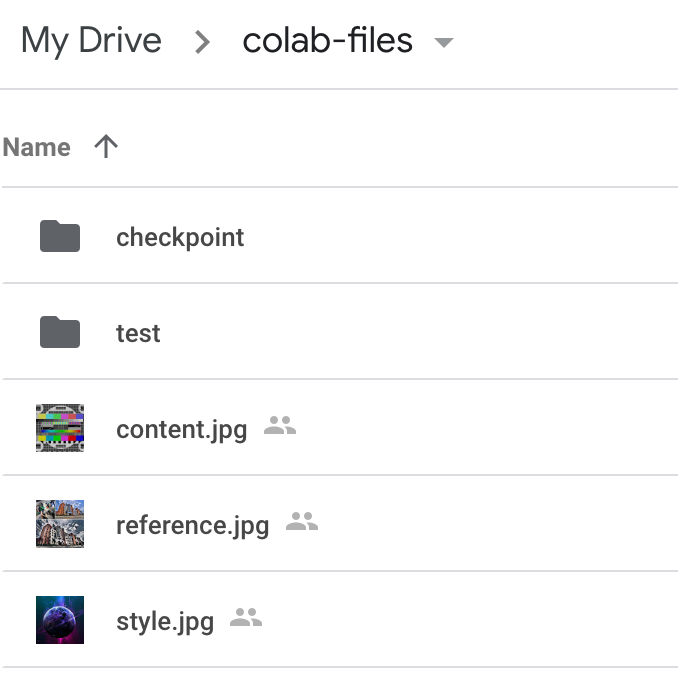
Put these within your colab-files directory on Google Drive and name them as style.jpg and content.jpg . Make two empty folders called checkpoint and test .
The checkpoint directory is where the model training will store all of its files. Checkpoints are just summaries of everything the machine learning model has learned so far. At any point, you can stop model training and use one of these checkpoints for style transfer.
Speeding Things Up
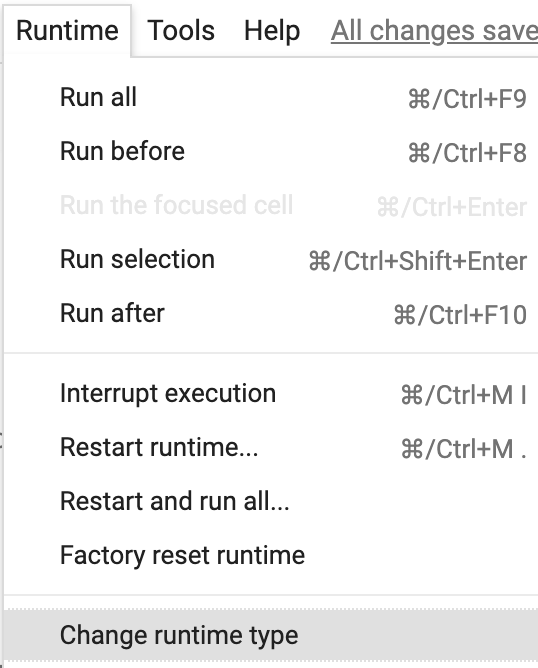
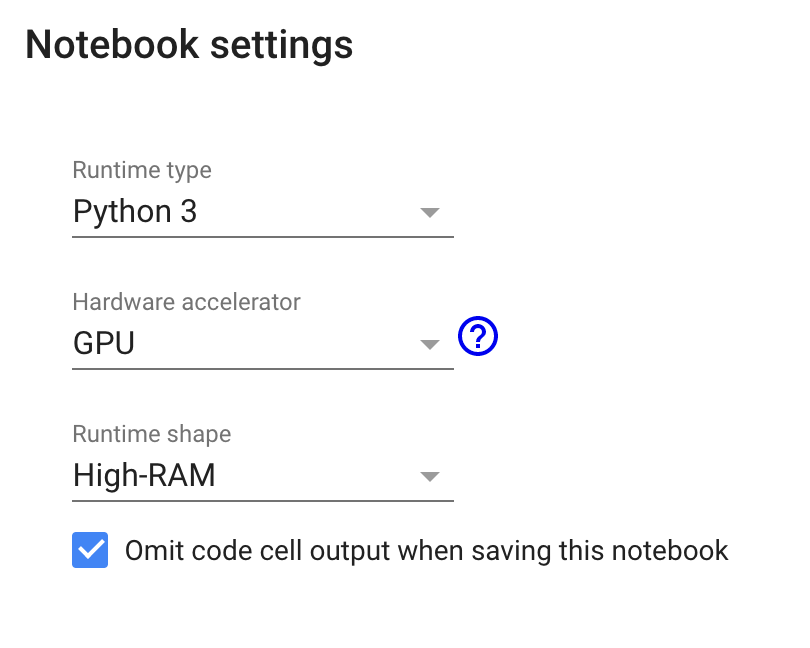
By default, Colab will use the CPU and a lower RAM allotment. We’ll need all the power we can get. Go to the Runtime > Change Runtime Type menu, and choose Python 3, GPU, and High RAM:
Running Code
Now that we’ve got some decent processing power, we finally get to run some code. In order for Colab to save to the directories you just made and use the images you saved for style transfer, you’ll need to mount your Google Drive.
From within the Colab Notebook you made a copy of, push the play button next to the very first code block (“Mounting Your Drive”):
It will first give you a URL, which you should click to follow in your browser. Allow access from Colab to your drive. That browser window will give you an authorization code you can paste back into the field in Colab (“enter your authorization code”). Hit enter, and wait for it to authorize your drive.
Once this is done, you should see the success message “Mounted Google Drive”.
For any code block, make sure to wait until the ring around the stop icon stops spinning and returns to a play icon. That’s how you’ll know the code has fully executed.

Click the play button for the next code block to list your files. You should see, at the very least, your style.jpg , content.jpg images, and your checkpoint and test folders listed out.
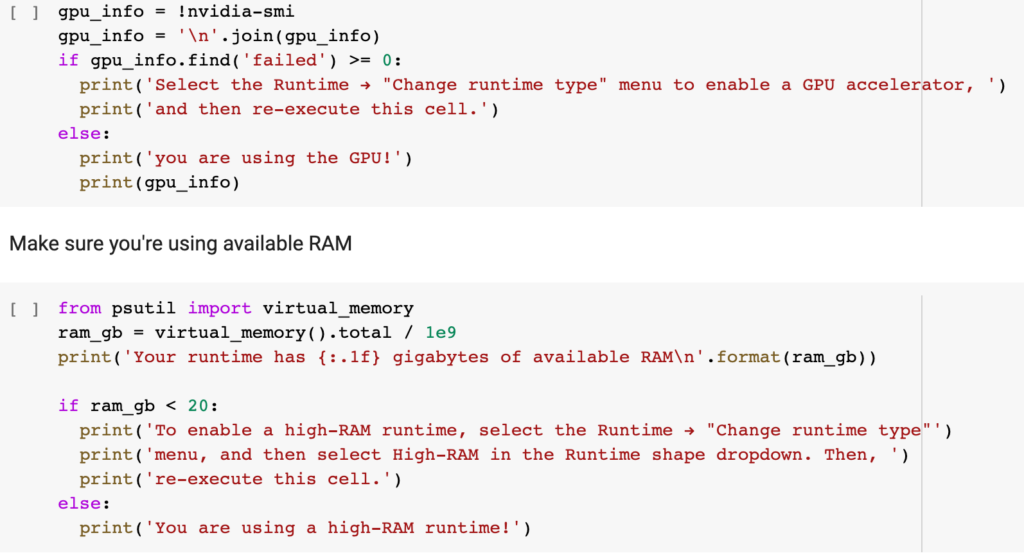
The next two code blocks can be skipped, but they will allow you to verify that the GPU and High RAM are being used successfully:
Downloading the Style Transfer Model
Assuming this is all working properly, we now need to download the style transfer model by pushing play in the following code block:

As I mentioned before, Colab can run all kinds of different code. In this case, we’ll be cloning a GitHub repo for style transfer using TensorFlow straight into Colab. This gets loaded into the content folder of our working directory, so we’ll need to change into that directory to use style transfer:

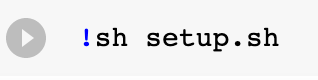
Running Setup
We have the code, but we still need to run some setup. The next code block runs a setup script to do all the necessary configuration of fast style transfer. This will take a bit, so go grab a snack while it runs.
What Is It Downloading? Where? Why is it taking so long?
The setup installs folders to your Drive, but in a temporary location that’s not included in what you might see if you were just to go to Google Drive (outside of Colab).
The big downloads here are the COCO and ImageNet datasets, which this model uses to be able to help speed up its baseline assumptions about whatever you’re asking it to train on. COCO (shows up in Colab as train-2014), on its own, is about 13GB. Thankfully, Google has plenty of storage space…
Can’t I just push one button and let it all run? I’ve got places I need to be…
Colab has a few options under the Runtime menu:
Run All — Runs every code block from the start of the Notebook to the end.
Run After — Runs every code block after the most recently executed code block — so if you’ve already gotten started, but you want to put the rest on autopilot, choose this option. The following steps will wait until each previous step is done, and then automatically execute.
There are a few drawbacks to this, however:
- You won’t understand as well what’s happening in the code.
- Some code blocks have prompts from the system — such as yes/no questions, or the prompt from earlier where we had to paste in an authorization code. These can lead to timeouts, which will disconnect you from the Colab runtime, and then you will potentially have to start over.
- If there are intermediary, manual, non-code related steps, such as copying files, running all steps will lead to errors.
- If there are errors, it can be a bit confusing to try and troubleshoot what went wrong and where.
Ok, ok, I’m going step by step, and the setup script is done. What now?
At the time of writing, there was an issue with the latest version of one of the style transfer’s dependencies, scipy , so I included the next block of code which uninstalls it, and re-installs a specific version where that issue does not occur:

By the way, you might notice some of the code blocks start with an ! mark. This is necessary to run system-level commands from the terminal (vs, for example, Python commands).
Begin Model Training
If everything went smoothly, you should have everything you need to start training your own style transfer model!
Model training is slow, but if you’re willing to give it time, your results will definitely improve. The next block of code allows you to set up your training parameters and begin model training:
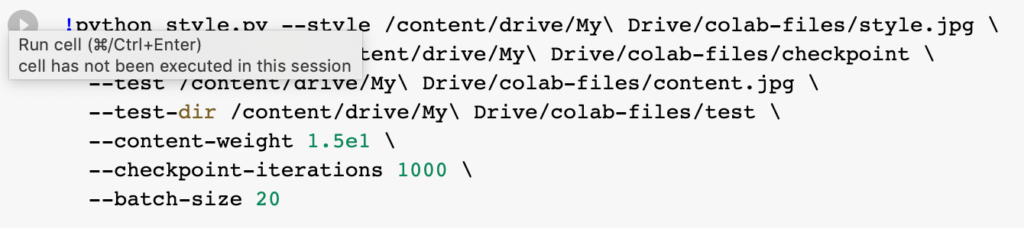
Assuming you named your images and folders as instructed above, you could just hit play here, but you may want to change a few things:
Content Weight: Not sure why the number here is listed in e (scientific) notation, but it’s really just saying 1.5×10¹, or 15. You can adjust this number in decimal format or scientific notation to adjust the content weight. This determines how much of the style of the content image to keep vs how much of the style image to apply to the content image. A higher weight means less change in the image you want to apply your style to.
But what should I adjust it to? What’s the acceptable range?
I haven’t been able to find an answer to this. If you know, let me know!
Checkpoint Iterations: This is how many times to run through the training per checkpoint generation. At each 1000 iterations, you will get an image in the test directory that allows you to visualize how the training is going.
Batch Size: Refers to the number of training examples utilized in one iteration. So if you were to set this to your number of iterations (1000), your training would be done in a single epoch — but you wouldn’t get any intermediary checkpoints to know how the training was going.
Other Parameters: You can see all of the parameters available for this script by looking at any of the add_argument flags listed here. Any of these can be adjusted or added to the code block above (e.g. –style-weight 150 ).
Seeing Results
If you’ve never trained a model before, you may be confused as to whether all this work you’ve done is amounting to anything. You’ll know the training is working if the code block has a stop icon, and is spinning. You should eventually see lines of output like:
That Loss number should get better over time, meaning that your model is learning!
Where are the files?
The trained model gets put in the checkpoint directory you made. You should see something like:
That .meta file should be large, >100MB, most likely.
The test directory stores images of the training process as the model gets trained. The first images you see might look completely unlike your style image, but gradually they will start to look more and more similar.
Give it some time — but if you notice these images aren’t significantly improving over time, or are not the results you were hoping for — stop the training, adjust the content or style weight, change your content or style image, and try your training again.
This is taking too long, can I stop it?
Yes — you can use your most recent checkpoint at any time. Make sure to click the stop icon on the active code block. Then, in Google Drive, you can just download the checkpoint folder and use it as you’d like.
How Do I Maximize My Training Time Before Getting Disconnected?
For now, there is a hack, which is to open up the developer tools in your browser, (View > Developer > Developer Tools in Chrome), and in the console, paste this code:
This will simulate a click on the connect button every minute, signaling to the browser that you’re remaining active on the page.
Can I apply my model to a bunch of images?
If you want to use your model on many content images at once, gather those images, place them in a folder called evaluate within your colab-files directory on Google Drive, make another empty folder called results within the colab-files directory, and then run the evaluate script:

Processing these images should be fast—a couple seconds per image at most. The images output to your results directory:
Where to go from here
Real Time Style Transfer with a Webcam
We won’t cover it here, but the Colab notebook goes on to show you how you can perform real-time style transfer in a web browser using TensorFlow.js and ML5.
Video Style Transfer
Alternatively, the GitHub repo for fast style transfer provides some code for how to run style transfer on video. See if you can modify this to work in Colab!
Other Machine Learning Models
ModelZoo lists all kinds of machine learning models that can be run in Colab. Try them out!
Thanks!
If you make anything interesting, catch any errors, have any feedback or questions, give a holler.
Editor’s Note: Heartbeat is a contributor-driven online publication and community dedicated to providing premier educational resources for data science, machine learning, and deep learning practitioners. We’re committed to supporting and inspiring developers and engineers from all walks of life.
Editorially independent, Heartbeat is sponsored and published by Comet, an MLOps platform that enables data scientists & ML teams to track, compare, explain, & optimize their experiments. We pay our contributors, and we don’t sell ads.
If you’d like to contribute, head on over to our call for contributors. You can also sign up to receive our weekly newsletters (Deep Learning Weekly and the Comet Newsletter), join us on Slack, and follow Comet on Twitter and LinkedIn for resources, events, and much more that will help you build better ML models, faster.

Comments 0 Responses