
Sometimes you might want to change part of your lenses and replace them with an image or object or even an effect. Segmentation allows you to do that while using segmentation textures.
For instance, you can change the background by adding the texture you want or changing the user’s hair by adding color or a texture to it.
Types of segmentation textures include portrait background, portrait hair, portrait shoulder, portrait face, portrait head, sky, and body. We will look at what they do later on in this article.
Let’s first look at how you can create a different background and later on add texture to the user’s hair.
Getting Started
The first thing to do is open Lens Studio, then create a new project.
Adding Background Resources
To start with, let’s look at how you can add a different background using the portrait background segmentation texture.
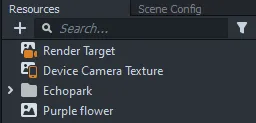
Choose the background texture of your choice. I’m going to use a flower image by Kristina Paukshtite from Pexels. To add your resources to Lens Studio, drag them to the Resources panel.
Adding Background Texture
The next step is to add the background texture. To do this, add a screen image by going to the objects panel and selecting the screen image.
The screen image will hold the background texture. Then duplicate the screen image, which will be used as a foreground image that will share the user’s image.
You can rename the first screen image as ‘background’ just to make it easier for identification. By selecting the screen image, the properties are exposed in the Inspector panel.
In the texture section, select the image you want as the background. You can do this by dragging the image from the resources panel and dropping it to the texture or clicking inside the texture box and selecting the image. See the illustration below.
Select the stretch mode as fill to ensure the image covers the whole area of the lens.
Foreground Segment
Let’s now work with the foreground segment. This will take the position of the user.
Select the foreground object in the objects panel to expose the properties in the Inspector panel. Go to the material section and choose unlit. Unlit material doesn’t reflect any light. It also has the opacity texture component that allows you to cover certain parts of the material.
After you have selected the unlit material, click on it to view the properties in the resources panel. In the Inspector panel, change the blend mode from disabled to normal for the opacity texture to work. Then set the texture to camera device texture. Enable the opacity texture by clicking the check box next to it. You will see that it exposes certain parts.
The opacity texture property allows you to select the portrait background segmentation as the opacity texture. Click on the texture option, then click on add new. Hover on the segmentation texture and select the portrait background.
As you can see in the outcome below, the user’s image is covered and only the background is exposed. But for this case, we want the user’s image exposed and the background covered with the flowers.
To achieve this, select the portrait background in the resources panel and check the Invert mask box in the inspector panel. See as illustrated below.
You can see the foreground is exposed but also the background with the texture of the purple flowers goes behind the user.
The portrait background segmentation component in the Inspector panel has more properties. The feathering property has a slider that allows you to increase or decrease the intensity of the feather effect to the edges. There is also the refine edge that makes the edges refined or not. Try them and see what you prefer.
Changing Hair texture
You can change the type of segmentation texture from the current texture to the texture you want in the Inspector panel. In the illustration below, I have achieved portrait hair segmentation by changing the texture type from portrait background segmentation to portrait hair. As you can see, it adds a different texture to the user’s hair.
Segmentation Textures
There are also other types of segmentation textures: portrait hair, portrait shoulder, portrait face, portrait head, sky, and body.
The portrait hair texture covers all other parts of the lens except the hair. The portrait shoulder texture covers everything else except the shoulders.
The portrait face texture covers everything else in the lens except the face. The portrait head texture only exposes the head of the user. The sky and body textures expose the sky and the body respectively and cover everything else.
Conclusion
The segmentation textures enable you to exercise your imagination and experiment. If you are interested in learning more about how to replace parts of your lenses with new and interesting ideas, check out this segmentation template.

Comments 0 Responses