
Dominos is running a campaign to get you to…well, think about Dominos some more. Take a picture of a pizza—any pizza—and get free points towards a free Dominos pie.
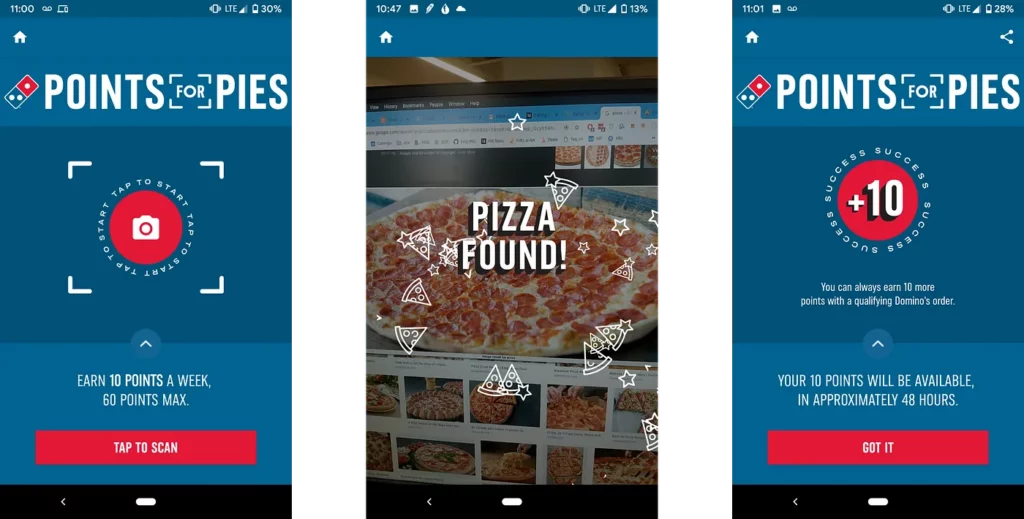
How can they do this? Does a person look at every photo taken and determine if it’s pizza or not? Fortunately, they do not:
In this tutorial, we’ll pretend like we’re part of Dominos’ internal teams and build our own pizza identifier using an on-device image labeling algorithm.
After you’ve completed this tutorial, you’ll be able to:
- Build a basic camera app in iOS using Swift
- Use the Fritz iOS SDK to identify the contents of an image
- Create basic iOS animations using UIKit
Starting out
Download and open the starter project for this tutorial. Choose the starter project.
It’s easiest to setup Fritz AI using Cocoapods. In the starter project folder, run:
This will create a FritzPizzaDetectorDemo.xcworkspace folder. Open this in Xcode.
Build and run the app. Note that since it uses the camera, it won’t work in the Simulator. The app doesn’t do a whole lot to start out—just a plain camera. We’ll be changing that soon.
Fritz AI Overview
In this tutorial, we’ll be using the Fritz AI iOS Image Labeling feature to detect pizza. The Fritz SDK comes with a variety of pre-built features that run directly on your phone.
All Fritz AI Vision APIs use a few constructs:
- FritzVisionImage: The image that the model runs on. It will wrap the provided pixel buffer or other image you provide.
- Options: Configuration options that are passed to the model letting you tweak how the model runs.
- Model: The actual model that runs predictions on the input images.
- Results: The output of the model. Each predictor has a different type of results. In this tutorial, the results are a list of FritzVisionLabel objects. For style transfer, the results are all CVPixelBuffers.
The Image Labeling feature can label over 1,000 different objects. Fortunately, one of those 1,000 labels is “pizza”.
Setup Fritz AI Account
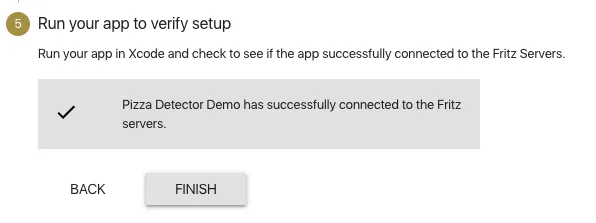
Setting up a Fritz AI account is easy. Follow the Getting Started directions to setup your Fritz AI account and connect the pizza demo to your account. Here are the steps you’ll run through:
- Create an account.
- Create an iOS App. Make sure that the Bundle ID of your project matches the one you created.
- Drag the Fritz-Info.plist file to your project.
- Add the Fritz configure to your AppDelegate.
After you run through the initialization steps, build and run your app. When your app has successfully checked in with Fritz AI, you’ll see the following in the webapp:
Add the Pizza Detector
Open ViewController.swift and add the following at the top of the class:
lazy var labelModel = FritzVisionLabelModel()
This will add initialize the Label Predictor that we’ll use to recognize pizza. Make sure to declare the variable as lazy so that it doesn’t load until the first time you use the model.
Now scroll to the AVCaptureVideoDataOutputSampleBufferDelegate extension. Add the following code to the captureOutput delegate method:
// 1
let image = FritzVisionImage(buffer: sampleBuffer)
image.metadata = FritzVisionImageMetadata()
image.metadata?.orientation = FritzImageOrientation(from: connection)

// 2
let options = FritzVisionLabelModelOptions()

// 3
guard let results = try? visionModel.predict(image, options: options) else { return }
print(results)
If you run this code, you should see some output in the console. With this code you have:
- Created a FritzVisionImage to pass into the Image Labeling predictor. The metadata takes the orientation of the input sampleBuffer into account when running predictions.
- Created a FritzVisionLabelModelOptions object with default options. This is not actually necessary right now, but we’ll customize it later.
- Run the label model on the created image. The model can throw an error, so we use a guard statement to guard against that and ensure we have predictions going forward.
Good question. Let’s only look for pizza labels. Update your code to the following:
// 2
let options = FritzVisionLabelModelOptions()
options.imageCropAndScaleOption = .centerCrop
options.threshold = 0.2

// 3
guard let results = try? visionModel.predict(image, options: options) else { return }

// 4
let pizzaResults = results.filter { $0.label == "pizza" }
if pizzaResults.count > 0 {
  print("Houston we have pizza")
}
Here’s what we just changed:
//2: We updated the options. The model was trained on square images that are smaller than images from our camera. Setting the imageCropAndScaleOption to .centerCrop tells the model to take the square of the center of the image. It helps increase prediction accuracy. Also, we lowered the threshold needed to return results.
//3: Nothing new here!
//4: Here we’re filtering the image results for the label “pizza”. The results are of the type [FritzVisionLabel]. Each label has a label and confidence value. We want to filter out all labels that aren’t pizza.
Now we have an app that labels pizza. Let’s add some toppings to our app.
Adding the pizza animation
Now we get to add pizza animations for when we see pizza. Scroll down to the createNewPizzaSlice function at the bottom of the project. Add the following code:
// 1
let pizzaView = UIImageView(image: UIImage(named: "pizza.png")!)
let frame = CGRect(
  x: self.view.frame.width / 2 – 50,
  y: self.view.frame.height / 2 – 50,
  width: 100,
  height: 100
)
pizzaView.frame = frame
This code creates a UIImageView with the pizza image. It specifies the frame of the view.
Next add the following:
// 2
self.view.addSubview(pizzaView)
self.view.bringSubviewToFront(pizzaView)

// 3
UIView.animate(withDuration: 2.0, animations: {
  pizzaView.center = self.generateRandomPizzaDestination()
}) { _ in
  pizzaView.removeFromSuperview()
}
Here’s what we added:
// 2: This adds the new pizza view to the main view of our ViewController. We make sure to bring it to the front of our view. All of our new pizzas will be added on the top.
// 3: Here’s the actual animation. What are we actually doing here? UIView.animate will perform an animation that will last for 2 seconds.
generateRandomPizzaDestination is a function I wrote to pick a point randomly along the edge of the screen. The animation moves the center of the pizza to a random point along the edge.
Once the animation finishes, it removes the pizza view, removing the pizza from our screens (but not our hearts) forever.
Now scroll back up to the captureOutput camera delegate method and add more pizzas as we find them:
// 4
let pizzaResults = results.filter { $0.label == "pizza" }
if pizzaResults.count > 0 {
DispatchQueue.main.async {
self.createNewPizzaSlice()
}
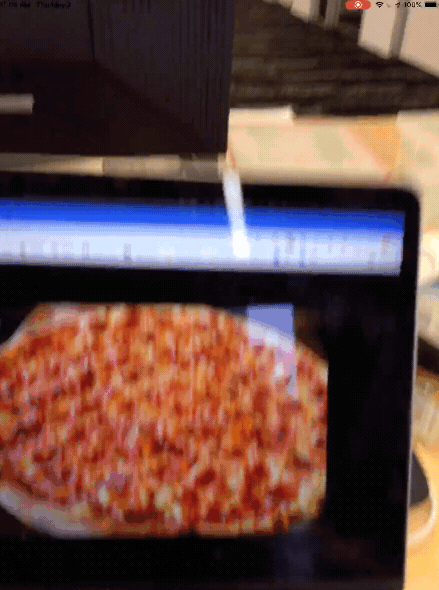
}Build the app and point your phone at some pizza!
For a bit more fun, add a few more slices on each detection:
// 4
guard let pizzaResults = results.filter { $0.label == "pizza" }
if pizzaResults.count > 0 {
  DispatchQueue.main.async {
    For _ in 0..<10 {
      self.createNewPizzaSlice()
    }
  }
}
Where to go from here?
Download the final project from this tutorial here. Or if you’d like to explore the project before jumping in, check out this repo.
Now you can officially be an engineer at Dominos (disclaimer: not true)! But this tutorial gives you a starting point for building an iOS app using a pre-built Image Labeling model.
Next week, we’ll take it a step further and show you how to build your own custom model to classify different pizza toppings with Google Colab and Fritz AI Training Templates.

Comments 0 Responses