
Once your TensorFlow model is ready, you can easily deploy it to a mobile application. This is done by converting it to the TF Lite format. If you are working on a common task such as image classification and object detection, you can easily grab a pre-trained model from TensorFlow Hub.
In this piece, we’ll use a pre-trained model to illustrate how one can deploy their model on an Android device.
Getting Started
The first step is to obtain a TensorFlow Lite model. You need a TensorFlow model which you can then convert to a TF Lite model. The conversion is done using the TensorFlow Lite Converter. As you do your conversion, it’s important to keep in mind that TF Lite doesn’t support all TensorFlow operations.
The inferencing stage requires a TensorFlow Lite interpreter and some input data, in this case, images. The interpreter accepts a model file and provides access to the output of the model. The interpreter uses tensors in the form of ByteBuffer. This form can be hard to debug and use. The TensorFlow Lite Android Support Library provides tools that aid in the development of machine learning for mobile applications.
Obtaining the Model
The image classification pre-trained model can be downloaded from this link. Once you download it, copy the model and the labels to the assets folder in your application’s main folder. You then need to specify that the model should not be compressed in your module’s build.gradle file.
android {
    aaptOptions {
        noCompress "tflite"
    }

}
Next, specify TF Lite dependencies in the same file.
dependencies {
    implementation 'org.tensorflow:tensorflow-lite:0.0.0-nightly'
    implementation 'org.tensorflow:tensorflow-lite-support:0.0.0-nightly'
    }
The App Elements
The application is made up of two elements:
- An ImageView that, when clicked, runs the prediction function.
- A TextView to show the predicted class and its confidence.
<?xml version="1.0" encoding="utf-8"?>
<androidx.constraintlayout.widget.ConstraintLayout xmlns:android="http://schemas.android.com/apk/res/android"
    xmlns:app="http://schemas.android.com/apk/res-auto"
    xmlns:tools="http://schemas.android.com/tools"
    android:layout_width="match_parent"
    android:layout_height="match_parent"
    tools:context=".MainActivity">

    <ImageView
        android:id="@+id/imageView"
        android:layout_width="wrap_content"
        android:layout_height="wrap_content"
        android:layout_marginTop="16dp"
        android:layout_marginBottom="46dp"
        android:onClick="predict"
        app:layout_constraintBottom_toTopOf="@+id/textView"
        app:layout_constraintEnd_toEndOf="parent"
        app:layout_constraintStart_toStartOf="parent"
        app:layout_constraintTop_toTopOf="parent"
        app:srcCompat="@drawable/hen" />

    <TextView
        android:id="@+id/textView"
        android:layout_width="341dp"
        android:layout_height="30dp"
        android:layout_marginStart="21dp"
        android:layout_marginEnd="25dp"
        android:layout_marginBottom="215dp"
        android:text="The label is "
        android:textAlignment="center"
        app:layout_constraintBottom_toBottomOf="parent"
        app:layout_constraintEnd_toEndOf="parent"
        app:layout_constraintHorizontal_bias="0.583"
        app:layout_constraintStart_toStartOf="parent"
        app:layout_constraintTop_toBottomOf="@+id/imageView" />
</androidx.constraintlayout.widget.ConstraintLayout>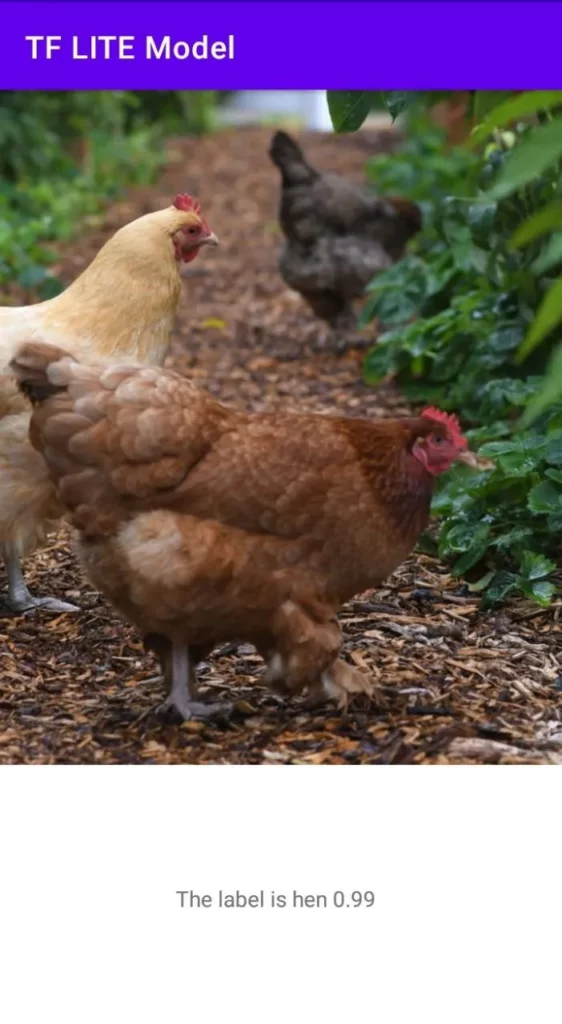
Obtaining the Image
In this case, we will obtain the image as a drawable asset. However, you can change this so that you can obtain the image from a camera stream or a network.
Bitmap bitmap = BitmapFactory.decodeResource(getResources(), R.drawable.hen);
Processing the Image
Next, let’s use the TensorFlow Lite Support Library to process the image. It is important that the image is of the size expected by the pre-trained model we downloaded. In this case, we resize the image to 224 by 224 pixels. This can be done using the ImagePreprocessor function and adding the preferred operations.
ImageProcessor imageProcessor =  new ImageProcessor.Builder()
                                        .add(new ResizeOp(224, 224, ResizeOp.ResizeMethod.BILINEAR))
                                        .build();
Create a TensorImage object
Now let’s create a TensorImage object since it’s what the TensorFlow Lite interpreter expects. After that, we load and process the image using the imageProcessor created above.
TensorImage tImage = new TensorImage(DataType.UINT8);
tImage.load(bitmap);
tImage = imageProcessor.process(tImage);
Create Output Objects
At this point, we can create a variable that will hold the result of the predictions. Since the model we downloaded is a quantized model, we defined the data type as UINT8 (8-bit unsigned integer).
TensorBuffer probabilityBuffer = TensorBuffer.createFixedSize(new int[]{1, 1001}, DataType.UINT8);
Load the model and run inference
We load the model as a MappedByteBuffer and then use that to create a new interpreter. The MappedByteBuffer is a direct byte buffer and its content is a memory-mapped region of a file. Since we are using a MappedByteBuffer it has to remain unchanged through the lifetime of the interpreter. While loading the model we also pass in the default interpreter options.
Running inferences on the model is done using Interpreter.run(). The run function takes the image as input and the probability container as the output.
 try{
           MappedByteBuffer tfliteModel = FileUtil.loadMappedFile(this,"mobilenet_v1_1.0_224_quant.tflite");

           Interpreter.Options options = new Interpreter.Options();
           Interpreter tflite = new Interpreter(tfliteModel, options);

           tflite.run(tImage.getBuffer(), probabilityBuffer.getBuffer());

       } catch (IOException e){

           Log.e("tflite Support", "Error reading model", e);

       }
Obtaining the result
Before we can see the results, we need to map the labels to the probabilities. We, therefore, start by loading the labels that are in our assets folder.
 final String MOBILE_NET_LABELS = "labels.txt";

       List<String> mobilenetlabels = null;

       try {
           mobilenetlabels = FileUtil.loadLabels(this, MOBILE_NET_LABELS);
       } catch (IOException e) {
           Log.e("tfliteSupport", "Error reading label file", e);
       }
Since this model produces a quantized result, it has to be converted. We do that by dividing the outputs by 255 so as to obtain the probability. This gives a number rating from 0 to 1.
TensorProcessor probabilityProcessor = new TensorProcessor.Builder().add(new NormalizeOp(0, 255)).build();
labels.getMapWithFloatValue() gives us a map of all the classes and their associated probabilities. Since we don’t want to show all the classes, we set a threshold of 50% and show just that class. The result variable is set as an empty variable at the beginning of the main activity class. Finally, we display the result on the text view.
  if (mobilenetlabels  != null ) {
           // Map of labels and their corresponding probability
           TensorLabel labels = new TensorLabel(mobilenetlabels, probabilityProcessor.process(probabilityBuffer));
           // Create a map to access the result based on label
           Map<String, Float> resultsMap = labels.getMapWithFloatValue();

           for (String key : resultsMap.keySet()) {
               Float value = resultsMap.get(key);
               if (value >= 0.50){
                   String roundOff = String.format("%.2f", value);
                   result = key + " " + roundOff;
               }
               Log.i( "Info",  key + " " + value);
           }
           textView.append(result);
       }
Conclusion
In this article, we have used a pre-trained mobile net model. You can try out several other pre-trained models, for example, the Inception pre-trained model. If the pre-trained model doesn’t have all the classes you are looking for, you can also retrain the model to customize it.
The complete source code for this article can be found below:

Comments 0 Responses