
Face Effects allow you to make alterations to faces in Lens Studio. Face effects can be used to make subtle changes on the face, exaggerated changes such as bulging of the face, and you can even add art and art objects to the face. These face effects include eye color, face stretch, face liquify, and more. Let’s look at these face effects in more depth.
Face Stretch
As the name suggests, this effect allows you to prolong parts of a user’s face. Face stretch enables you to create funny face effects on users’ faces.
Adding Face Stretch
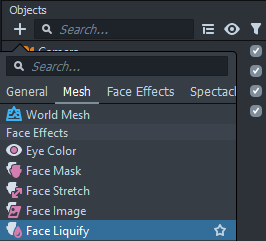
To add the face stretch object, open Lens Studio. Download here if you don’t have the Lens Studio. Once you have Lens Studio opened, open a new project for this effect. Then create a face stretch object by proceeding to the objects panel and clicking on the + button. Find the face effects and select the face stretch effect. This is illustrated below.

Creating a face stretch object opens up as a 2D object in the scene view panel. It has anchor points that allow you to adjust the face to the effect that you want.
Creating Face Stretch Effects
The 2D object contains points that you can pull to stretch specific points of the face. The symmetrical mode button is selected by default which allows you to drag the points symmetrically. You will see the changes on the preview panel as you adjust the anchor points in the 2D scene view.
To change all the points back to their default positions, click the reset button next to the symmetrical mode button. To move individual points, disable the symmetrical mode button by unchecking it. Reset individual points to their initial positions by double-clicking the points. This is demonstrated below.
The first step as illustrated is to reset all the points to default positions using the reset button. The individual points have been stretched on the face by unchecking symmetrical mode. The last step is the points have been reset by double-clicking on each point. The changes can be seen on the preview panel.
Face Effect Settings
Under the inspector panel, the face stretch component contains face index, feature, and add feature attributes.
The face index is 0 which means it’s the first face to be displayed. The feature attribute represents the effect applied to the user’s face. It has a slider that determines the intensity of the effect. To increase the intensity of the effect, drag the slider forward. First, select the face stretch object under the objects panel. By doing this, the inspector panel with the face stretch attributes opens. Make the adjustments you want by dragging the points in the 2D face object.
Adding more Features
The Add Feature property enables you to add additional effects on specific areas of the face and work on them individually.
Let’s add a new feature that includes a nose effect.
In Feature 0, the effect was stretching the edge of the face near the eyes, chin, and cheeks. The intensity was also increased. In the second feature, the nose was stretched. The combination of the effects of these two features gives us a final result of a comical-looking face.
Eye Color
This effect enables you to change the color of the user’s eyes.
Creating Eye Color
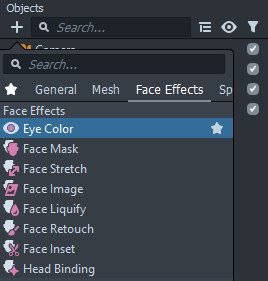
To open eye color effect, go to the objects panel, click the + button, and select Face Effects. Then click on Eye Color.
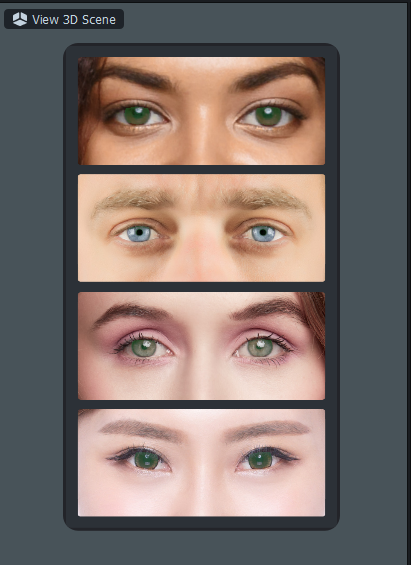
This opens up as a 2D object in the scene view panel. This lets you see the effects of the changes.
Eye Color Settings
The eye color of the user’s face is changed in the inspector panel on the eye color component.
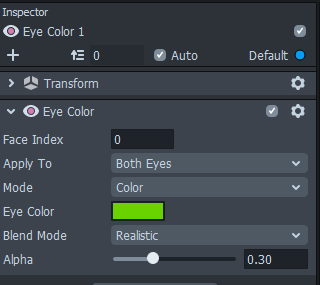
Under the eye color component, there is a face index set as 0 because it’s the first image to be displayed. Next, is the apply to label which allows you to choose either both eyes or the right or left eye for the effect to apply. The mode label gives you the option to choose the color of the user’s eyes. It also gives you the texture option which allows you to select a custom texture to add to the eyes.
Under color mode, you will get a variety of basic color options to choose from. Select a screen color from the pick screen color button. Moreover, you can add custom colors. These options are available when you click on the visual color display option of the eye color label. The blend mode helps you select which mode blends better with the eyes.
Face Liquify
This effect enables you to make parts of the face bulge and wrinkle. Let’s create a face liquify object and see how the effect works.
Creating a Face Liquify Object
To begin, create a new project in Lens Studio. Click on the + button, select face effects, and click on the Face Liquify effect.
Clicking on the face liquify effect opens up as a 2D object with two liquify points that look like circles. These points are where the liquify effect takes place. For instance, move the liquify points from one area of the face to another. To view the effect, check the preview panel as illustrated below.
To create a single liquify point, uncheck the symmetrical mode button and click on the + button in the scene view.
Increasing Effects
You might want to increase the intensity and the radius of the effect on the image. To do this, select the liquify object then head over to the inspector panel where the liquify properties reside. The radius label is one of the liquify properties that increases or decreases the diameter of the circle of influence. To increase, drag the slider to the right. The intensity label strengthens the effect.
Face Inset
The face inset effect allows you to attach a part of your face to other parts of the face. For instance, attach an eye in between the eyes, or even replace a feature of the face with another one.
Let’s get started with creating a Face Inset effect.
Adding Face Inset Object
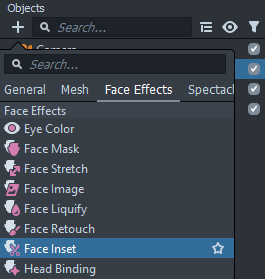
Open a new project in Lens Studio and, on the objects panel, click on the + button, select Face Effects and then click on Face Inset.
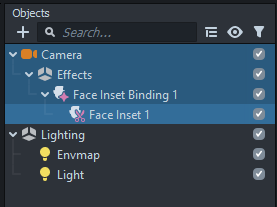
Adding Face Inset Binding object
When we add a face inset object in the objects panel, a face inset binding object is created and a child face inset sits below the face inset binding object. The face inset binding object binds the child face inset to the face, thus making the child face inset object the inset that we will map to areas of the face.
2D View Scene
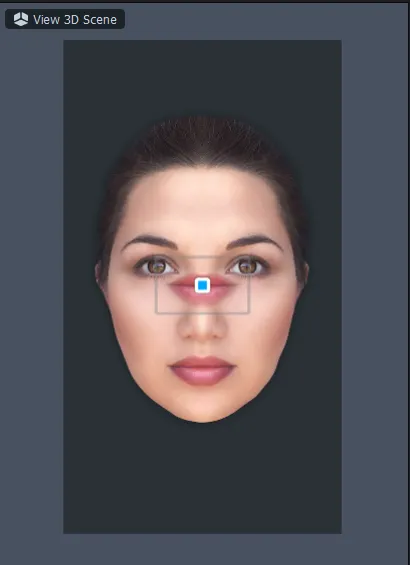
On clicking the face inset effect, it opens up as a 2D object in the scene view panel with an inset of the object. This panel allows you to visualize your object and edit your object. In this case, adjust the face inset in this 2D scene and map it to the areas of the face you want. As shown below, the face inset object is a mouth.
Customizing Face Inset Object
Select the face inset binding and face inset to visualize the object and inset object in the 2D scene. To edit the inset object, hold and drag the corner points of the inset object to where you want to attach it to on the user’s face.
Face Inset Settings
Settings help you achieve a customized result and also try different facial parts and blend modes. Go to the inspector panel and under the face inset section, you will see a number of properties.
Create a Face Inset Effect
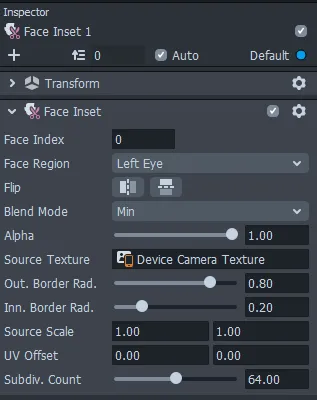
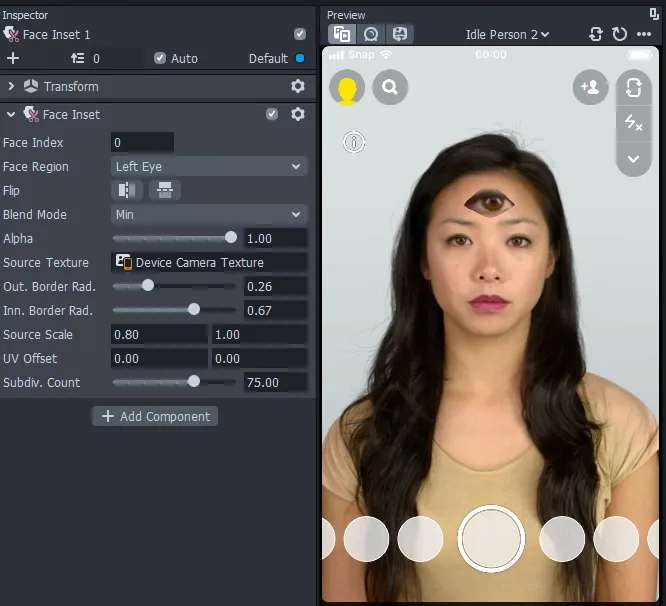
Use the face inset attributes to create a custom face inset effect. The face index is set as 0. It represents the first face we are using in the scene. The face feature you will copy is the left eye under the label face region. Other face regions available are the right eye, mouth, nose, and face. Below is the flip label. It allows you to flip the inset object to the right, left, up, and down. The blend mode is how well it blends with the face. Try different blend modes to see which blends with the user’s face better. Let’s use the min blend mode.
Alpha is how transparent you want your object to be. As you drag the slider back, it becomes more transparent. Source texture represents where the facial parts are sourced from. Set it as a device camera texture. The outer border radius is how large the outline of the object is or that you want it to be. The inner border radius is how transparent the edges of the object are. The source scale shows how stretched or tight the source inset is. The UV offset displays how far the inset object is from the center. Let’s place the inset object at the center. Subdiv count represents how smooth the shape of the inset object is.
The custom inset object image is shown below together with the settings used.
Face Mask
This effect applies a 2D mask to the user’s face. It can be used to cover the face fully with a mask or partially giving a makeup look.
Let’s get started with creating a Face Mask
Creating a Face Mask
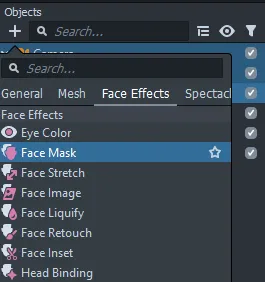
Create a new project for the face mask effect by clicking file and then select a new project. Click on the + button, select face effects, then click on the face mask effect.
Clicking on the Face mask effect opens up to a 2D mask on the scene panel.
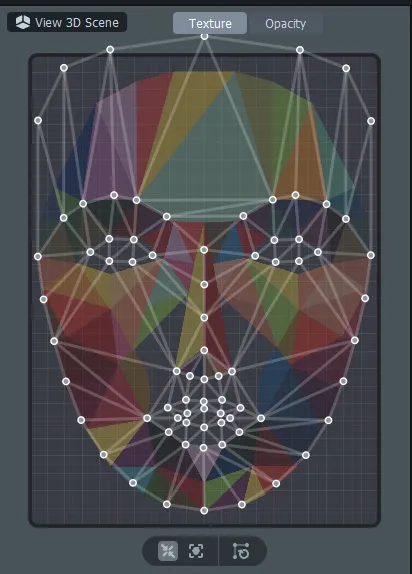
This 2D mask has anchor points that, when adjusted, adjust the face image on the preview panel.
Creating Texture
Use the default mask as shown above as a face mask effect or use your custom textures that will be mapped onto the user’s face. Create one that appears like art on the face.
Create the face texture by downloading the photoshop template from the Lens Studio documentation. After downloading, open it in Photoshop or use any other illustration software. In this case, let’s open it in Photoshop and create face paint around the eyes. Export the artboard as a PNG file.
Importing Texture
To import the texture to Lens Studio, drag and drop it into the Resources panel.

Mapping the Custom Face Mask
To map the face mask on the user’s face, drag the face paint texture from the resources panel to the texture label under the face mask section. You might need to adjust the anchor points on the 2D mask to ensure the custom face mask fits properly on the user’s face.
Also, you can use the default mask. To create the default mask, go to the objects panel, click the + button, select the face effects, and click face effects.
Face Mask Settings
Under the inspector panel, in the face mask section, there are elements that you use to customize your mask. The first element is the face index, which represents the first image that is used for the scene. The material refers to ways the visual objects appear when they interact with light. Let us leave it at default. The texture is what is added to the user’s face image. In our case, it’s the face paint texture. The opacity texture refers to where the face mask will appear. When you open the face mask object, it sets the opacity texture to default. The blend mode allows you to use different modes that would blend well with the face image. Next is the alpha which stands for how strong the face mask object is. Draw mouth is checked if the effect can be used on the mouth as well. The user’s original face is checked when the user’s face is used as a texture.
Face Retouch
The face retouch effect allows you to rework features in a user’s face. This includes teeth whitening, eye whitening, soft skin, and eye sharpening. To achieve a quality look, this effect needs to be applied moderately. Let’s look at how it works.
Creating the Face Retouch
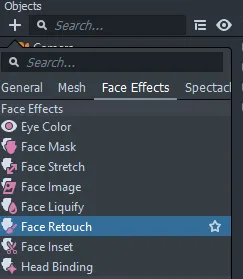
Open a new project and once it’s open, click on the + button in the objects panel and select Face Effects. Click on the Face Retouch.
Scene View
When you create a Face Retouch object, it opens up as a 2D object in the scene view. This object allows you to see the changes on the object as you adjust the settings of the face feature you are retouching.
Adding Retouch Settings
To adjust the face retouch settings, select the face retouch object in the objects panel. This opens up the face retouch component in the inspector panel. Under this component, there are face retouch features that have buttons which, when checked, activate the effects. The face retouch features include soft skin, teeth whitening, eye sharpening, and eye whitening. They have intensity attributes with sliders, which control the intensity of the effect.
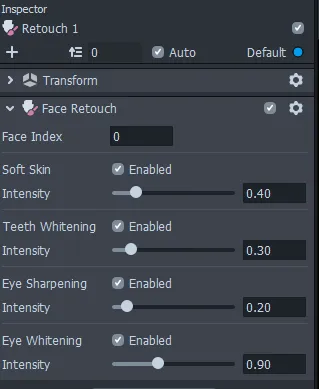
In the face retouch section, face index 0 refers to the first face used in the scene. The soft skin feature activates the soft skin effect on the user’s face. The teeth whitening is used to increase whiteness in the user’s teeth when they open their mouth. The eye sharpening feature gives a crisp look to the eyes. The eye whitening feature whitens the eyes of the user’s face.
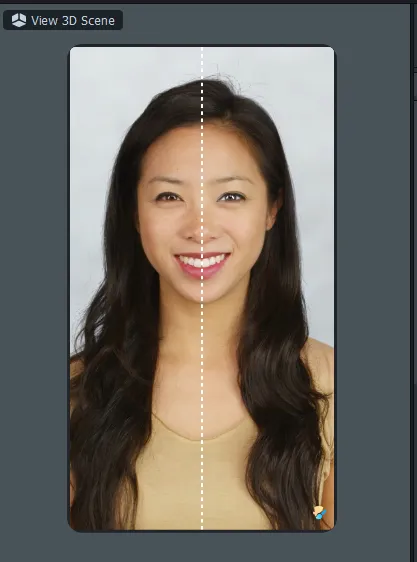
Illustration of Face Retouch Effects
Let’s adjust various face retouch effects to the user’s face as illustrated below.
Conclusion
In this article, we have looked at how you can add face effects to your lenses. Some effects make subtle and exaggerated changes to the face and others attach art to the lens. There are other intricate effects which you can use, including 3D animations and objects.
Check out this link to see more on Face effects.
Happy creating!

Comments 0 Responses