
LUT or, Look Up Table, is a photo or image filter that enhances and changes the color tone and grading of your image. It essentially can convert colors and details in a source file to a new destination state.
Using a custom lookup table or “LUT” allows us to have free range on creating our own custom color corrections through external third party programs and bring them directly into Lens Studio.
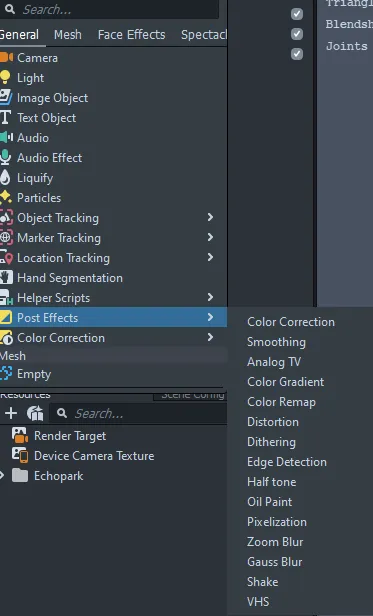
To get started, we will need to navigate to the objects panel and select the ‘+’ button, then select Color Correction under Post Effects. This will create an effect under the Effects scene object.
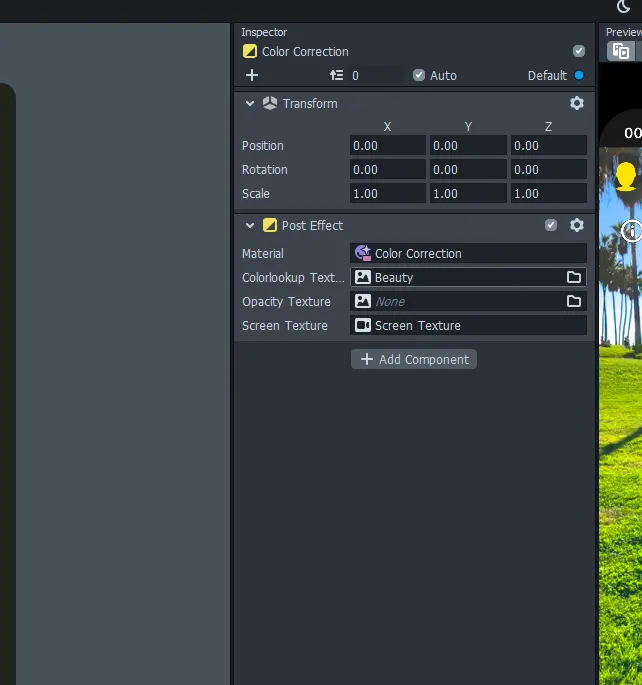
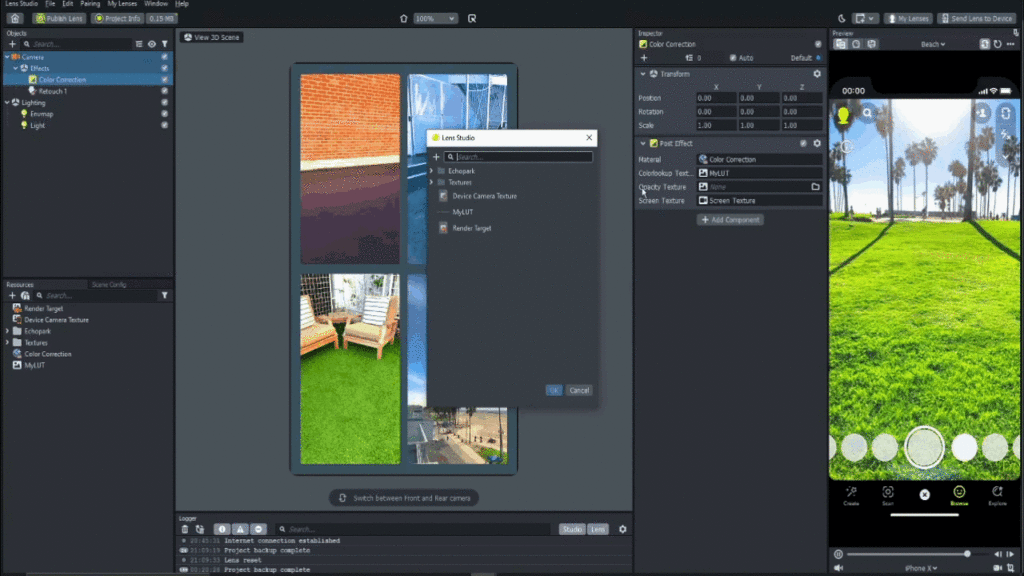
Now under our Inspector panel we will have a new post effect, in order to change it to our Custom LUT we will need to select the Color Lookup Texture.
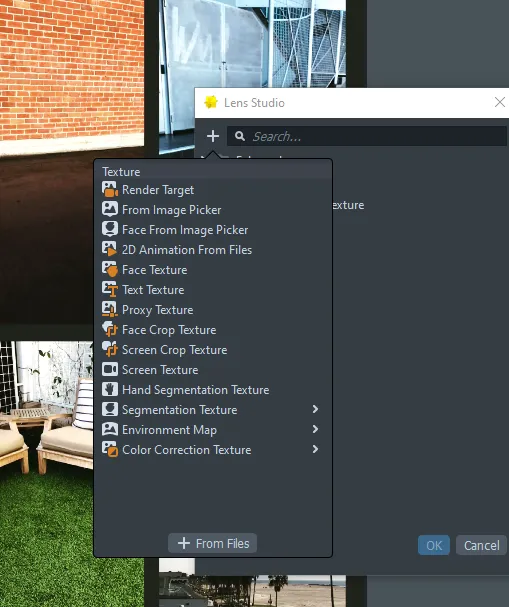
Selecting it will bring up a window. Select the + Button and Select “From Files” — this will prompt you to select your Custom Lookup Table.
Look Up Table
Using the lookup table you are able to create your own color corrections through external photo editing programs and bring them directly into Lens Studio with ease. Download the LUT here.


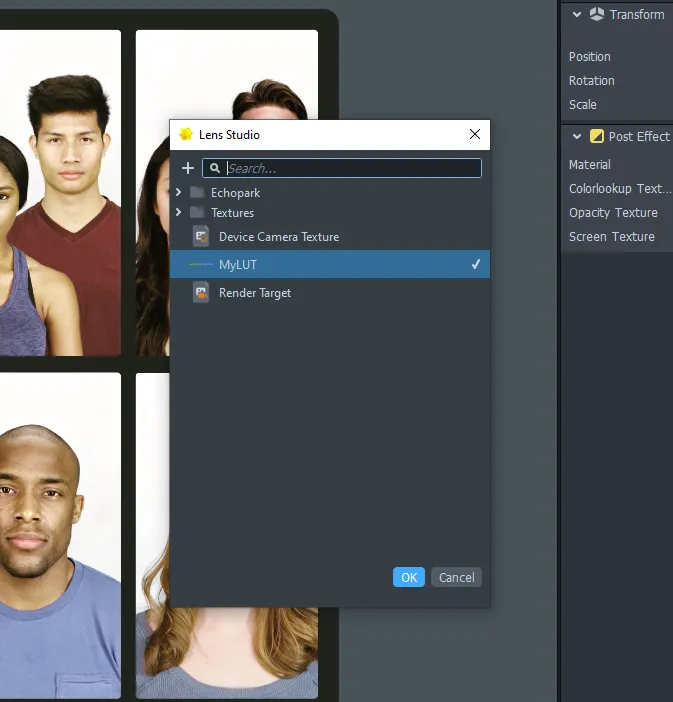
After Selecting the LUT you have created, it should appear in the Color Lookup Texture Box. From here it is just a matter of adjusting your Color Correction to best fit the look you are trying to achieve!
Adjusting Opacity Texture
When selecting the Color Correction Material in the Resource Panel, you’ll see a few more settings in the Inspector panel. To adjust the strength of the Color Correction you will need to use the “Opacity” Slider and change its value within 0.00–1.00 (depending on how strong you would you like the effect to be).
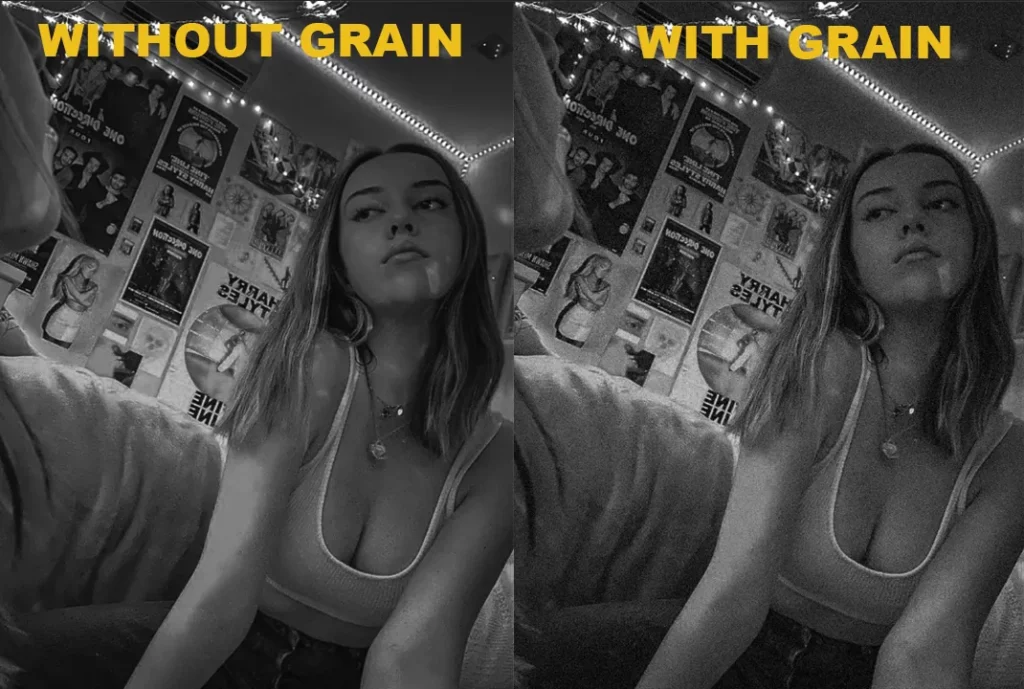
Applying Grains and Overlays
Using Grains and Overlays help give your Lens more detail and depth whilst helping them to be more distinctive and stand out.
Overlays can be anything big or small from a text to a vignette to help soften out edges. Overlays can bring more depth into your Lens by adding small but effective details while Grains help to give off a grainier wear type look to your Lens.
I have included a small pack that you can download here which includes a few assets to better enhance your Lens.
To add an Overlay, first drag and drop the overlay into the resources panel then create a new Screen Image through the object panel, now drag the Overlay onto the image texture. Now that your Overlay is on the Lens, change the Blend mode to ‘Overlay.’ This will make the Overlay transparent and leave the main effect in.
Conclusion
In this article we looked into one of Lens Studio’s basic features on creating custom color corrections and importing our own Overlays and applying them to our Lens.

Comments 0 Responses