
This tutorial is a quick guide on how to integrate Facebook login with Firebase while developing with React Native. By using Firebase and Facebook login, you’ll be able to understand how to use and integrate Firebase properly, as well as implement Facebook authentication along with login. This process will also help developers learn a lot about Firebase, which can be used as lightweight and easy-to-configure backend.
Nowadays, Facebook login has become important in a wide range of apps, as it will provide users with an easier login approach than having to manually enter credentials. It’s a simple but effective way to improve an app’s UX.
First, you’ll learn about the integration of React Native Firebase starter boilerplate using the GitHub repository.
Then, you’ll integrate react-native-fbsdk into your React Native project to enable the Facebook login. This plugin is a React Native wrapper around the Facebook SDKs for Android and iOS, which provides access to Facebook login, sharing, graph requests, app events, etc. All the configurations required are explained in detail below. At the end of this tutorial, you’ll be able to create your own React Native Firebase project that includes a Facebook login.
Setting up Firebase Boilerplate
To quickly and easily set up the for our project, we’ll clone a react-native-firebase-starter package. It’s a boilerplate for your project that will have all the configuration required for the Firebase setup. We do this by simply cloning the GitHub repo into our local drive. The command to clone the repo is given below:
As a result, you’ll see a React Native project folder in your drive with all the needed configurations. Now we need to install those configurations.
To do that we run yarn, which will install all the required plugins and packages required for the React Native Firebase project. This finalizes our setup of the starter project and we’ll see google-service.json in our project files, generated from the Firebase console.
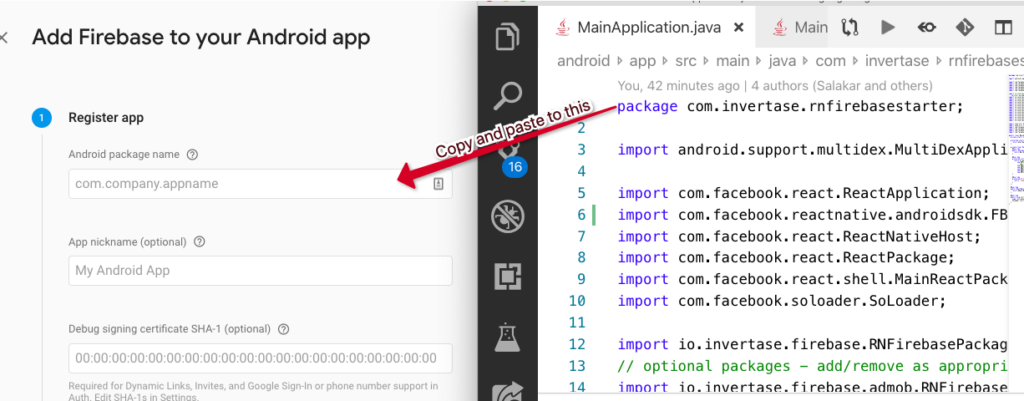
After app creation is complete, we need to select the Android app and open MainApplication.java in our IDE. There we’ll see an imported package named com.invertase.rnfirebasestarted. We need to copy com.invertase.rnfirebasestarter and paste it into the Firebase console, as shown in the screenshot below:
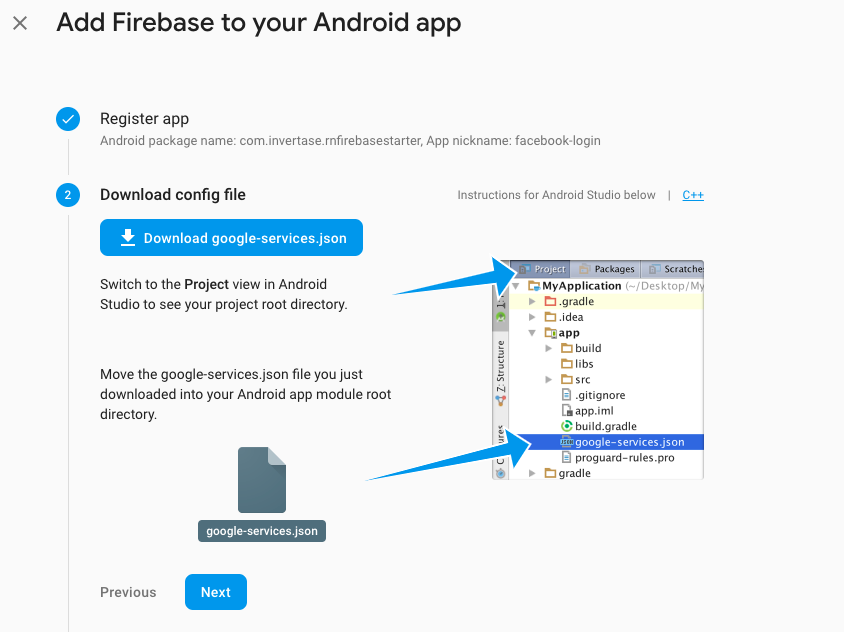
Follow the guiding points in the screenshots and download the google-services.json file into our project folder:
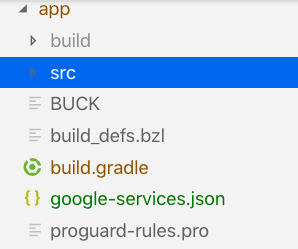
After downloading the google-services.json file into your project folder, we need to move the file from the main project folder into the project’s app folder.
Then, we start the app / project using the command below:
react-native run-android
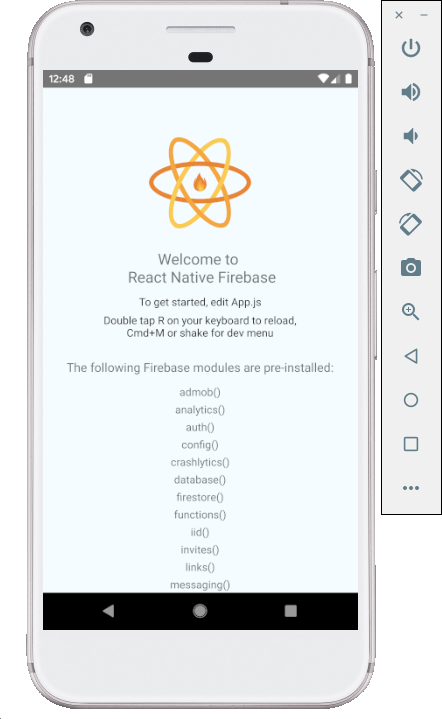
Then, we’ll see the following result in our Android emulator:

Finally, we can see that our Firebase integration is working properly. Now we can move on to adding Facebook login into our app.
Setting up the Facebook SDK plugin
Since we’ve integrated the Firebase plugin using the official documentation. To integrate the Facebook login, the docs recommend that developers usethe react-native-fbsdk package. So let’s get started by installing the plugin as follows:
After installing the Facebook SDK package, we must link the SDK to configure the iOS and Android projects. We can do that by using the following piece of code in our project console:
Now, go to MainApplication.java and MainActivity.java under app/src/main/java/com/<project name>/ to complete the setup.
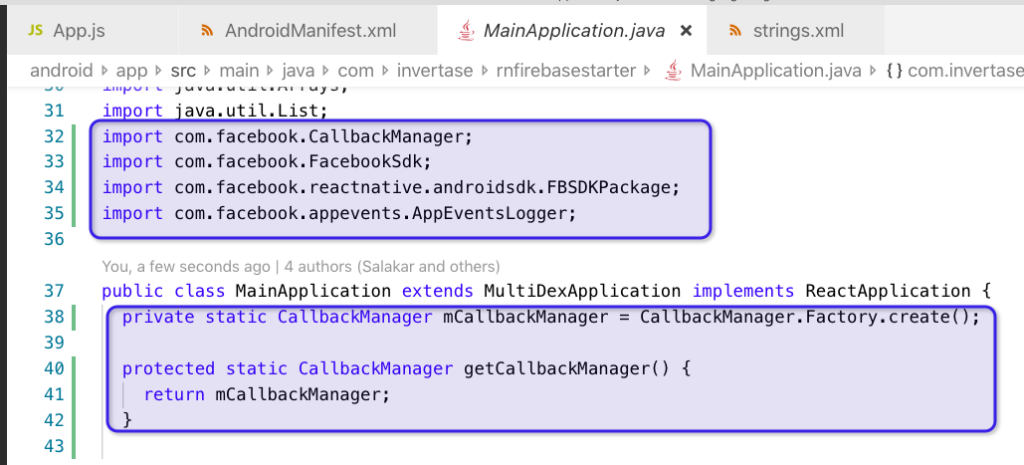
In MainApplication.java, we need to add an instance variable of type CallbackManager and its getter. You can use the code snippet below to do that:
The example of the above code used in the app project is shown below:
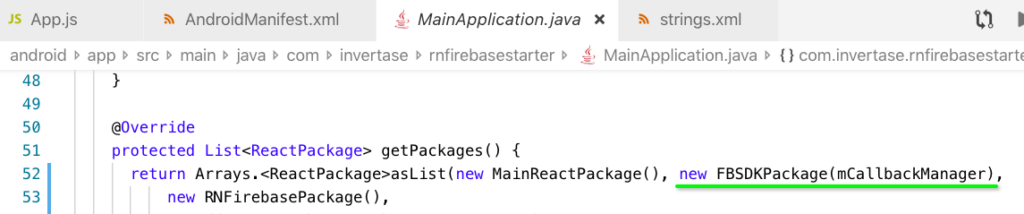
Now, we’ll need to register the SDK package using the getPackages() method. Follow the code snippet below to do that:
The integration of the above code in the app project is shown by the screenshot below:
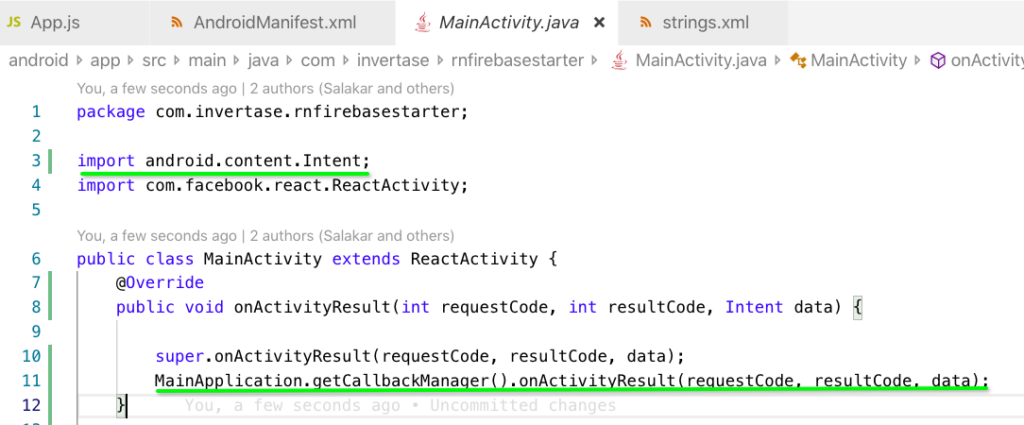
Now, in the MainActivity.java file, we need to override the method onActivityResult():
And again, the above code in our project environment:
After this is done, test the result in the IDE Android mobile emulator by running our app. The result can be seen in the screenshot below:
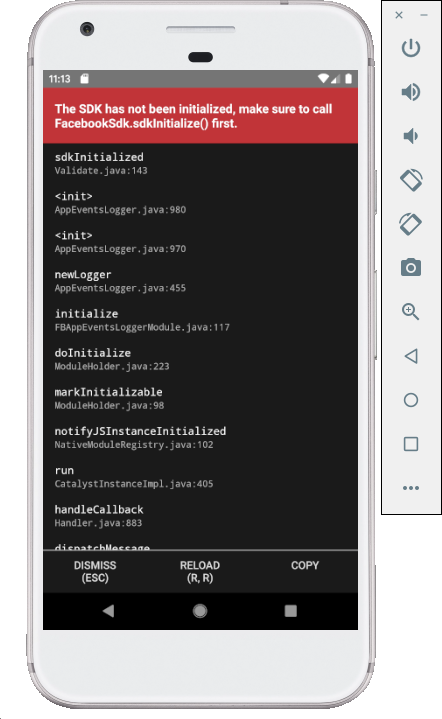
The above screenshot shows the occurrence of the error. This error is due to not establishing the APP_ID. You can find the solution of this error here.
Now, open the android/app/src/main/AndroidManifest.xml file and look for the <application> tag to confirm that this meta-data tag exists:
Then, we open the android/app/src/main/res/values/strings.xml file and confirm that there’s a facebook_app_id string tag with our app id as the value:
Finally, we run react-native run-android again to get the following result in our IDE android emulator:
Finally, our configuration of react-native-fbsdk is completed.
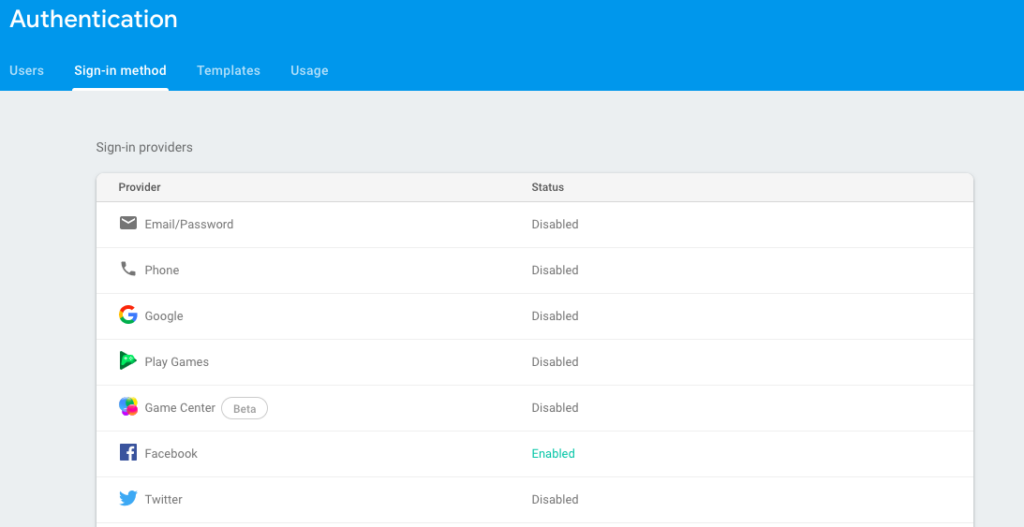
But we need to remember that to activate Facebook login on the Firebase console, we have to add a copy of the APP_ID and APP_SECRET from our facebook developer account.
Coding phase for setting up Facebook login
Here, we follow the guide provided by rnfirebase.io on setting up social authentication required during Facebook login. Here, we’ll try to prove that the normal flow given in the guide works.
In App.js, import the AccessToken and LoginManager modules from react-native-fbsdk package:
After that, we need to create a function to handle the Facebook login logic. Here, we’ve created an asynchronous function called facebookLogin() to handle all the logic of logging in, permissions, authentication, and error throwing (if it occurs). You can see the logic in the code snippet below:
async facebookLogin() {
    try {
      const result = await LoginManager.logInWithReadPermissions([
        "public_profile",
        "email",
      ]);

      if (result.isCancelled) {
        // handle this however suites the flow of your app
        throw new Error("User cancelled request");
      }

      console.log(
        `Login success with permissions: ${result.grantedPermissions.toString()}`
      );

      // get the access token
      const data = await AccessToken.getCurrentAccessToken();

      if (!data) {
        // handle this however suites the flow of your app
        throw new Error(
          "Something went wrong obtaining the users access token"
        );
      }

      // create a new firebase credential with the token
      const credential = firebase.auth.FacebookAuthProvider.credential(
        data.accessToken
      );

      // login with credential
      const firebaseUserCredential = await firebase
        .auth()
        .signInWithCredential(credential);

      console.warn(JSON.stringify(firebaseUserCredential.user.toJSON()));
    } catch (e) {
      console.error(e);
    }
  }
Now, we need to provide users a button for the Facebook login, which when triggered, runs the above function to login with Facebook. We do that by using the following piece of code:
Let’s try it out
Save the code and then reload the IDE android emulator. You’ll see the following result:
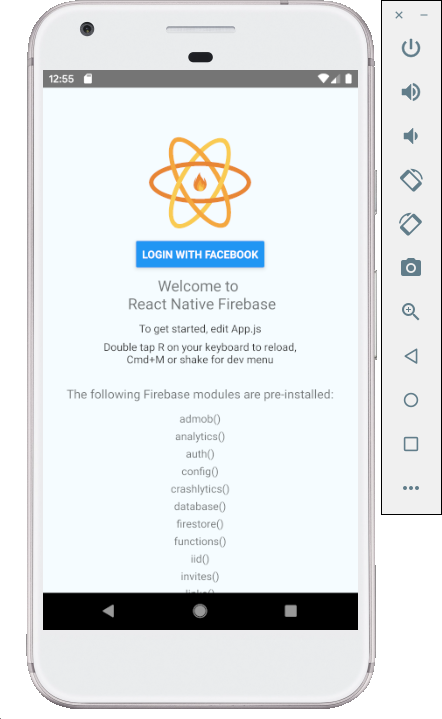
Here, when we click on the button, it triggers a web-view because we haven’t yet installed a native app on an emulator.
For quick testing, you can create a test user from your Facebook developer account, as shown in the screenshot below:

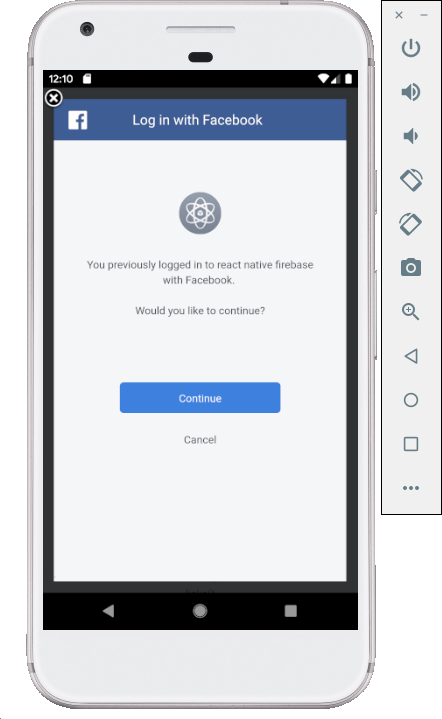
Finally, click on the login button, and you’ll be directed to the Facebook authentication page, as shown in the screenshot below:
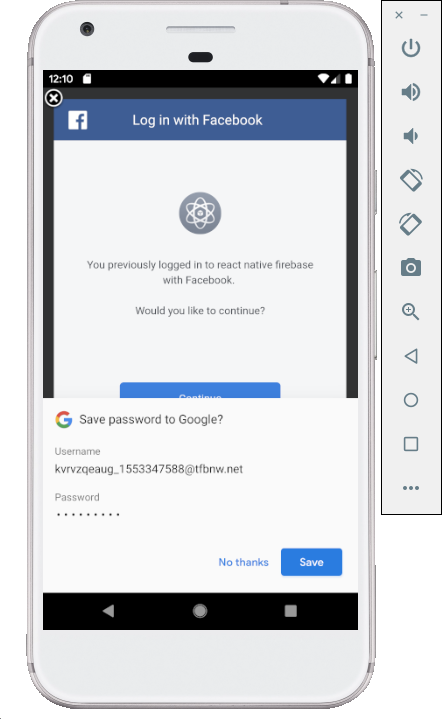
Accept it and click “Continue” to complete the login with Facebook.
Now, to see the login result, we need to open debug mode on your browser and check the console as follows:
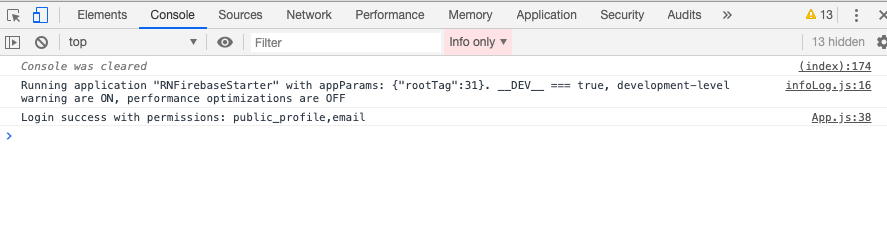
Upon the success of the above step, we’ve completed the integration of the Facebook plugin in our React Native Firebase app.
Summary
This tutorial has shown you how to quickly setup Firebase on React Native, and then set up the Facebook SDK to integrate Facebook login into your app. You also should leave knowing different configurations based on Firebase guides and also have learned how to fix some common issues with these configurations.
By completing this tutorial, you should be able to test your app and create your very own version of a React Native Firebase app with a Facebook login feature. We’ll continue with a look at integrating this on iOS in the next tutorial.

Comments 0 Responses