
Phone authentication allows a user to sign in to a mobile app using their phone number. This could be done traditionally by associating a password with a user and storing it when the user first registers with the app.
However, another common pattern to log in a user using their phone number is to send a verification code to their registered mobile number. This verification code is a unique number, and the user is only allowed to sign in when it matches.
In this tutorial, let’s try to create a small login screen using phone number authentication. To quickly and efficiently establish a backend service, let’s use our good old friend Firebase with a React Native app.
Table of Contents
- Requirements
- Generate a new project
- Enable Phone Authentication
- Create PhoneAuthScreen component
- Add a method to send an OTP
- Add OTP confirmation view
- Running the app
- Conclusion
Requirements/Stack
- Node.js >= 10.x.x version installed
- watchman
- react-native-cli
- Active Firebase project
- react-native-firebase
Do note that I’m going to use an iOS simulator for this tutorial. So any library (such as react-native-firebase) that needs configuration set up to be platform-specific, please refer to their official docs.
If you aren’t familiar with how to set up a new Firebase project, please follow the instructions under “Create a Firebase Project” from a previous post.
Generate a new project
Create a new React Native app by executing the following command in a terminal window:
react-native init rnPhoneAuthDemo

# install following dependencies
yarn add react-native-firebase
Enable Phone Authentication
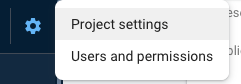
To use the Firebase SDK in React Native apps, you have to add the config file . From the Firebase console, click on the Settings icon and go to Project settings.
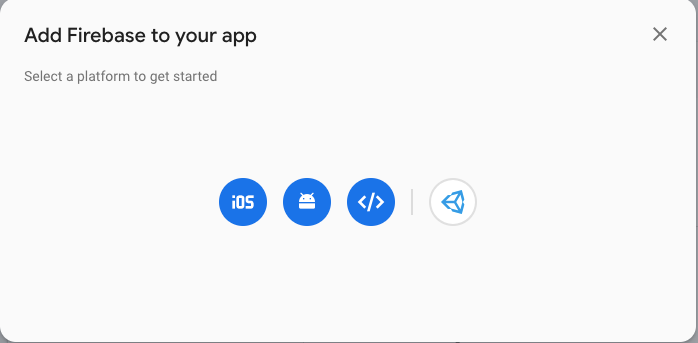
From there, click on the button Add app, select the appropriate platform, and follow the included instructions.
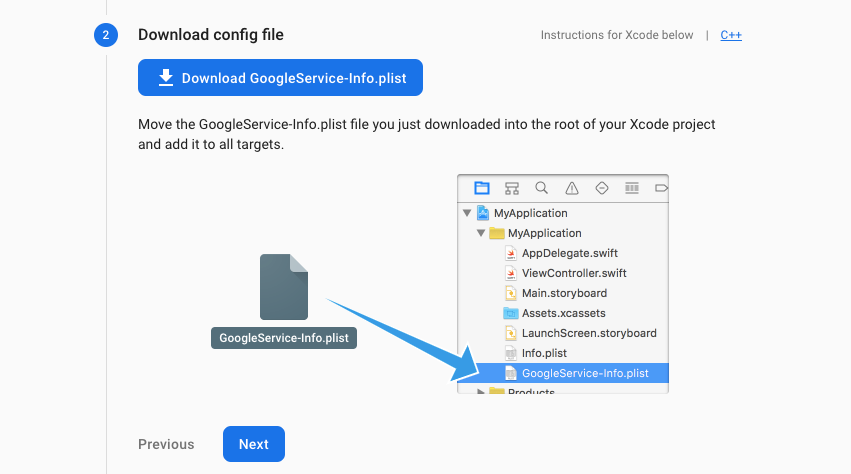
Download the file GoogleService-info.plist if your selected platform in the previous step is iOS. Then, open Xcode add this file to the project.
For Android users, you’ll download google-services.json and save it at the location android/app/.
After adding the config file, you’ll have to follow the react-native-firebase documentation instructions here. Don’t forget to configure the Firebase/Auth dependency from the docs here.
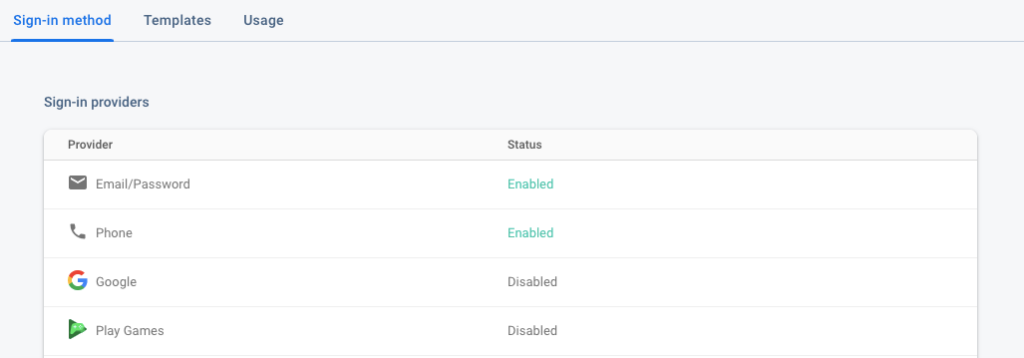
To use phone authentication as a sign-in method, you have to enable it in the Firebase project. From the Firebase console, go to Authentication > the Sign-in method tab. There, enable the phone authentication method.
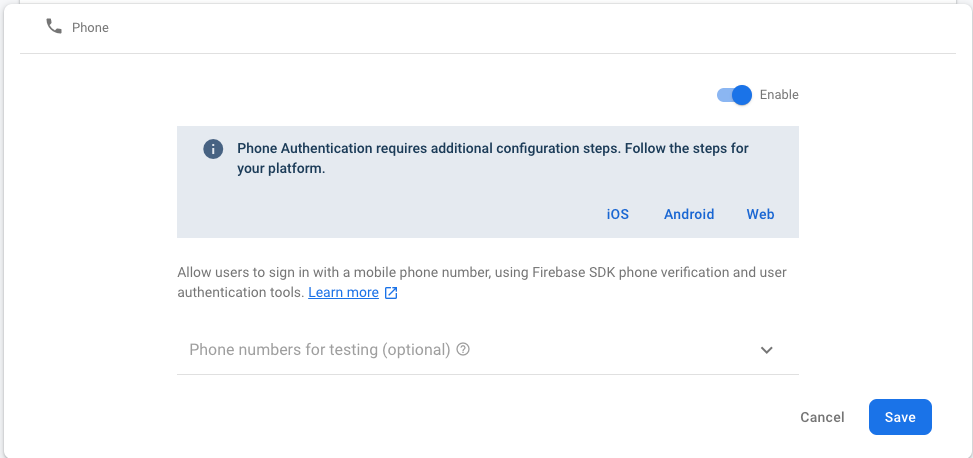
The React Native app is going to use reCAPTCHA verification to verify a user. To set this up, open the file [PROJECT_NAME]/ios/[PROJECT_NAME].xworkspace in Xcode. Double-click the project name in the left tree view and select the app from the TARGETS section. Then select the Info tab, and expand the URL Types section.
Click the + button, and add a URL scheme for your reversed client ID. To find this value, open the GoogleService-Info.plist configuration file, and look for the REVERSED_CLIENT_ID key. Copy the value of that key and paste it into the URL Schemes box on the configuration page. Leave the other fields blank.

That’s it for all the necessary configuration and setup.
Create a PhoneAuthScreen component
Phone authentication follows a particular flow to sign in a user. It starts with a user entering their number and then requests an OTP from Firebase. The Firebase uses reCAPTCHA first to verify the user’s authenticity. Then, once that’s confirmed, it sends the OTP to the mobile number, and the user can enter that value to sign in successfully.
To start this process, first, let’s import all the necessary statements for the PhoneAuthScreen component.
import React, { Component } from 'react'
import {
  StyleSheet,
  SafeAreaView,
  TouchableOpacity,
  View,
  Text,
  TextInput
} from 'react-native'
import firebase from 'react-native-firebase'
Next we create a class component with an initial state object. When the user enters their phone number, the following variables have to be tracked:
- phone: User’s phone number.
- verificationCode: OTP code sent by Firebase via SMS (by default).
- confirmResult: When the verification code is received, Firebase provides a parameter confirmResult that you can manually save to confirm the code and proceed further.
- userId: The unique identifier created by Firebase when a new user registers with the app.
class PhoneAuthScreen extends Component {
  state = {
    phone: '',
    confirmResult: null,
    verificationCode: '',
    userId: ''
  }

  // ...
}

export default PhoneAuthScreen
Add a method to send an OTP
Using a RegExp pattern, you can match the phone number against a pattern manually. If the phone number entered by the user in the input field matches the RegExp pattern, return a boolean true from this method. JavaScript’s .test() method is used to match a string, and it returns true if the phone number entered is valid.
Add the utility method validatePhoneNumber.
validatePhoneNumber = () => {
  var regexp = /^+[0-9]?()[0-9](s|S)(d[0-9]{8,16})$/
  return regexp.test(this.state.phone)
}
This method is used inside the handler method that contains logic to send the OTP to the user on the phone number entered. Create a handler method handleSendCode. Inside this method, firebase.auth().signInWithPhoneNumber() is used.
At this step, Firebase uses reCAPTCHA to verify the user as a “human”. If the reCAPTCHA verification process is a success, this Firebase method has a promise attached to it that gets resolved.
handleSendCode = () => {
  // Request to send OTP
  if (this.validatePhoneNumber()) {
    firebase
      .auth()
      .signInWithPhoneNumber(this.state.phone)
      .then(confirmResult => {
        this.setState({ confirmResult })
      })
      .catch(error => {
        alert(error.message)

        console.log(error)
      })
  } else {
    alert('Invalid Phone Number')
  }
}
When the promise resolves, it updates the state variable confirmResult.
Add OTP confirmation view
In this section, we’re going to add the view for when the user has received the verification code. At this point, the app will display two input fields. The first is for the user to change their phone number if there’s been a mistake. Otherwise, the phone number is displayed on the initial screen and the user has to enter the OTP (the second input field).
The method changePhoneNumber is going to take care of incorrect phone numbers, and the handler method handleVerifyCode is going to send the request back to Firebase to verify the OTP entered by the user. If the OTP verification is a success, for now, you can display the user’s uid in an alert message.
this.setState({ confirmResult: null, verificationCode: '' })
 }

 handleVerifyCode = () => {
 // Request for OTP verification
 const { confirmResult, verificationCode } = this.state
 if (verificationCode.length == 6) {
 confirmResult
 .confirm(verificationCode)
 .then(user => {
 this.setState({ userId: user.uid })
 alert(`Verified! ${user.uid}`)
 })
 .catch(error => {
 alert(error.message)
 console.log(error)
 })
 } else {
 alert('Please enter a 6 digit OTP code.')
 }
 }
 renderConfirmationCodeView = () => {
 return (
 <View style={styles.verificationView}>
 <TextInput
 style={styles.textInput}
 placeholder='Verification code'
 placeholderTextColor='#eee'
 value={this.state.verificationCode}
 keyboardType='numeric'
 onChangeText={verificationCode => {
 this.setState({ verificationCode })
 }}
 maxLength={6}
 />
 <TouchableOpacity
 style={[styles.themeButton, { marginTop: 20 }]}
 onPress={this.handleVerifyCode}>
 <Text style={styles.themeButtonTitle}>Verify Code</Text>
 </TouchableOpacity>
 </View>
 )
 }
Lastly, add the render method with the following JSX snippet:
render() {
 return (
 <SafeAreaView style={[styles.container, { backgroundColor: '#333' }]}>
 <View style={styles.page}>
 <TextInput
 style={styles.textInput}
 placeholder='Phone Number with country code'
 placeholderTextColor='#eee'
 keyboardType='phone-pad'
 value={this.state.phone}
 onChangeText={phone => {
 this.setState({ phone })
 }}
 maxLength={15}
 editable={this.state.confirmResult ? false : true}
 />

 <TouchableOpacity
 style={[styles.themeButton, { marginTop: 20 }]}
 onPress={
 this.state.confirmResult
 ? this.changePhoneNumber
 : this.handleSendCode
 }>
 <Text style={styles.themeButtonTitle}>
 {this.state.confirmResult ? 'Change Phone Number' : 'Send Code'}
 </Text>
 </TouchableOpacity>

 {this.state.confirmResult ? this.renderConfirmationCodeView() : null}
 </View>
 </SafeAreaView>
 )
 }
Also, don’t forget to add some styling to the above components.
const styles = StyleSheet.create({
  container: {
    flex: 1,
    backgroundColor: '#aaa'
  },
  page: {
    flex: 1,
    alignItems: 'center',
    justifyContent: 'center'
  },
  textInput: {
    marginTop: 20,
    width: '90%',
    height: 40,
    borderColor: '#555',
    borderWidth: 2,
    borderRadius: 5,
    paddingLeft: 10,
    color: '#fff',
    fontSize: 16
  },
  themeButton: {
    width: '90%',
    height: 50,
    alignItems: 'center',
    justifyContent: 'center',
    backgroundColor: '#888',
    borderColor: '#555',
    borderWidth: 2,
    borderRadius: 5
  },
  themeButtonTitle: {
    fontSize: 24,
    fontWeight: 'bold',
    color: '#fff'
  },
  verificationView: {
    width: '100%',
    alignItems: 'center',
    marginTop: 50
  }
})
Running the app
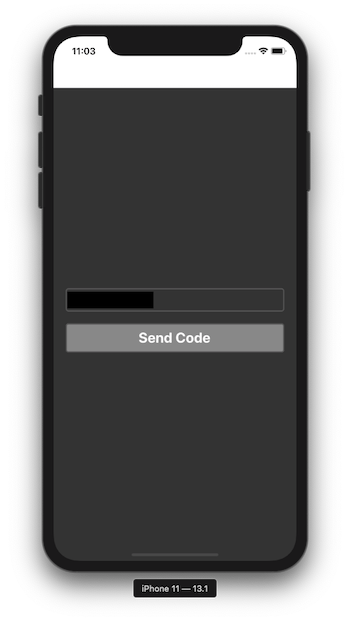
Open the app in a simulator. Initially, the user will be welcomed by the following screen. Enter the phone number.
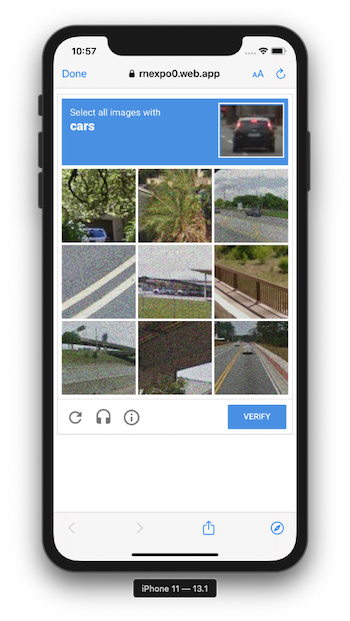
On clicking the button Send code, the reCAPTCHA process will trigger if the user is signing in for the first time.
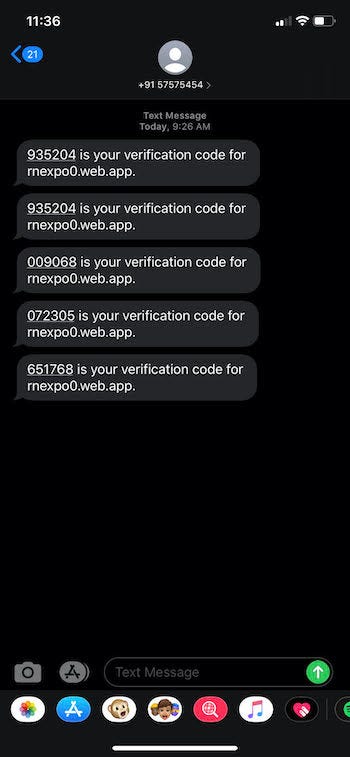
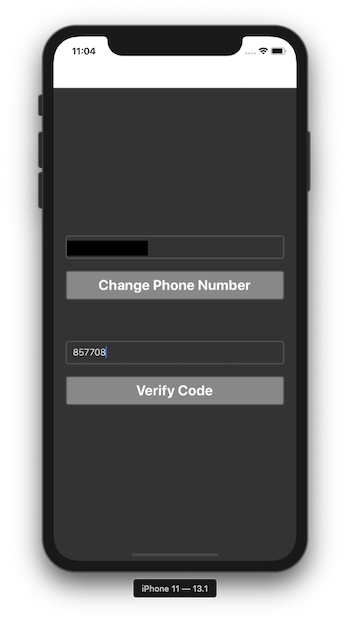
After that, the user receives the verification code via SMS.
Enter the verification code.
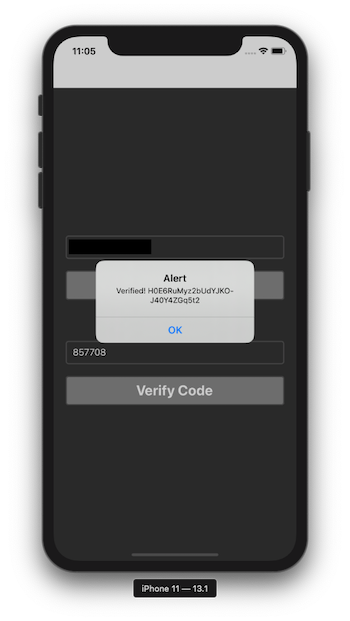
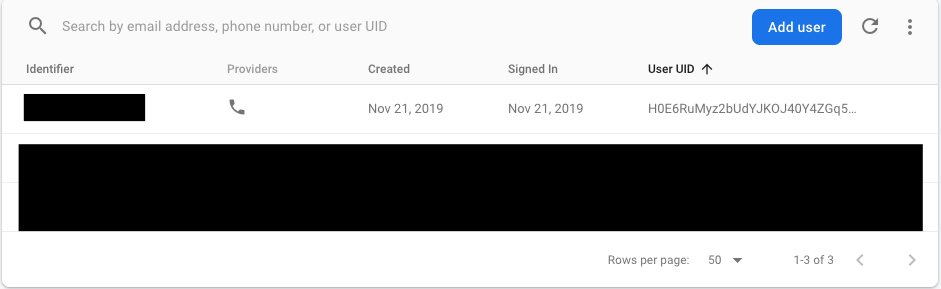
On success, it responds with a uid in an alert message that you can verify in the Firebase console.
Conclusion
Congratulations! You have learned how to integrate the phone authentication process using the Firebase SDK in a React Native application.
You can find the complete code at this GitHub repo.

Comments 0 Responses