
Facebook’s AR Studio is used for building augmented reality experiences targeted at the Facebook and Instagram platforms.
In this tutorial, let’s look at how you can use this software to build an effect that responds to someone’s face. To achieve this you will take advantage of AR Studio’s Face Tracker, Face Mesh, and Texture.
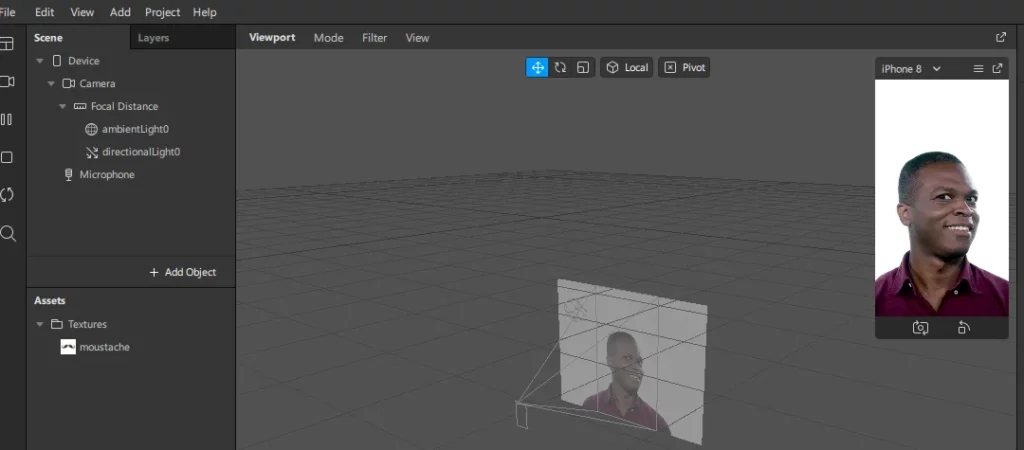
Getting started
The first step is to download Facebook AR Studio. You will also need to download this texture sample in order to follow along.
Next, fire up the software, and let’s begin the journey. You will see the effect on the viewpoint as well as on the simulator as you create it.
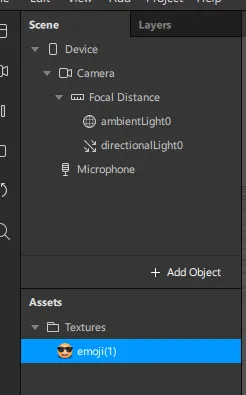
Adding the texture sample
You can import the texture from the computer through the assets panel. Click the import button on the assets panel and import the sample you downloaded earlier.

After you are done with this step you will see the emoji that you are going to use for this tutorial.
Creating the face tracker
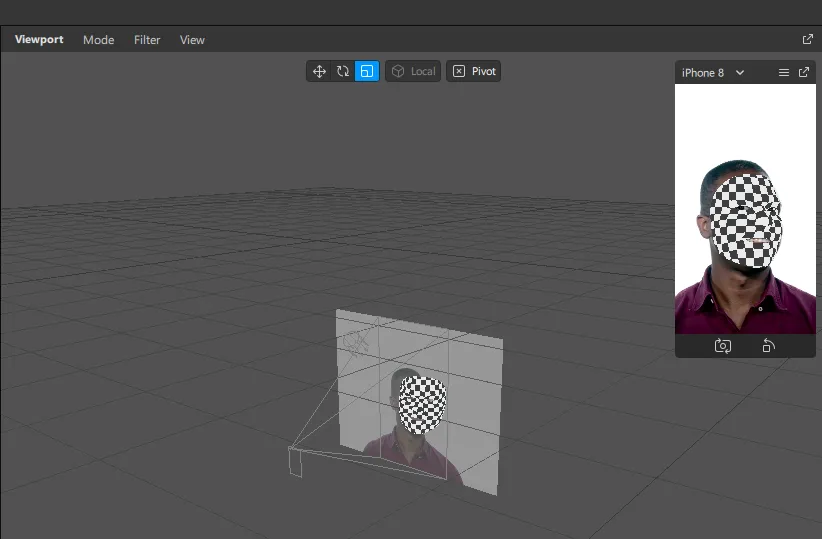
The Face Tracker in AR Studio is used to create an effect that will respond to a person’s face. If merged with a Face Mesh, the Face Tracker will generate a surface that detects movements and the appearance of a face.
You can add the Face Tracker by clicking on the Add object button. This will display the various objects that AR Studio allows you to add. Scroll down and choose the Face Tracker. Click Insert to insert the Face Tracker.
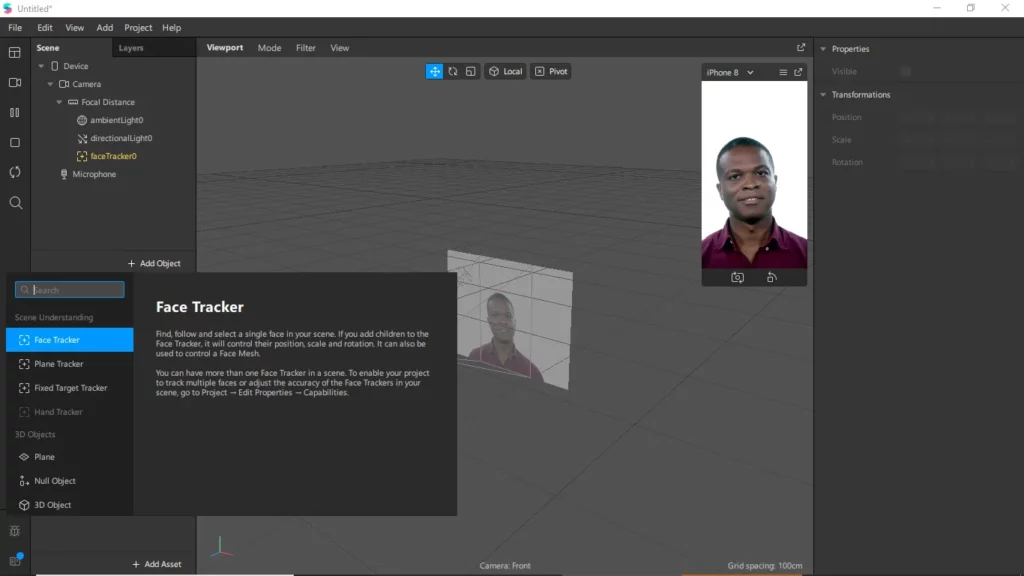
After that, you should see the movement of the face on the viewpoint.
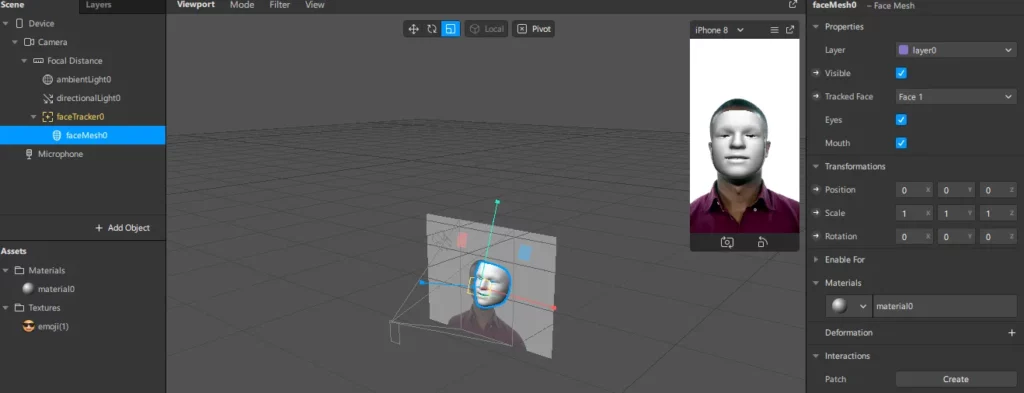
Adding a face mesh
In Spark AR Studio a Face Mesh is used together with the Face Tracker. The Face mesh is a 3D model that appears on the surface of the face and acts in response to the movements detected by the Face Tracker. The Face Mesh is added as a child object of the Face Tracker, making the Face Tracker a parent object. A child object takes on modifications made on the parent object.
Here is how to add a Face Mesh:
- Right-click on the Face Tracker on the scene panel.
- Select Add.
- From the options, choose the Face Mesh.
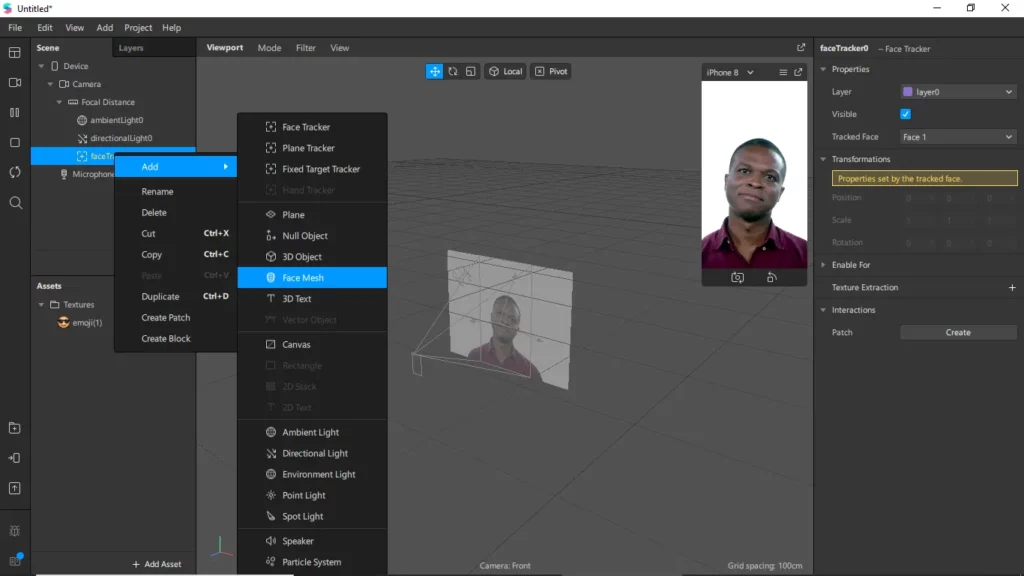
After you are done with this you will see the Face Mesh object in the Viewport and Simulator.
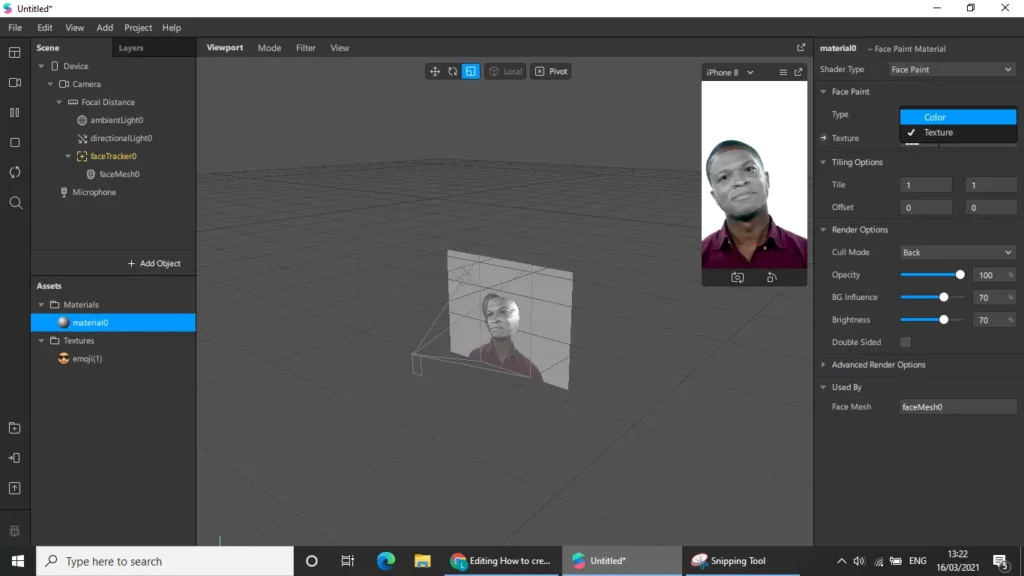
Creating material
In order to create a material for the Face Mesh, the Face Mesh has to be selected in the Scene panel. With that in place, head over to the Inspector panel on the right. Use the + button next to Material to create a material for the Face Mesh. You will then see a material covering the Face Mesh in the Viewport and Simulator as shown below.
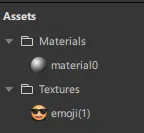
When you look at the Asset panel you will find the material listed as material0, as shown.
Another option to create material is by clicking on Add asset and selecting Material. You can then add material to an object in the scene by clicking on the dropdown on the inspector.
You might also want to rename your objects. Renaming objects ensures that your work is well presented and doesn’t get confusing. The process of renaming objects is as follows:
- Right-click on material0.
- Select Rename.
- Give the material the name of your choosing.
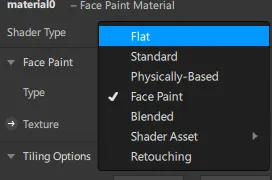
Setting the shader type
The next step in this process is to create a shader. AR Studio has various shaders that are built to represent how materials appear in your effects. Let’s use a mask that will show the user’s face behind it.
The most appropriate shader for this masking effect is the face paint shader. This is because the texture is applied on top of the face, hence maintaining the glow of the face.
You can change the type of the shader by clicking the drop-down menu next to the shader type. After that, choose the Face Paint option.
The face can be seen through the material as shown below.
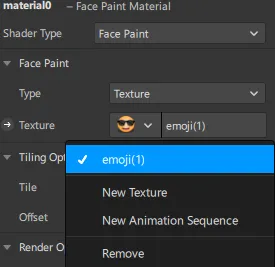
Applying the texture
The next step in this process is to apply a texture. The process for getting this done is:
- Go to Texture.
- Select Choose File.
- Select emoji.
The emoji is from the sample image you downloaded at the beginning of this tutorial.
Adding a second face
Often, you will want to create an effect that can accommodate more than one face. You can add another face by:
- Going to the scene panel and selecting Face Tracker.
- Press control and c to copy on your keyboard, then control and v to paste.
You will now see another Face Tracker and Face Mesh listed in the scene panel.
You now need to attach this new Face Tracker to the second face. In the scene panel, select the second Face Tracker, i.e facetracker1. You will now see a feature known as the Tracked face on the inspector panel.
It is automatically set to face 1 — change it to face 2.
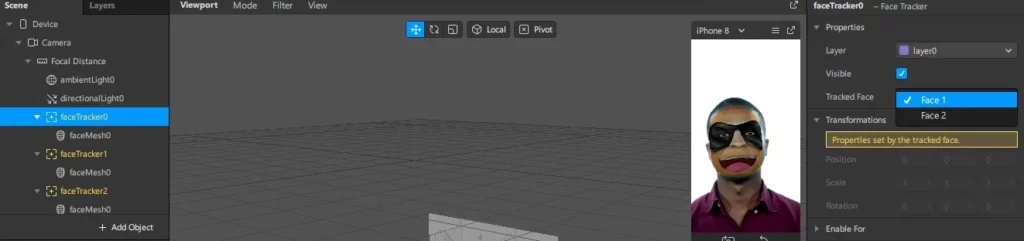
This makes it respond to the second face that will emerge. Your effect can now be used by two people.
Conclusion
In this article, you have seen how you can add a face tracking effect to a face using Facebook’s Spark AR Studio. You can export this effect and visualize it on the Spark AR Player on your computer or phone. One of the ways that you can improve this effect is to use a different texture for the second face. You can learn more about Facebook’s AR Studio from the official docs.

Comments 0 Responses