
Swift Packages are one of the most exciting applications of the Swift programming language. Packages allow for development beyond your usual app — it even works on Linux!
It’s well-known that projects without documentation don’t get the attention they deserve. And rightfully so, because it’s very hard for new “users” (developers who consume your package) to get started with your project if documentation is lacking. However, writing and maintaining documentation is often seen as a boring task. Besides, your documentation will quickly be outdated if you don’t update it.
Luckily, great tools exist to generate documentation for you. In this post, I’d like to give you a quick introduction to jazzy: a Realm project to automatically generate great documentation pages for your project. And it even works with Objective-C.
We’ll also look at how to host the generated documentation on GitHub Pages, for free! Simply put, a deployed version of your documentation is much better than just sending your users some HTML files.
And as icing on the cake, you’ll also learn how to use GitHub Actions to generate new docs each time you deploy a new version of your package, format your code through SwiftLint, and run your tests. All automated and completely free!
How to write a Swift Package?
If you’ve never written a Swift Package before, I recommend you check out the following article by Antoine v.d. Lee:
Adding documentation to your project
Writing documentation for your project can be done right from the code files. This ensures there’s a strong connection between the actual code and the documentation, which will help you stay organized as your project grows.
Keeping docs in separate directories is suboptimal. Not only that, it will also encourage future contributors, including yourself, to update the documentation when you make changes to your code.
Swift uses a special flavor of Markdown. If you aren’t already familiar with that, check out the following guides:
In short, you should prepend a Markdown string with triple slashes (///) to each public variable, function, and class, explaining what it does.
One thing the above articles don’t touch on is usage examples — the greatest way of documenting something. So let’s look at that now.
Like most Markdown parsers, you can add ### for a subheading, which you probably want to use to differentiate your usage example from the description. In contrast to some other parsers, Swift works better if you also add ### to the end of the line.
To write code blocks, I recommend you use 4 grave accents: ““.
Here’s a representative usage example:
/// ### Usage Example: ###
///
/// - Execute `ls -l -g`:
///
/// ````
/// shell("/bin/ls", "-l", "-g")
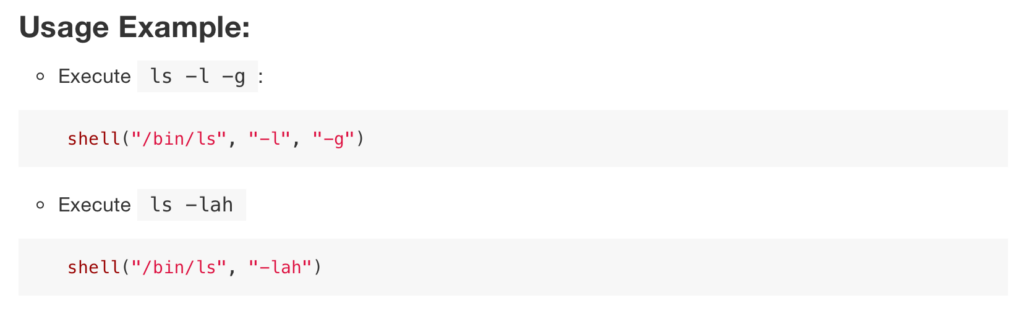
/// ````And here’s what it will look like on the documentation website:

Of course, multiple usage examples work, too:
/// ### Usage Examples: ###
///
///  - Execute `ls -l -g`:
///
///    ````
///    shell("/bin/ls", "-l", "-g")
///    ````
///
///  - Execute `ls -lah`
///
///    ````
///    shell("/bin/ls", "-lah")
///    ````
Jazzy
Now that you’re an expert in writing documentation comments for your code, let’s look at how to generate pretty webpages.
Installation
The installation is beyond easy with the Ruby package manager:
Generating docs
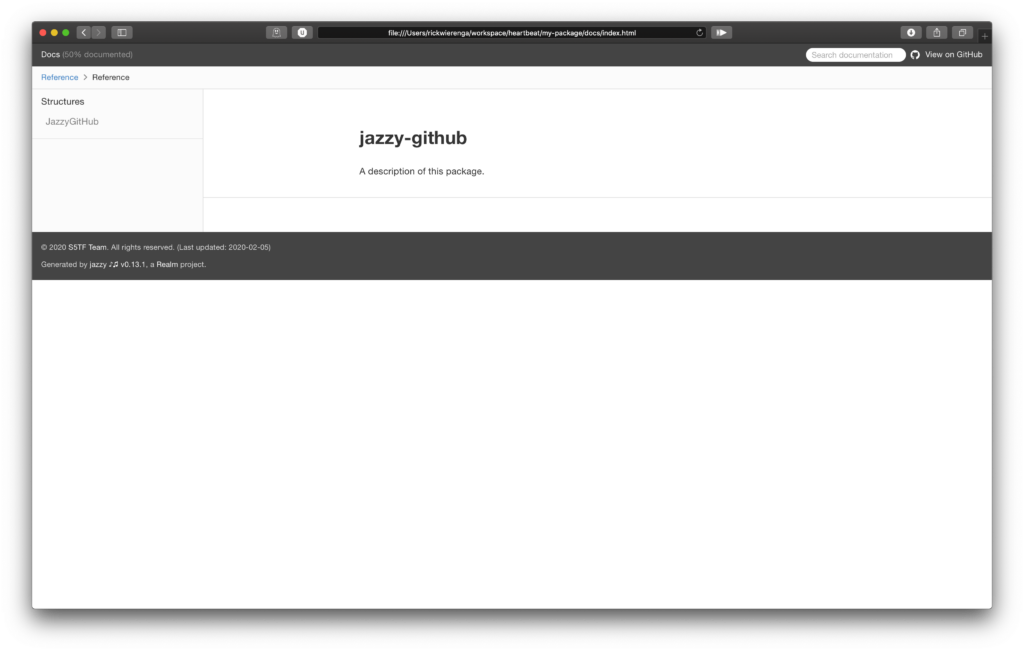
To generate documentation, simply run jazzy in the terminal (you should cd into your project’s directory).
Jazzy parses all your files and generates a webpage for each object.
Customization
By default, these pages look pretty good, but you can also customize them to fit your specific needs. For example, let’s say you want to link to your own webpage. To do this, you can pass the –author_url parameter.
While this works perfectly fine when you run jazzy locally, it will get messy very quickly when you host the documentation generation process on GitHub. And it’s not easy to share the settings with other contributors.
So instead let’s write a .jazzy.yaml file that hosts your configuration. If you’ve never seen YAML before, don’t worry—it’s just like a Word document.
If we wanted to put the above configuration in a separate file, it would look something like this:
Let’s add a few more properties:
Note theme? Yes, Jazzy supports different themes!
- apple: https://realm.io/docs/swift/latest/api/
- fullwidth: https://reduxkit.github.io/ReduxKit/
- jony: https://harshilshah.github.io/IGListKit/
To get a full list of configuration options, run:
Viewing your docs locally
Before pushing to GitHub, it’s always a good idea to validate that your code is working. In this case, that means checking if your documentation was generated correctly.
You can view the documentation in Safari by typing open docs/index.html in the terminal. If this does not open Safari but a text editor, for example, type open docs, which will open a Finder window. Then find index.html and drag in into Safari.
Note that you shouldn’t push the docs folder to GitHub because your documentation will be hosted on a separate branch. So a docs folder would only be confusing. Moreover, it will probably create a lot of unwanted merge conflicts. It’s better to add it to your .gitignore file.
Creating the main GitHub Pages
To host something on GitHub Pages, you need to create your own home page.
a) I already have a GitHub Pages page
If you already have a GitHub Pages page, that’s great! You can keep your homepage, and GitHub will automatically host your docs at example.github.io/your_package.
b) I don’t have a GitHub Pages page yet
If you do not have a GitHub Pages page, you can create one super easily by creating a new GitHub repository titled <your-username>.github.io. You should check “Initialize this repository with a README” on creation.
After a couple of minutes, you can visit <your-username>.github.io in your favorite browser to see your personal page.
For more information, check out the following links:
GitHub Actions
In order to run GitHub Actions, your library needs to be public. GitHub grants you free macOS compute in exchange for your efforts in contributing to open source ❤️
To run jazzy automatically, we’ll use a preconfigured GitHub Action called “Publish Jazzy Docs” available here:
- Navigate to github.com/<your-username>/<your-package>/actions/new.
- In the top right corner, select “Set up a workflow yourself.”

This will open GitHub’s Actions editor. Again, this is a yaml file.
3. The following code would be a good start.
This Action runs automatically if you create a new release. It also uses your .jazzy.yaml file to load the configuration.
You could change
to
to run regenerate documentation on every commit.
If you’re interested in learning more, check out the Action homepage:
4. In order to publish anything to GitHub Pages, a program needs a special access token. The reason for this is that the default GitHub Action access token provided to all Actions doesn’t have access to GitHub Pages. Your access token should have at least repo privileges. See the following document:

Remember the token, because you won’t be able to see it again.
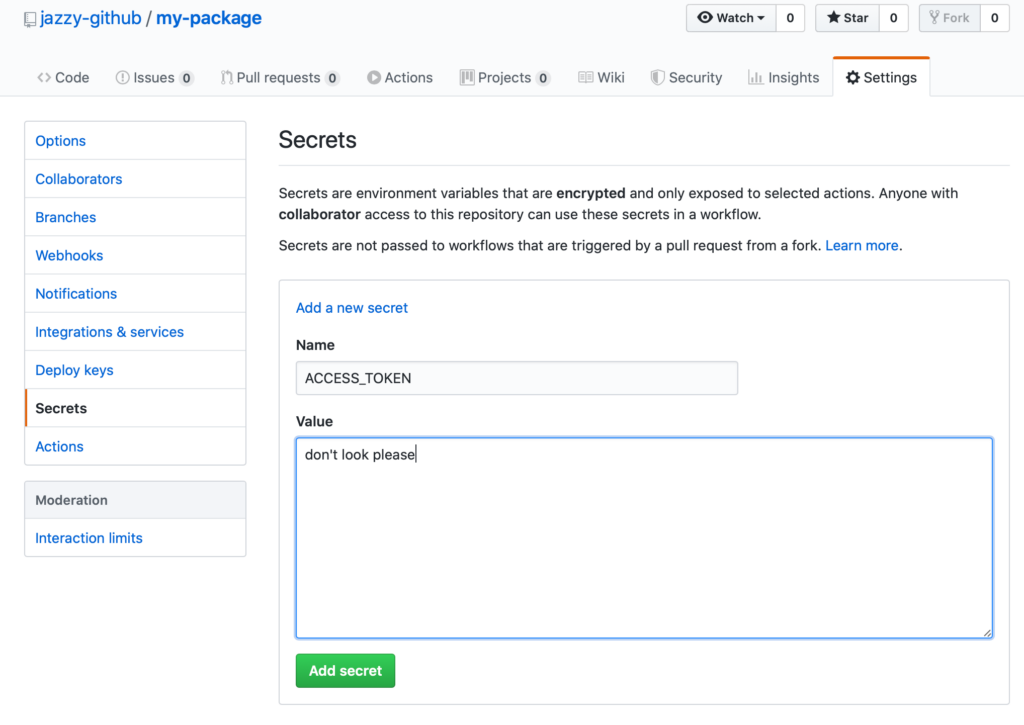
5. To use this token, you’ll need to make it accessible to your workflows. You can do that by going to settings > secrets > new. Call it ACCESS_TOKEN.
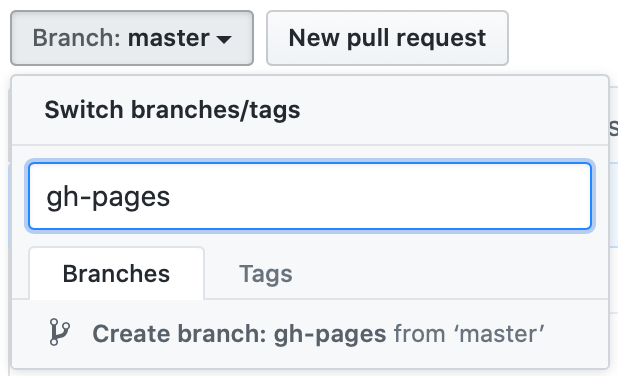
6. Next, you should create a new gh-pages branch. To do this, select the master branch and type gh-pages. Click on the Create branch: gh-pages from ‘master’ link.
GitHub/jazzy will now run your workflow and build the documentation website.
For more information on GitHub Actions checkout the GitHub Action homepage:
Hosting the docs
As I mentioned earlier, GitHub offers to host your documentation for free through GitHub Pages. Setting this up is super easy.
Then navigate to https://github.com/<your username>/<your-package>/settings. Scroll down to “GitHub Pages.”
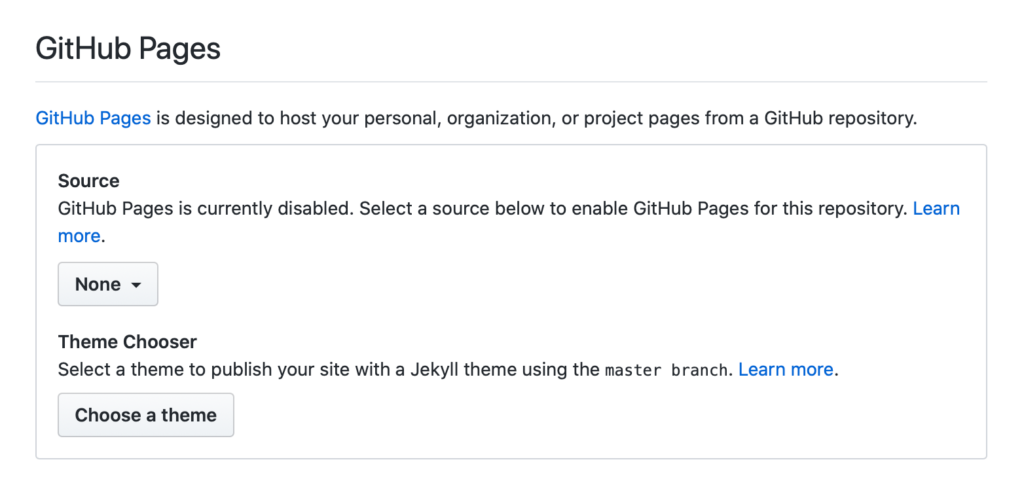
From “Source” select the “gh-pages branch” option.
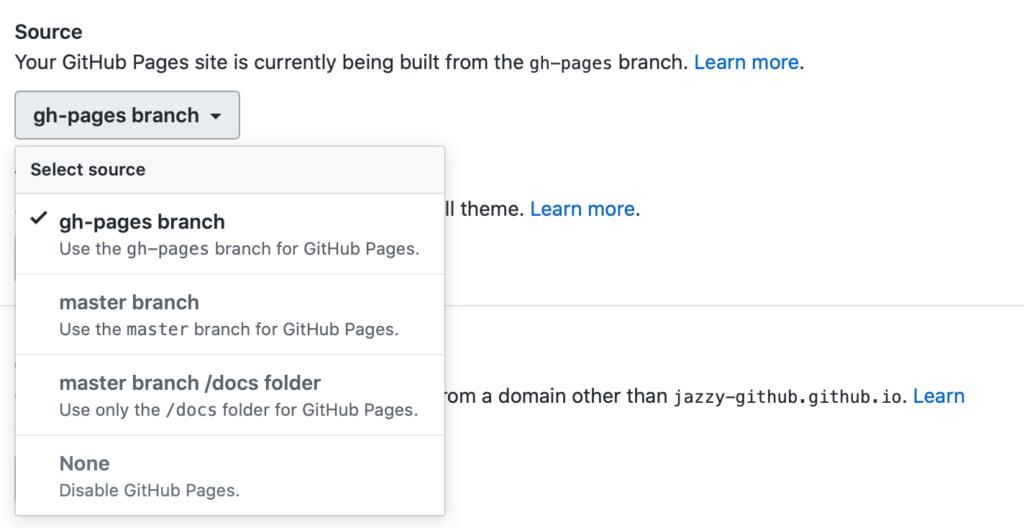
The page will reload and show you the link to your docs page.

Congratulations 🎉 GitHub now hosts your project.
More GitHub Actions
Automatically publishing documentation is not the only thing you can do with GitHub Actions — many other awesome GitHub Actions exist. Here are some of my favorites:
Testing
You might also like this Action, which automatically runs tests on Ubuntu and/or macOS. Including tests for your PRs!
Styling
The swiftlint (another Realm project) GitHub Action to enforce a consistent code style:
What’s next?
There you go! You now have a perfect testing/documentation setup for your Swift Package.
Here are some useful links to explore:
- The jazzy GitHub repo:
- This tutorial on how to make design APIs in Swift by John Sundell:
- The Swift Style Guide by Ray Wenderlich:
If you have any questions or comments, feel free to reach out on Twitter or email me directly at rick_wierenga [at] icloud [dot] com.

Comments 0 Responses