
Hi there, this is the 3rd part of a 3 part series, for better understanding kindly read my first and second articles here:
In part 3, we’ll be taking the model we built in parts 1 and 2 and exploring how to implement it on a Raspberry Pi 3.
Content
- Introduction: Setting up of your Raspberry Pi 3
- Loading the models and implementation
- Conclusion
- References
Introduction: Setting up of your raspberry pi3
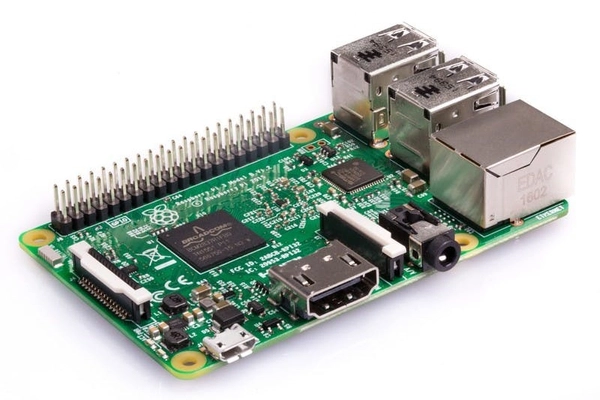
Raspberry Pi is a low-cost micro computer that can be plugged into a computer monitor or TV alongside a keyboard and mouse to simulate a full PC experience.
These are capable little devices that enable developers to explore computing and to learn how to program in languages like Python. It’s capable of doing everything you’d expect a desktop computer to do. Here are the specifications of the Raspberry Pi 3 (B+ and above) I recommend for this project, alongside other components.
- Broadcom BCM2837B0, Cortex-A53 (ARMv8) 64-bit SoC @ 1.4GHz
- 1GB LPDDR2 SDRAM
- 2.4GHz and 5GHz IEEE 802.11.b/g/n/ac wireless LAN, Bluetooth 4.2, BLE
- Gigabit Ethernet over USB 2.0 (maximum throughput 300 Mbps)
- Extended 40-pin GPIO header
- 4 USB 2.0 ports
- Full-size HDMI
- CSI camera port for connecting a Raspberry Pi camera
- DSI display port for connecting a Raspberry Pi touchscreen display
- 4-pole stereo output and composite video port
- Micro SD port for loading your operating system and storing data.
- 5V/2.5A DC power input
- Power-over-Ethernet (PoE) support (requires separate PoE HAT)
Other types of Raspberry Pi dev boards you can try to use can be found here.
To get the Raspberry Pi fully running like a mini-computer, you’ll need the following:
- A Micro SD card with NOOBS (32GB).
- Micro USB power supply (2.1 A).
- TV or monitor and HDMI cable.
- Keyboard and mouse.
- Raspberry Pi 3 camera.
The following reference blogs helps show how to get NOOBS installed and set up your Raspberry Pi.
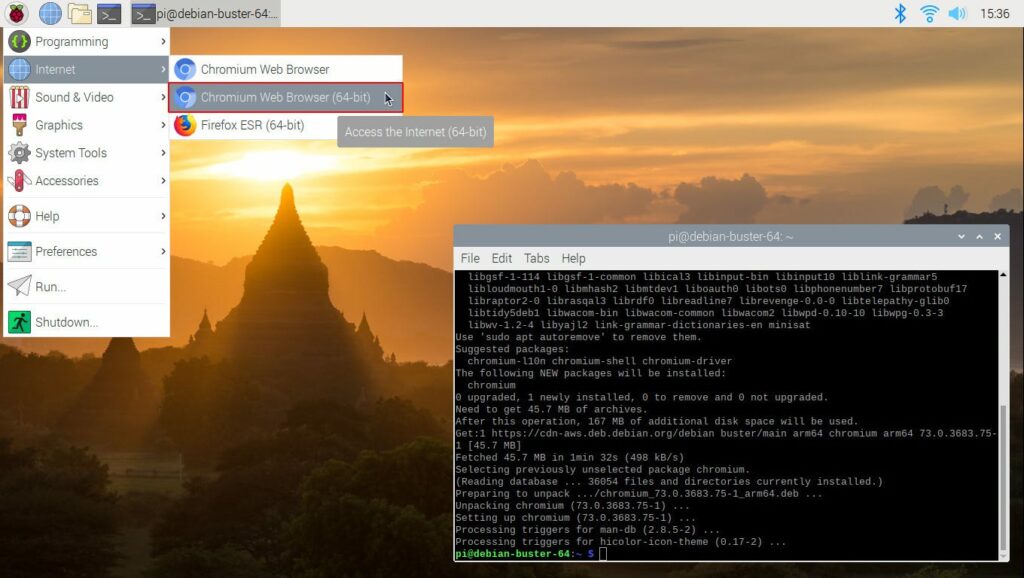
The raspberry pi interface looks like the above screenshot, when launched.
To implement the model on Raspberry Pi, we can copy the following files and save them as a folder on our Pi desktop; the most recent checkpoint data and saved_model.pb, pipeline.config, and label_data.pbtxt files. I named the folder efficientDet.
Before we get into running the model, we need to setup TensorFlow, Keras, OpenCV, and the TensorFlow Object Detection API on our Raspberry Pi.
The following commands can be executed via the terminal for proper installation of TensorFlow, Keras, and OpenCV. Be sure to execute one after the other:
Now that we have TensorFlow, Keras, and OpenCV installed, let’s go ahead an set up the Object Detection API. Protobuf helps us to set this up, so we need to compile and install protobuf.
If this doesn’t work out well for you, it means you have issues with your proto.exe file; you might need to go through these instructions on how to compile and install protobuf, which is explained here.
Run this below code from the source terminal, step-by-step:
If you don’t get an error, this implies that the object_detection API has been successfully installed. The next step is to copy this code below and save as a file named test.py; now, open the terminal and run Python3 test.py. Be sure to execute right from the /home/pi/tensorflow1/models directory or in your desktop folder that we created earlier (efficientDet):
import matplotlib
import matplotlib.pyplot as plt

import os
import random
import io
import imageio
import glob
import scipy.misc
import numpy as np
from six import BytesIO
from PIL import Image, ImageDraw, ImageFont
from IPython.display import display, Javascript
from IPython.display import Image as IPyImage

import tensorflow as tf

from object_detection.utils import label_map_util
from object_detection.utils import config_util
from object_detection.utils import visualization_utils as viz_utils
from object_detection.utils import colab_utils
from object_detection.builders import model_builder

%matplotlib inline
Loading the models and implementation
In this section, we’ll be putting together the code such that we can load the model and run it in real-time on our Raspberry Pi. But before we proceed to this implementation, let’s first look at a few building blocks we need to set up.
First and foremost, we need to activate our camera. To do this, open the command line and run the following:
Use the cursor keys to select and open Interfacing Options, and then select Camera. Follow the prompt to enable the camera.
Now let’s test our camera by streaming live from the Raspberry Pi camera field. We can do this by using OpenCV.
Here’s a code snippet that turns your camera on and also displays what it’s capturing in real-time. You can save this as a camera_testing.py file, in your desktop folder (efficientDet), and run that Python file from the terminal:
import numpy as np
import cv2

cap = cv2.VideoCapture(0)

while(True):
    # Capture frame-by-frame
    ret, frame = cap.read()

    # Our operations on the frame come here
    gray = cv2.cvtColor(frame, cv2.COLOR_BGR2GRAY)

    # Display the resulting frame
    cv2.imshow('frame',gray)
    if cv2.waitKey(1) & 0xFF == ord('q'):
        break

# When everything done, release the capture
cap.release()
cv2.destroyAllWindows()
Now, one more thing—we need to save the real-time object detection prediction results from the video field. To save every session from the cameras field to the local drive, the video writer needs to be added, which we can see in the code snippet below:
import numpy as np
import cv2


cap = cv2.VideoCapture(0)
# Define the codec and create VideoWriter object
fourcc = cv2.VideoWriter_fourcc(*'XVID')
out = cv2.VideoWriter('./outputff.avi',fourcc, 20.0, (640,480))

while(True):
    # Capture frame-by-frame
    ret, frame = cap.read()

    # Our operations on the frame come here
    gray = cv2.cvtColor(frame, cv2.COLOR_BGR2GRAY)

    # Display the resulting frame
    out.write(gray)
    cv2.imshow('frame',gray)
    if cv2.waitKey(1) & 0xFF == ord('q'):
        break

# When everything done, release the capture
cap.release()
cv2.destroyAllWindows()
The next thing we need to do is modify our code so t it can take in each image from the video and detect our target objects in real time (onions and peppers). But first, the data input pipeline needs to be modified.
This code below gives structure to the data pipeline by executing label mapping and inference encoding, checkpoint loading, and image conversion to a NumPy array. This is the pipeline we worked with while experimenting the model on a test image of peppers.
The next step is to create a new Python file containing the following code snippet in the desktop folder (efficientDet) and name it real_time.py.
import matplotlib
matplotlib.use('TkAgg')
import matplotlib.pyplot as plt

import warnings
warnings.filterwarnings('ignore')

import io
import glob
import scipy.misc
import numpy as np
from six import BytesIO
from PIL import Image, ImageDraw, ImageFont

import tensorflow as tf

import os, sys
# os.environ['PYTHONPATH'] += "./models"

# import sys
# sys.path.append("./models")


from object_detection.utils import label_map_util
from object_detection.utils import config_util
from object_detection.utils import visualization_utils as viz_utils
from object_detection.builders import model_builder

#%matplotlib inline


def load_image_into_numpy_array(image):

  #img_data = tf.io.gfile.GFile(path, 'rb').read()
  #image = Image.open(BytesIO(img_data))
  (im_width, im_height, channel) = image.shape
  return image.astype(np.uint8)


#recover our saved model
pipeline_config = './pipeline.config'
#generally you want to put the last ckpt from training in here
model_dir = 'ckpt 5'
print(os.getcwd())
configs = config_util.get_configs_from_pipeline_file(pipeline_config)
model_config = configs['model']
detection_model = model_builder.build(
      model_config=model_config, is_training=False)

# Restore checkpoint
ckpt = tf.compat.v2.train.Checkpoint(
      model=detection_model)
ckpt.restore(os.path.join('ckpt-5'))


def get_model_detection_function(model):
  """Get a tf.function for detection."""

  @tf.function
  def detect_fn(image):
    """Detect objects in image."""

    image, shapes = model.preprocess(image)
    prediction_dict = model.predict(image, shapes)
    detections = model.postprocess(prediction_dict, shapes)

    return detections, prediction_dict, tf.reshape(shapes, [-1])

  return detect_fn

detect_fn = get_model_detection_function(detection_model)


#map labels for inference decoding
label_map_path = configs['eval_input_config'].label_map_path
label_map = label_map_util.load_labelmap(label_map_path)
categories = label_map_util.convert_label_map_to_categories(
    label_map,
    max_num_classes=label_map_util.get_max_label_map_index(label_map),
    use_display_name=True)
category_index = label_map_util.create_category_index(categories)
label_map_dict = label_map_util.get_label_map_dict(label_map, use_display_name=True)
Now that everything has been initialized, we need to embed the model for real-time prediction from the camera field. We do this by combining the two scripts (camera_testing.py and real_time.py) into a single script (real_time.py). The real_time.py file now gets modified to the code snippet below:
import matplotlib
matplotlib.use('TkAgg')
import matplotlib.pyplot as plt

import warnings
warnings.filterwarnings('ignore')

import io
import glob
import scipy.misc
import numpy as np
from six import BytesIO
from PIL import Image, ImageDraw, ImageFont

import tensorflow as tf

import os, sys
# os.environ['PYTHONPATH'] += "./models"

# import sys
# sys.path.append("./models")


from object_detection.utils import label_map_util
from object_detection.utils import config_util
from object_detection.utils import visualization_utils as viz_utils
from object_detection.builders import model_builder

#%matplotlib inline


def load_image_into_numpy_array(image):

  (im_width, im_height, channel) = image.shape
  return image.astype(np.uint8)


#recover our saved model
pipeline_config = './pipeline.config'
#generally you want to put the last ckpt from training in here
model_dir = 'ckpt 5'
print(os.getcwd())
configs = config_util.get_configs_from_pipeline_file(pipeline_config)
model_config = configs['model']
detection_model = model_builder.build(
      model_config=model_config, is_training=False)

# Restore checkpoint
ckpt = tf.compat.v2.train.Checkpoint(
      model=detection_model)
ckpt.restore(os.path.join('ckpt-5'))


def get_model_detection_function(model):
  """Get a tf.function for detection."""

  @tf.function
  def detect_fn(image):
    """Detect objects in image."""

    image, shapes = model.preprocess(image)
    prediction_dict = model.predict(image, shapes)
    detections = model.postprocess(prediction_dict, shapes)

    return detections, prediction_dict, tf.reshape(shapes, [-1])

  return detect_fn

detect_fn = get_model_detection_function(detection_model)


#map labels for inference decoding
label_map_path = configs['eval_input_config'].label_map_path
label_map = label_map_util.load_labelmap(label_map_path)
categories = label_map_util.convert_label_map_to_categories(
    label_map,
    max_num_classes=label_map_util.get_max_label_map_index(label_map),
    use_display_name=True)
category_index = label_map_util.create_category_index(categories)
label_map_dict = label_map_util.get_label_map_dict(label_map, use_display_name=True)


#run detector on test image
#it takes a little longer on the first run and then runs at normal speed.


import random
import numpy as np
import cv2
import tensorflow as tf

cap = cv2.VideoCapture(0)
# Define the codec and create VideoWriter object
fourcc = cv2.VideoWriter_fourcc(*'XVID')
out = cv2.VideoWriter('./outputff.avi',fourcc, 20.0, (640,480))

while(True):
    # Capture frame-by-frame

    ret,image_np = cap.read()
    image_np = load_image_into_numpy_array(image_np)

    input_tensor = tf.convert_to_tensor(
    np.expand_dims(image_np, 0), dtype=tf.float32)


    detections, predictions_dict, shapes = detect_fn(input_tensor)

    label_id_offset = 1
    image_np_with_detections = image_np.copy()

    viz_utils.visualize_boxes_and_labels_on_image_array(
          image_np_with_detections,
          detections['detection_boxes'][0].numpy(),
          (detections['detection_classes'][0].numpy() + label_id_offset).astype(int),
          detections['detection_scores'][0].numpy(),
          category_index,
          use_normalized_coordinates=True,
          max_boxes_to_draw=200,
          min_score_thresh=.5,
          agnostic_mode=False,
    )

    # Display the resulting frame
    out.write(image_np_with_detections)
    cv2.imshow('frame',image_np_with_detections)
    if cv2.waitKey(1) & 0xFF == ord('q'):
        break

# When everything done, release the capture
cap.release()
cv2.destroyAllWindows()
The next step is to run this by either copying all the contents in our desktop folder (efficientDet) into this directory (/home/pi/tensorflow1/models) and then open the terminal to run python3 real_time.py.
Alternatively, we can execute the Python file directly from the desktop folder (efficientDet) in the terminal. Either way should work—if one doesn’t work due to installation issues, you can try the other.
Having done the above, you will have something similar to the video shown below. With all this in place, our custom peppers/onions detector should be working fine.
Conclusion
This brings us to the conclusion of our end-to-end implementation of EfficientDet on a Raspberry Pi 3.
Here are some limitations to this work. This architecture was only trained to detect two objects (peppers and onions), but it began to detect most other objects as onions. This does not implying overfitting, but instead a sign that the algorithm only has an idea of what it’s learned from the data—hence, it’s returning more false positives than we’d like.
We might solve this issue is by increasing the number of classed from 2 to 3. We could tag this 3rd object class as others (anything that is not peppers or onions). This will help us address our model’s biases.
Thanks for reading—do share with friends!
References
- https://www.raspberrypi.org/products/raspberry-pi-3-model-b/
- https://www.raspberrypi.org/help/what-%20is-a-raspberry-pi/
- https://piguide.dev/2019/03/11/easy-guide-to-installing-noobs-raspberry-pi.html
- https://projects.raspberrypi.org/en/projects/raspberry-pi-setting-up
- https://github.com/EdjeElectronics/TensorFlow-Object-Detection-on-the-Raspberry-Pi
- https://www.raspberrypi.org/documentation/faqs/
- https://www.raspberrypi.org/products/raspberry-pi-3-model-b-plus/
- https://www.raspberrypi.org/documentation/configuration/camera.md
- https://www.raspberrypi.org/products/

Comments 0 Responses