
I’ve been working on a personal project recently, in which I need to know the main topic of a user’s generated text. So I made a tag system, which means that the user can tag his post based on the topic.
I thought that this would suffice to classify the posts based on topics, but I was wrong.
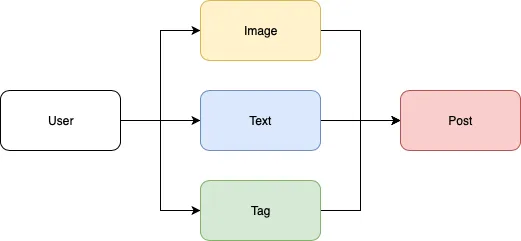
The user can create a post with some text and optionally an image, and has to add a least one tag:
I had hoped that users would use the right tags and be genuine, but I noticed that users actually try to add as many tags as possible, which can lead to a very confusing recommendation and classification problem.
In this article, I’ll create a small model that can classify text based on the topic and implement it on in iOS application.
Overview:
- What is Apple’s “Natural Language” library?
- Find the dataset and preprocess it
- Train the model
- Evaluate the model
- Build the iOS Application
- Conclusion

What’s Apple’s “Natural Language” library?
To process plain text from content, you have to rely on
advanced natural language processing tools. This discipline, which combines computer science and computational linguistics, allows us to do text processing to extract semantics, context, vocabulary and many other characteristics essential to understanding the nature of the text
Given this, we can apply the power of artificial intelligence to perform tasks such as spell checking, text summarization, document classification, and content generation, among others.
“Natural Language” is Apple’s framework/library for NLP. It’s very powerful and easy to use. You can use it to process any kind of text.
Finding and preprocessing the dataset
I have found a .CSV file on GitHub with five classes and a little bit more than 2000 text examples. Specifically, it consists of 2225 documents from the BBC news website, corresponding to stories in five topical areas from 2004–2005
If you have your own text, you have to make sure that the “annotation” is correct and that you have enough texts to cover some of the anomalies and edge cases. In my personal project, I had to clean up some of the data and manually tag the text with the appropriate topic.
To download the .CSV file, open the terminal and write this line:
Now that we have the .CSV, we need to convert it into a .JSON file so that it can be correctly parsed by the Create ML APIs, which is what we’ll be using to build our model (the .JSON file is in the GitHub repository as “dataset-topic.json”)

Training the model:
As mentioned above, we’ll be using Create ML to train the model. Luckily, Create ML is pretty straightforward and simple.
Open a new Playground and add the following code—I’ve commented every line to explain all the steps:
import CreateML
import Foundation

//Don't forget to change the path according to where your json file is located
let myJsonFilePath = "/Users/omarmhaimdat/Downloads/dataset-topic.json"

//Get an URL variable from the string
let url = URL(fileURLWithPath: myJsonFilePath)

//Translate the Json file to a MLDataTable
let trainingData = try MLDataTable(contentsOf: url)

//Train the model and specify the name of text and label column, as well as the training data
let model = try MLTextClassifier(trainingData: trainingData, textColumn: "news", labelColumn: "type")

//You can change where you want to save the model
try model.write(to: URL(fileURLWithPath: "/Users/omarmhaimdat/Desktop/TopicClassifier"))
Evaluate the model:
Now that we have the model in the form of a .mlmodel file (i.e. ready to be used in iOS), we need to test it against real data:
You can go to Google news or Yahoo news to find articles and use the text from the article to evaluate the model:
import NaturalLanguage
import Foundation
import CoreML

//Create a string with model path, change it according to where the model is stored
let modelPath = "/Users/omarmhaimdat/Desktop/TopicClassifier.mlmodel"

//Get a URL variable the string variable
let url = URL(fileURLWithPath: modelPath)

//Compile the mlmodel file
let compiledModel = try MLModel.compileModel(at: url)

//Get the Natural language model
let model = try NLModel(contentsOf: compiledModel)

//Get the inference
let label = model.predictedLabel(for: "When Nobel Laureate and Irrational Exuberance author Robert Shiller says he sees bubbles in the financial markets — you'd better listen up. I see bubbles everywhere, Shiller, economics professor at Yale University and author of just-published Narrative Economics told investors gathered in Los Angeles Wednesday. You invest even though you expect the price to decline. Shiller famously predicted the 2000 stock market crash and the 2007 crash of the housing market.")
Build the iOS Application (Dark mode ready):
Create a new project:
To begin, we need to create an iOS project with a single view app. Make sure to choose Storyboard in the “User interface” dropdown menu (Xcode 11 only):

Now we have our project ready to go. I don’t like using storyboards myself, so the app in this tutorial is built programmatically, which means no buttons or switches to toggle — just pure code 🤗.
To follow this method, you’ll have to delete the main.storyboard and set your SceneDelegate.swift file (Xcode 11 only) like so:
func scene(_ scene: UIScene, willConnectTo session: UISceneSession, options connectionOptions: UIScene.ConnectionOptions) {
        // Use this method to optionally configure and attach the UIWindow `window` to the provided UIWindowScene `scene`.
        // If using a storyboard, the `window` property will automatically be initialized and attached to the scene.
        // This delegate does not imply the connecting scene or session are new (see `application:configurationForConnectingSceneSession` instead).
        guard let windowScene = (scene as? UIWindowScene) else { return }

        window = UIWindow(frame: windowScene.coordinateSpace.bounds)
        window?.windowScene = windowScene
        window?.rootViewController = ViewController()
        window?.makeKeyAndVisible()
    }
With Xcode 11, you’ll have to change the Info.plist file like so:

You need to delete the “Storyboard Name” in the file, and that’s about it.
Create View Controller
We only need one View Controllers:
- ViewController():
This is where we’ll set our UICollectionView with all the text and show the text’s topic.
Create a navigation
- MainTabBarController():
This is our main navigation where we’ll create the full navigation structure for our application.
Navigation in iOS is pretty straightforward and easy to implement. Here, I’ve changed some things like the font for the navigation bar, etc. so it looks nice.
class MainTabBarController: UITabBarController {

    override func viewDidLoad() {
        super.viewDidLoad()
        setupTabBar()
        if #available(iOS 13.0, *) {
           tabBar.backgroundColor = UIColor.label
        } else {
           // Fallback on earlier versions
           tabBar.backgroundColor = UIColor.black
        }
        tabBar.isTranslucent = true
    }

    func setupTabBar() {

        let vc = ViewController()

        let viewController = UINavigationController(rootViewController: vc)
        viewController.tabBarItem.image = UIImage(systemName: "text.badge.plus")?.withTintColor(.white)
        viewController.tabBarItem.title = "News"

        viewControllers = [viewController]

        UITabBar.appearance().tintColor = .label
        let navigation = UINavigationBar.appearance()

        let navigationFont = UIFont(name: "Avenir", size: 20)
        let navigationLargeFont = UIFont(name: "Avenir-Heavy", size: 34)

        navigation.titleTextAttributes = [NSAttributedString.Key.foregroundColor: UIColor.black, NSAttributedString.Key.font: navigationFont!]

        if #available(iOS 11, *) {
            navigation.largeTitleTextAttributes = [NSAttributedString.Key.foregroundColor: UIColor.black, NSAttributedString.Key.font: navigationLargeFont!]
        }
    }
}
Setup a UICollectionView — ViewController.swift
Create and setup the collection’s layout
First, instantiate a UICollectionView object and cellId object:
    let cellId = "cellId"

    var newCollection: UICollectionView = {

        let collection = UICollectionView(frame: .zero, collectionViewLayout: UICollectionViewFlowLayout())
        collection.backgroundColor = UIColor.clear
        collection.translatesAutoresizingMaskIntoConstraints = false
        collection.isScrollEnabled = true
        collection.showsVerticalScrollIndicator = false
        collection.allowsMultipleSelection = true

        return collection
    }()
Then set up the layout and add delegates:
    func setupCollection() {

        self.view.addSubview(newCollection)

        newCollection.centerXAnchor.constraint(equalTo: self.view.centerXAnchor).isActive = true
        newCollection.centerYAnchor.constraint(equalTo: self.view.centerYAnchor).isActive = true
        newCollection.heightAnchor.constraint(equalToConstant: view.frame.height).isActive = true
        newCollection.widthAnchor.constraint(equalToConstant: view.frame.width).isActive = true
        newCollection.topAnchor.constraint(equalTo: self.view.topAnchor).isActive = true
        newCollection.bottomAnchor.constraint(equalTo: self.view.bottomAnchor).isActive = true

    }

    func setupCollectionView() {
        if #available(iOS 13.0, *) {
            newCollection.backgroundColor = UIColor.systemBackground
        } else {
            // Fallback on earlier versions
           newCollection.backgroundColor = .white
        }
        newCollection.register(ViewControllerCell.self, forCellWithReuseIdentifier: cellId)
        newCollection.alwaysBounceVertical = true
        newCollection.delegate = self
        newCollection.dataSource = self

    }
We also need a CollectionViewCell. I’ve created a custom one, but you can obviously use the default one:
class ViewControllerCell: UICollectionViewCell {

    var cornerColor: UIColor?
    var primaryColor: UIColor?
    var secondaryColor: UIColor?

    override init(frame: CGRect) {
        super.init(frame: frame)
        setupCell()
    }
    required init?(coder aDecoder: NSCoder) {
        fatalError("init(coder:) has not been implemented")
    }

    override var isHighlighted: Bool {
        didSet {

            UIView.animate(withDuration: 0.27, delay: 0.0, usingSpringWithDamping: 1, initialSpringVelocity: 1.0, options: [.curveEaseOut, .beginFromCurrentState], animations: {
                self.contentView.alpha = self.isHighlighted ? 0.35 : 1
                self.transform = self.isHighlighted ? self.transform.scaledBy(x: 0.96, y: 0.96) : .identity
            })
        }
    }

    override var isSelected: Bool {
        didSet {
            if isSelected {
                self.contentView.layer.borderColor = secondaryColor?.cgColor
                self.contentView.backgroundColor = secondaryColor
            } else {
                self.contentView.layer.borderColor = cornerColor?.cgColor
                self.contentView.backgroundColor = primaryColor
            }
        }
    }

    // MARK: UI
    let topic: UILabel = {
        let label = UILabel()
        label.text = "....."
        label.textColor = UIColor.label
        label.font = UIFont.boldSystemFont(ofSize: 16)
        label.textAlignment = .left
        label.numberOfLines = 1

        return label
    }()

    let text: UILabel = {
        let label = UILabel()
        label.text = "........................."
        label.textColor = UIColor.label
        label.font = UIFont.boldSystemFont(ofSize: 12)
        label.textAlignment = .left
        label.numberOfLines = 0
        label.sizeToFit()
        label.lineBreakMode = .byWordWrapping

        return label
    }()

    // MARK: Setup Cell
    fileprivate func setupCell() {
        roundCorner()
        setCellShadow()
        self.addSubview(topic)
        self.addSubview(text)

        topic.anchor(top: safeTopAnchor, left: safeLeftAnchor, bottom: nil, right: safeRightAnchor, paddingTop: 15, paddingLeft: 20, paddingBottom: 0, paddingRight: 20)

        text.anchor(top: topic.bottomAnchor, left: safeLeftAnchor, bottom: safeBottomAnchor, right: safeRightAnchor, paddingTop: 10, paddingLeft: 20, paddingBottom: -25, paddingRight: 20)
    }

    // MARK: Methods
    func setCellShadow() {
        self.layer.shadowColor = UIColor.black.cgColor
        self.layer.shadowOffset = CGSize(width: 0, height: 1)
        self.layer.shadowOpacity = 0.2
        self.layer.shadowRadius = 6.0
        self.layer.masksToBounds = false
        self.layer.cornerRadius = 14
        self.clipsToBounds = false
    }

    func roundCorner() {
        self.contentView.layer.cornerRadius = 14
        self.contentView.layer.masksToBounds = true
        self.contentView.layer.borderWidth = 3.0
        self.contentView.layer.borderColor = cornerColor?.cgColor
        self.contentView.backgroundColor = .systemBackground
    }

}
Populate the collection view
We need a model to host our text and the prediction, so for the sake of simplicity, I’ve created a struct called “Model”:
struct Model {
    var text: String
    var color: UIColor
    var secondaryColor: UIColor
    var topic: String

    init(text: String, color: UIColor, topic: String, secondaryColor: UIColor) {
        self.text = text
        self.color = color
        self.secondaryColor = secondaryColor
        self.topic = topic
    }
}
We also need to create an array of Models that will be used to populate the UICollectionView:
Now we have an array of models we can use to populate the collection. I prefer to use extensions, so I’ve created a separate file:
extension ViewController: UICollectionViewDataSource, UICollectionViewDelegate, UICollectionViewDelegateFlowLayout {

    func numberOfSections(in collectionView: UICollectionView) -> Int {
        return 1
    }

    func collectionView(_ collectionView: UICollectionView, numberOfItemsInSection section: Int) -> Int {
        return self.cells.count
    }

    func collectionView(_ collectionView: UICollectionView, cellForItemAt indexPath: IndexPath) -> UICollectionViewCell {
        let cell = collectionView.dequeueReusableCell(withReuseIdentifier: cellId, for: indexPath) as! ViewControllerCell

        cell.topic.text = "(self.cells[indexPath.row].topic)"
        cell.text.text = self.cells[indexPath.row].text
        cell.contentView.layer.borderColor = self.cells[indexPath.row].color.cgColor
        cell.cornerColor = self.cells[indexPath.row].color
        cell.contentView.backgroundColor = self.cells[indexPath.row].color
        cell.primaryColor = self.cells[indexPath.row].color
        cell.secondaryColor = self.cells[indexPath.row].secondaryColor
        return cell
    }

    func collectionView(_ collectionView: UICollectionView, layout collectionViewLayout: UICollectionViewLayout, sizeForItemAt indexPath: IndexPath) -> CGSize {

        let width = round((view.frame.width - 40) / 2.0)*2

        let height = self.cells[indexPath.row].text.heightWithConstrainedWidth(width: width, font: UIFont.boldSystemFont(ofSize: 12)) + 90

        return CGSize(width: width, height: height)
    }

    func collectionView(_ collectionView: UICollectionView, layout collectionViewLayout: UICollectionViewLayout, insetForSectionAt section: Int) -> UIEdgeInsets {
        return UIEdgeInsets(top: 25, left: 0, bottom: 25, right: 0)
    }

    func collectionView(_ collectionView: UICollectionView, didSelectItemAt indexPath: IndexPath) {
        switch mMode {
        case .view:
            newCollection.deselectItem(at: indexPath, animated: true)
        case .select:
            dictionarySelectedIndexPath[indexPath] = true
        }
    }

    func collectionView(_ collectionView: UICollectionView, didDeselectItemAt indexPath: IndexPath) {
        if mMode == .select {
            dictionarySelectedIndexPath[indexPath] = false
        }
    }
}
I’ve also added a small extension for the String class so that I can calculate the height of the text and resize the collection view cells dynamically.
Add new text:
We need to setup the tabBar and add a rightBarButtonItem with a ‘plus’ sign button that will allow our users to add text and predict the topic.
This button should also trigger a UIAlertController with a TextField:
func setupTabBar() {
        navigationController?.navigationBar.prefersLargeTitles = true
        self.navigationItem.title = "News Classifier"
        if #available(iOS 13.0, *) {
            self.navigationController?.navigationBar.barTintColor = .systemBackground
             navigationController?.navigationBar.titleTextAttributes = [.foregroundColor : UIColor.label]
        } else {
            // Fallback on earlier versions
            self.navigationController?.navigationBar.barTintColor = .lightText
            navigationController?.navigationBar.titleTextAttributes = [.foregroundColor : UIColor.black]
        }
        self.navigationController?.navigationBar.isHidden = false
        self.setNeedsStatusBarAppearanceUpdate()
        self.navigationItem.largeTitleDisplayMode = .automatic
        self.navigationController?.navigationBar.barStyle = .default
        if #available(iOS 13.0, *) {
            navigationController?.navigationBar.largeTitleTextAttributes = [.foregroundColor : UIColor.label]
        } else {
            navigationController?.navigationBar.largeTitleTextAttributes = [.foregroundColor : UIColor.black]
        }
        if #available(iOS 13.0, *) {
            navigationController?.navigationBar.backgroundColor = .systemBackground
        } else {
            // Fallback on earlier versions
            navigationController?.navigationBar.backgroundColor = .white
        }
        self.tabBarController?.tabBar.isHidden = false
        self.navigationItem.rightBarButtonItem = .init(barButtonSystemItem: .add, target: self, action: #selector(addCell(_:)))
        self.navigationItem.leftBarButtonItem = .init(barButtonSystemItem: .edit, target: self, action: #selector(editCell(_:)))
    }
Get the inference and populate the CollectionView :
@objc func addCell(_ sender: UIBarButtonItem) {

        let model = TopicClassifier()

        let alertController = UIAlertController(title: "", message: "", preferredStyle: .alert)
        alertController.addTextField { textField in
            textField.placeholder = "Text"
        }
        let confirmAction = UIAlertAction(title: "Add", style: .default) { [weak alertController] _ in
            guard let alertController = alertController, let textField = alertController.textFields?.first else { return }
            if let text = textField.text {
                do {
                    let prediction = try model.prediction(text: text)
                    if prediction.label == "business" {
                        let cell = Model(text: text, color: UIColor.systemBlue, topic: prediction.label, secondaryColor: UIColor.systemGray6)
                        self.cells.append(cell)
                        self.newCollection.reloadData()
                    } else if prediction.label == "tech" {
                        let cell = Model(text: text, color: UIColor.systemGreen, topic: prediction.label, secondaryColor: UIColor.systemGray6)
                        self.cells.append(cell)
                        self.newCollection.reloadData()
                    } else if prediction.label == "entertainment" {
                        let cell = Model(text: text, color: UIColor.systemOrange, topic: prediction.label, secondaryColor: UIColor.systemGray6)
                        self.cells.append(cell)
                        self.newCollection.reloadData()
                    } else if prediction.label == "politics" {
                        let cell = Model(text: text, color: UIColor.systemRed, topic: prediction.label, secondaryColor: UIColor.systemGray6)
                        self.cells.append(cell)
                        self.newCollection.reloadData()
                    } else if prediction.label == "sport" {
                        let cell = Model(text: text, color: UIColor.systemTeal, topic: prediction.label, secondaryColor: UIColor.systemGray6)
                        self.cells.append(cell)
                        self.newCollection.reloadData()
                    }
                } catch {
                    print(error)
                }
            }
        }
        alertController.addAction(confirmAction)
        let cancelAction = UIAlertAction(title: "Cancel", style: .destructive, handler: nil)
        alertController.addAction(cancelAction)
        present(alertController, animated: true, completion: nil)
    }
I randomly choose some articles from Google News:
- Politics: https://www.bbc.com/news/uk-politics-50205603
- Sport: https://www.espn.com/nba/story/_/id/27947089/terry-stotts-portland-trail-blazers-credits-damian-lillard-key-coach-challenge
- Technology: https://www.theverge.com/2019/10/28/20932406/microsoft-surface-laptop-3-13-5-inch-review-test-price-specs-features
- Entertainment: https://metro.co.uk/2019/10/28/jennifer-aniston-shares-kiss-ellen-degeneres-live-tv-admits-doesnt-smooch-friends-10995418/
- Business: https://edition.cnn.com/2019/10/28/investing/lvmh-tiffany-co-louis-vuitton/index.html
Here’s the result:

Conclusion
I cannot emphasize how easy it is to create a text classification model with Apple’s APIs. One of the best parts is that the model lives on the phone and requires no communication with external servers. Every iOS developer should take advantage of this technology to improve user engagement or add new features to their applications—all with minimal effort.
I should also add that the majority of the dataset is already there, you just have to use it.
If you liked this tutorial, please share it with your friends. If you have any questions don’t hesitate to send me an email at [email protected].
This project is available to download from my GitHub account.

Comments 0 Responses