
Once your machine learning model is ready, you have to deploy it to a device. One of the ways that can be done is by shipping the model with the application. A challenge with this method is that whenever your model changes, you will need to ship a new APK to the app stores.
Obviously, this takes a long time because every app update needs to be verified by the app store. Now, imagine if it was possible to update the model over the air without the need to ship a new application. In this article, we will see how that can be done using Firebase Machine Learning.
Getting Started
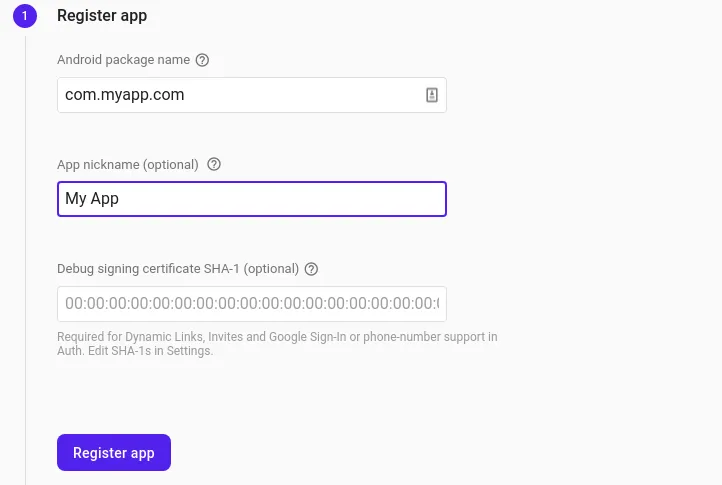
Before we can get this plane in the air, we first need to ensure that we’ve connected to Firebase. Head over to the Firebase Console and create a project. After that, you need to register your application with that project.
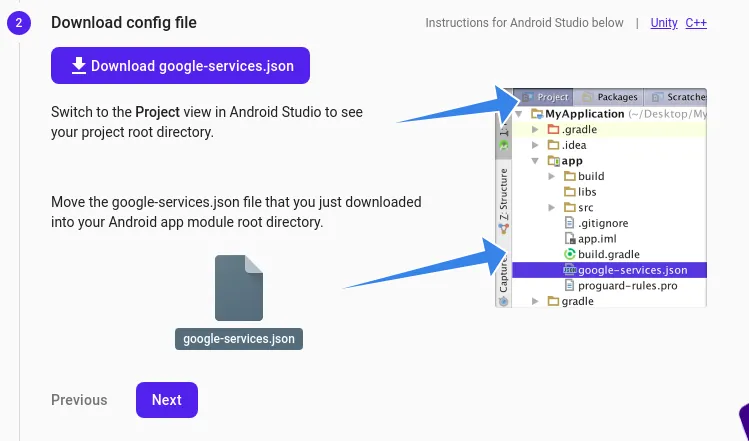
Next, download the Google JSON file and place it in the app folder of your application. This file contains configurations that are specific to the project and app you just registered.
The next step is to add the Firebase SDK to the application. Add the following to the project-level build.gradle file.
buildscript {
  repositories {
    // Check that you have the following line (if not, add it):
    google()  // Google's Maven repository
  }
  dependencies {
    ...
    // Add this line
    classpath 'com.google.gms:google-services:4.3.4'
  }
}

allprojects {
  ...
  repositories {
    // Check that you have the following line (if not, add it):
    google()  // Google's Maven repository
    ...
  }
}
Add the Google Services plugin to the App-level build.gradle file.
apply plugin: 'com.google.gms.google-services'Let’s also declare that TFLite files shouldn’t be compressed. This is crucial because we will load an on-device model before the online model is downloaded. We do this to ensure that the user gets the expected output before the model is downloaded.
android {
    compileSdkVersion 30
    buildToolsVersion "30.0.2"

    aaptOptions {
        noCompress "tflite", "lite"
    }
    ......
    }
In the same file define the dependencies needed for this application.
dependencies {
    implementation platform('com.google.firebase:firebase-bom:26.2.0')
    implementation 'com.google.firebase:firebase-analytics'
    implementation 'com.google.firebase:firebase-ml-model-interpreter'

    implementation 'org.tensorflow:tensorflow-lite:2.3.0'
    implementation 'org.tensorflow:tensorflow-lite-support:0.0.0-nightly'

    ........

    }
When used, the Firebase Android BoM (Bill of Materials) enables you to specify just the version of the BoM. After that, the BoM will be responsible for ensuring that the Firebase library versions used for your application are compatible.
When you update the BoM, Firebase libraries will be updated to the versions that are associated with the version of BoM. Notice that when the BoM is used, the versions of Firebase libraries need not be defined.
com.google.firebase:firebase-ml-model-interpreter is the dependency for the Firebase ML Custom Models library. Dependencies for TensorFlow Lite are also included.
Since internet access is needed in order to download the model, you’ll need to include that in the Android Manifest file.
<uses-permission android:name="android.permission.INTERNET" />
Deploy the model
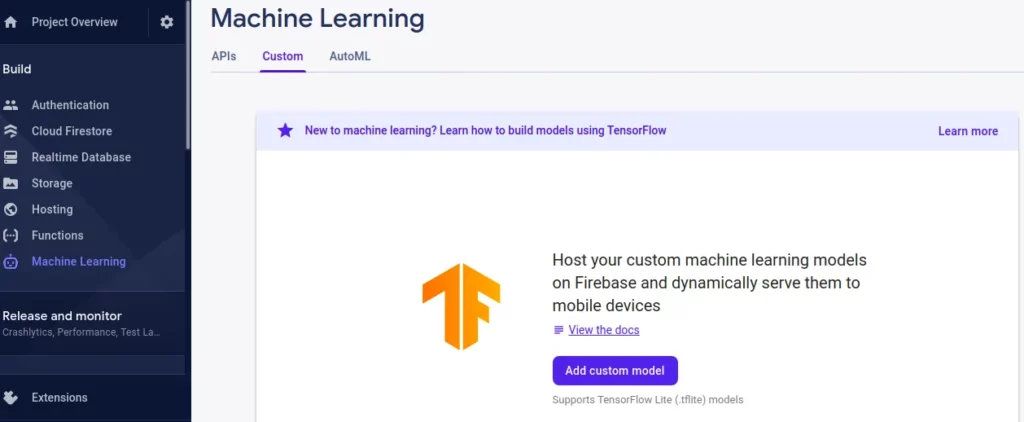
Next, you need to upload your model to Firebase. In this case, let’s use a MobileNet pre-trained model. However, you can train and upload your own custom model. Click “add custom model” to get started.
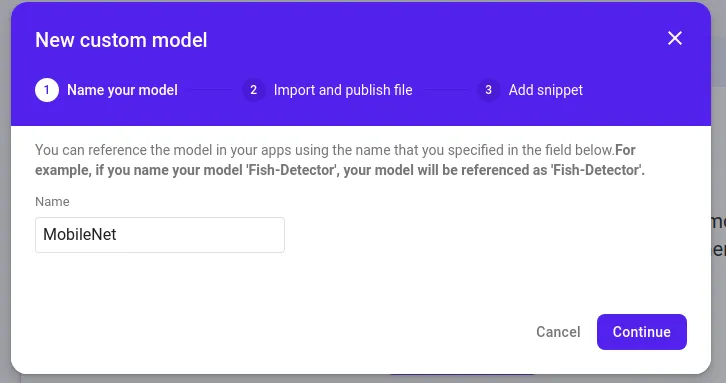
After this, you will be prompted to name and upload your model. Note that this is the name that you will use to download the model.
The App Elements
The application will have a single view. This view will display the image that will be used along with a button. When the button is clicked, a certain function will run. This function will use a local model if the online model is yet to be downloaded. Once the online model is downloaded, the application will switch to that model.
<?xml version="1.0" encoding="utf-8"?>
<androidx.constraintlayout.widget.ConstraintLayout xmlns:android="http://schemas.android.com/apk/res/android"
    xmlns:app="http://schemas.android.com/apk/res-auto"
    xmlns:tools="http://schemas.android.com/tools"
    android:layout_width="match_parent"
    android:layout_height="match_parent"
    tools:context=".MainActivity">

    <ImageView
        android:id="@+id/imageView"
        android:layout_width="366dp"
        android:layout_height="304dp"
        android:layout_marginTop="90dp"
        android:layout_marginBottom="69dp"
        app:layout_constraintBottom_toTopOf="@+id/buttonClick"
        app:layout_constraintEnd_toEndOf="parent"
        app:layout_constraintHorizontal_bias="0.01"
        app:layout_constraintStart_toStartOf="parent"
        app:layout_constraintTop_toTopOf="parent"
        app:srcCompat="@drawable/hen" />

    <TextView
        android:id="@+id/textView"
        android:layout_width="294dp"
        android:layout_height="58dp"
        android:layout_marginTop="78dp"
        android:layout_marginBottom="144dp"
        android:text="Label:"
        app:layout_constraintBottom_toBottomOf="parent"
        app:layout_constraintEnd_toEndOf="parent"
        app:layout_constraintStart_toStartOf="parent"
        app:layout_constraintTop_toBottomOf="@+id/buttonClick" />

    <Button
        android:id="@+id/buttonClick"
        android:layout_width="263dp"
        android:layout_height="56dp"
        android:layout_marginStart="50dp"
        android:layout_marginTop="8dp"
        android:layout_marginEnd="50dp"
        android:layout_marginBottom="241dp"
        android:onClick="predict"
        android:text="Label Image"
        app:layout_constraintBottom_toBottomOf="parent"
        app:layout_constraintEnd_toEndOf="parent"
        app:layout_constraintStart_toStartOf="parent"
        app:layout_constraintTop_toBottomOf="@+id/imageView" />
</androidx.constraintlayout.widget.ConstraintLayout>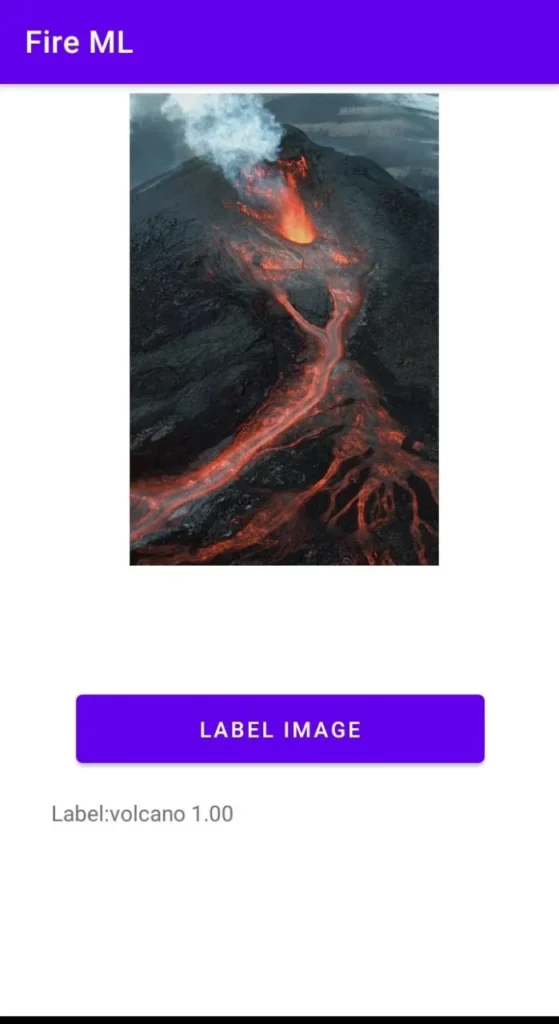
The Main Activity
The first step is to define some global variables. These variables will be used and re-defined at various parts of the application as we will see shortly.
    ImageView imageView;
    Context context;
    TextView textView;
    String result = "";
    TensorBuffer modelOutput;
    Interpreter interpreter;
    File modelFile;
    Interpreter.Options options = new Interpreter.Options();
Next, obtain the image and text views. The image view will display the image while the text view will display the class and confidence level as predicted by the model.
imageView = findViewById(R.id.imageView);
textView = findViewById(R.id.textView);
The Predict Function
Let’s now define a function that will do a couple of things:
- Create an instance of the FirebaseCustomRemoteModel with the name of the model you uploaded.
- Download the latest version of the model.
- Create an Interpreter from the online model if it’s ready, otherwise use the on-device model.
- When the online model downloads successfully, switch the Interpreter to that model.
The conditions needed in order to download the model are also defined. In this case, WIFI is a requirement. Other conditions that can be added include the requirement to have the device be idle or charging.
public void predict(View view) {
        context = this;
        FirebaseCustomRemoteModel remoteModel = new FirebaseCustomRemoteModel.Builder("MobileNet").build();

        FirebaseModelDownloadConditions conditions = new FirebaseModelDownloadConditions.Builder()
                .requireWifi()
                .build();

        FirebaseModelManager.getInstance().download(remoteModel, conditions)
                .addOnSuccessListener(v -> {
                    Log.i("Info", "Switching to downloaded model");
                    FirebaseModelManager.getInstance().getLatestModelFile(remoteModel)
                            .addOnCompleteListener(task -> {
                                modelFile = task.getResult();
                                assert modelFile != null;
                                interpreter = new Interpreter(modelFile, options);
                            });
                });

        if (modelFile != null) {
            interpreter = new Interpreter(modelFile, options);
            makePrediction();
        } else {
            Log.i("Info", "Trying Local Model");

            try {
                MappedByteBuffer tfliteModel = FileUtil.loadMappedFile(context, "mobilenet_v1_1.0_224_quant.tflite");
                Interpreter.Options options = new Interpreter.Options();
                interpreter = new Interpreter(tfliteModel, options);
                makePrediction();
            } catch (IOException e) {
                Log.e("tflite Support", "Error reading model", e);
            }

        }
    }
Notice that when the Interpreter is ready, a function known as makePrediction is executed. In this function the following takes place:
- The image to be used in the prediction is obtained as a drawable asset.
- The image is processed so that it’s the size that is expected by the MobileNet model.
- The image is converted into a TensorImage.
- A TensorBuffer large enough to hold the output of the model is created.
- The model runs the prediction as the image input and buffer output is passed in.
- It loads in the MobileNet labels and map them to the predicted result.
- Then the model displays the result with a threshold of at least 50%.
- Finally, it will re-initialize the output buffer to prevent any buffer overflow exceptions the second time you run the predict function.
    void makePrediction() {
        Bitmap bitmap = BitmapFactory.decodeResource(getResources(), R.drawable.hen);
        ImageProcessor imageProcessor = new ImageProcessor.Builder()
                .add(new ResizeOp(224, 224, ResizeOp.ResizeMethod.BILINEAR))
                .build();
        TensorImage tImage = new TensorImage(DataType.UINT8);
        tImage = imageProcessor.process(TensorImage.fromBitmap(bitmap));
        modelOutput = TensorBuffer.createFixedSize(new int[]{1, 1001}, DataType.UINT8);
        interpreter.run(tImage.getBuffer(), modelOutput.getBuffer());
        final String MOBILE_NET_LABELS = "labels_mobilenet_quant_v1_224.txt";
        List<String> mobilenetlabels = null;
        try {
            mobilenetlabels = FileUtil.loadLabels(context, MOBILE_NET_LABELS);
        } catch (IOException e) {
            Log.e("tfliteSupport", "Error reading label file", e);
        }
        TensorProcessor probabilityProcessor = new TensorProcessor.Builder().add(new NormalizeOp(0, 255)).build();
        if (mobilenetlabels != null) {
            // Map of labels and their corresponding probability
            TensorLabel labels = new TensorLabel(mobilenetlabels, probabilityProcessor.process(modelOutput));
            // Create a map to access the result based on label
            Map<String, Float> resultsMap = labels.getMapWithFloatValue();

            for (String key : resultsMap.keySet()) {
                Float value = resultsMap.get(key);
                if (value >= 0.50) {
                    String roundOff = String.format("%.2f", value);
                    result = key + " " + roundOff;
                }
                Log.i("Info", key + " " + value);
            }
            Log.i("Info", "The label is " + result);
            textView.append(result);

            modelOutput = TensorBuffer.createFixedSize(new int[]{1, 1001}, DataType.UINT8);
        }
    }
Conclusion
It is important to note that the version of Firebase ML used here is still in beta. Therefore the API might change in backward-incompatible ways. However, when changes are made, the documentation will always provide a way to implement the changes in your application.

Comments 0 Responses