
According to Snapchat’s founders, the smartphone camera has always been at the heart of their app. Over the years, Snapchat has evolved to do much more to your photos than simple image and video messaging.
This giant social media platform is most popular among young people, and the main reason for this is its amazing photo/video editing tools and a wide variety of available camera filters.
These filters are actually augmented reality (AR) experiences that superimpose 2D and 3D artwork onto a user’s face or surroundings. My previous post covers more information about AR and the various platforms like Snapchat that host such experiences. In this post, we’ll learn how to create our own AR experiences for Snapchat.
Let’s start by getting to know the different types of camera experiences that Snapchat offers:
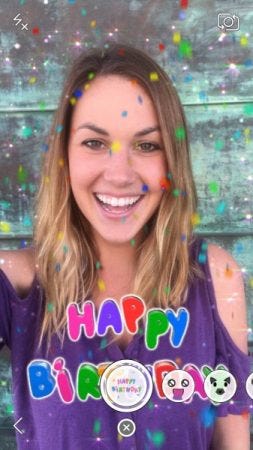
1) Filters: Image or text overlays on camera captures or gallery pictures. For example, a frame for someone’s birthday or any other event.
Filters can be easily created on Snapchat’s web interface, which consists of a lot of templates that you can use and customize.
Creating and posting these types of filters costs money depending on the time period these filters will be available to the user and the geographical area within which they can be activated.
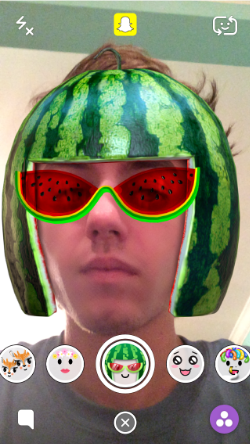
2) Lenses: Snapchat calls their AR filters Lenses. A lens can track a user’s face or a flat surface and overlay images or objects on it. Some examples are dog ears on a user’s forehead or sunglasses over their eyes.
Similar to Filters, Lenses are easy to create using the web interface, with customizable pre-made templates. They are also only available in some countries, and their cost depends on the time duration and geographical location.
3) Community Filters: These filters are free to create and share on Snapchat. They can be easily created by uploading an overlay image of size 1080×2340 pixels from inside the Snapchat app or from here on a computer. Community Filters are of 2 types:
a) Geofilters: Filters that can be activated only in specific geographical locations. For example: only within a Disneyland theme park.
b) Moment Filters: Filters that can be activated at a specific time or moment. For example: only during the morning or during summers.
Creating custom Filters and Lenses for free using Lens Studio
Lens Studio is the official feature-packed Lens creation tool offered by Snapchat. It can be used to create any type of filter or lens for free—and publish them for an indefinite amount of time, with no geographical restrictions!
In this post, we’ll learn to create our own custom filter that tracks the user’s face and displays an image at certain points, like the forehead and mouth, using the Lens Studio. Along with face tracking, we’ll also learn a few more basic techniques such as skin smoothing and changing eye color. All of this without a single line of code!
The filter we’re going to create will look like this (you can use the filter yourself here):
Let’s start by downloading Lens Studio and figuring out its interface.
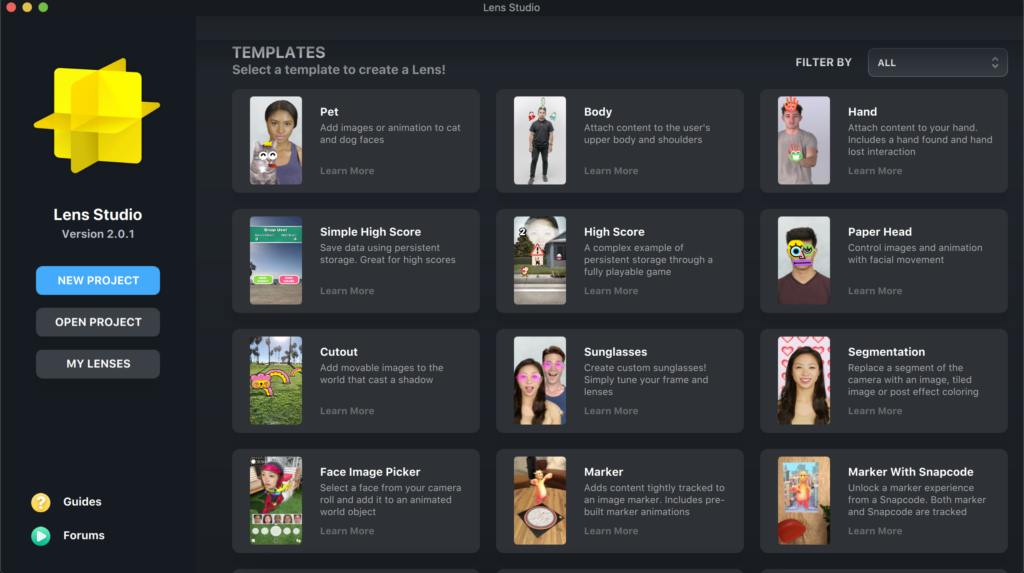
Lens Studio supports both Windows and macOS. The latest version(2.0.1) can be downloaded from its official site.
After the installation is complete, the home screen of Lens Studio lists a couple of templates on the right and options to create new, open, or view your Lens projects. The Lens Studio documentation contains more information about using the starting templates.
Now start a fresh project by clicking on ‘New Project’. It will open the development environment that consists of 5 main sections, as shown below:
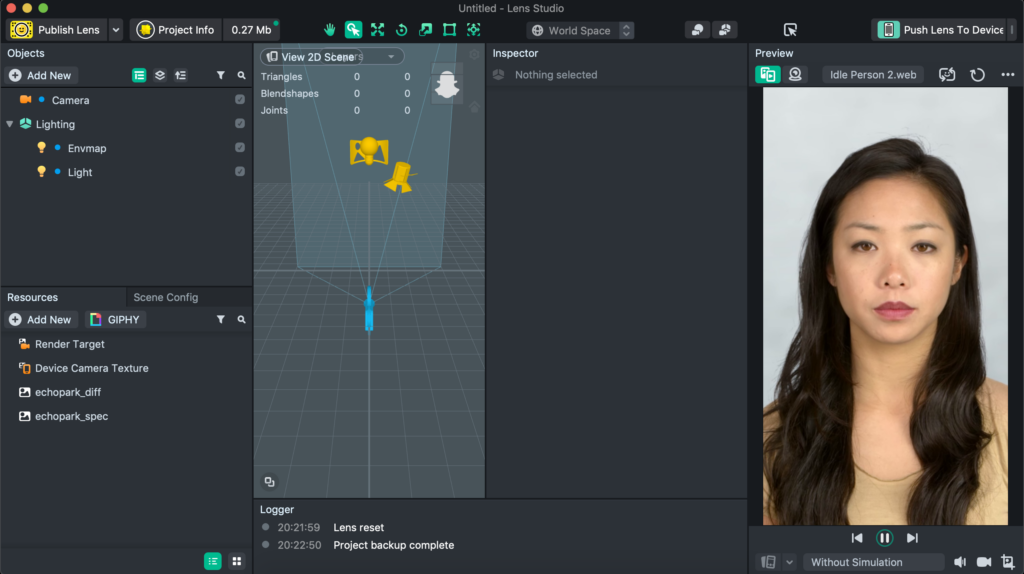
The five main sections are:
1. Objects panel (top-left): Everything in the effect we create is called an object, be it an image, sound, or even lights. This panel shows us all the objects our effect is using and its hierarchical structure.
2. Resources panel (bottom-left): The resources panel contains all the external assets that we need in our effects, such as the bunny ears and teeth images.
3. Scene (second vertical panel from left): This panel contains the 2D or 3D scene structure. It shows us where exactly our objects are placed in 2D or 3D space.
4. Inspector panel (third vertical panel from left): This panel changes depending on the selected object. It shows all the properties of the selection, which can be tweaked to customize the object.
5. Preview (extreme right): As the name suggests, it shows us a preview of the effect we’re creating. The model in the preview and its pose can be changed from the center dropdown option.
Now let’s start creating our bunny effect by deciding the object we need. Objects can be added by simply clicking and selecting an object from the ‘add new’ button at the top of the objects panel.
For our effect, we’ll use the following objects:
- 2 Image objects for the ears (mouth+teeth)
- 2 Head Bindings to make those images track the user’s face
- a Screen Image for the grass
- eye color for red eyes; and
- face retouch for skin smoothing
Next, before we start adding our objects, let’s import our image assets. Simply drag and drop images into the resources panel. Download assets for this tutorial here. You may delete the default assets (echopark_diff and echopark_spec) by right-clicking them and selecting delete.
Now let’s start with the head binding and image objects.
Click on the ‘add new’ in the objects panel and select ‘Head Binding’ under the ‘Face effects’ tab.
You should now see a Head Binding object consisting of a Face Occluder under Effects in the objects hierarchy. You may rename the Head Binding to ‘ears’ by right-clicking and selecting rename.
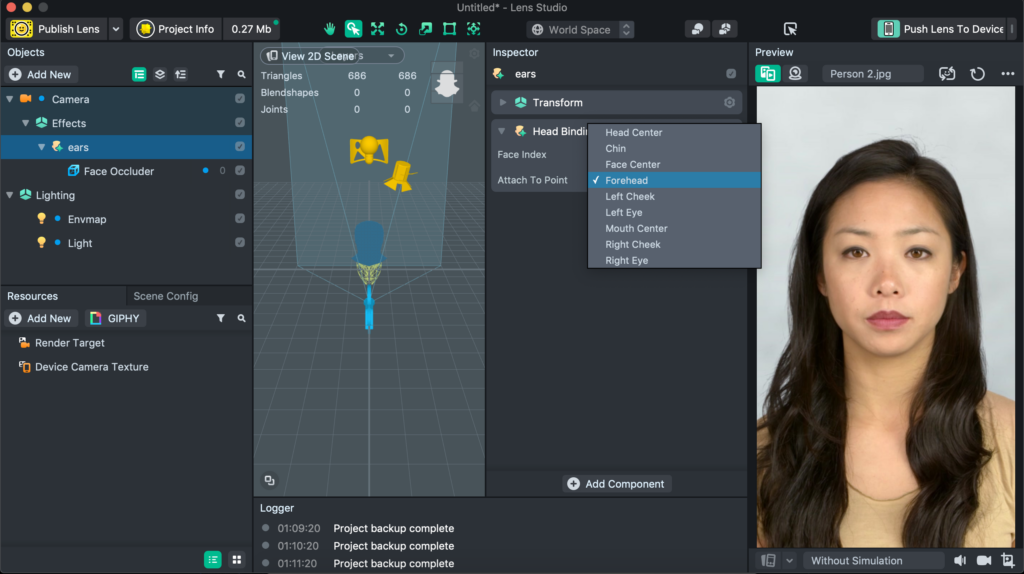
Next, we need to attach the Head Binding to the forehead. This can be easily done by changing the ‘Attach To Point’ property of the Head Binding object in the Inspector panel.
Now we need another Head Binding object for the ‘teeth’. To do this, we can simply duplicate our ears Head Binding by right-clicking>duplicate and then renaming it to teeth. Set the ‘Attach To Point’ property of the teeth to ‘Face Center’.
After we’re done with the Head Bindings we need to add Image objects. Select the ears binding and click the ‘Add new’ button in the objects panel and select the ‘Image’ object in the ‘General’ tab. After adding an image object, you should see the Scene panel change to 2D view and the preview update with a default image overlaying the face.
In the inspector panel under the ‘Image’ section, change the texture property and set it to the ‘ears’ image asset you imported earlier. At this point, our preview should look something like this:
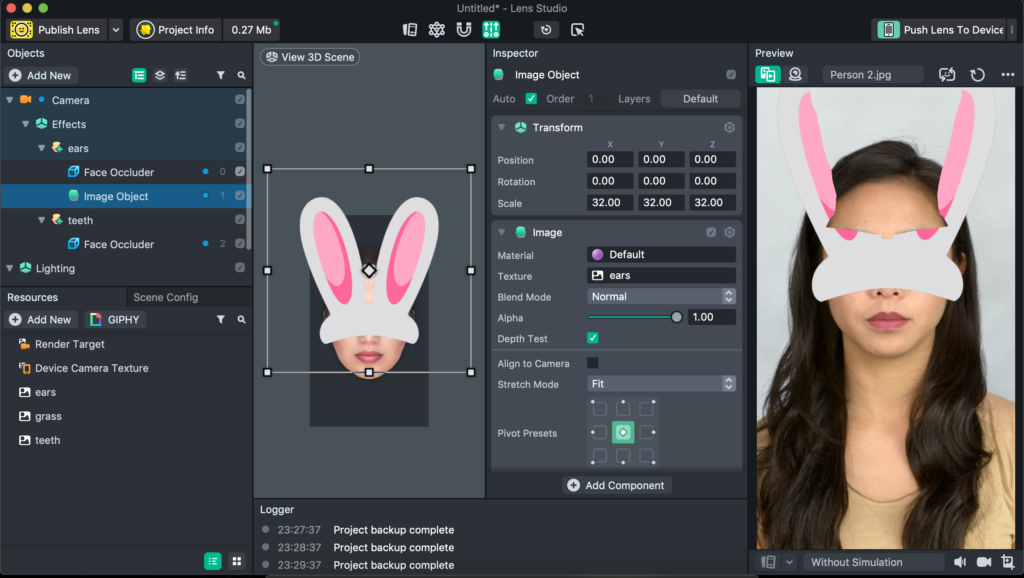
Now adjust the position and size of the image according to your preference in the scene panel using the adjustment handles at the corners. You may notice that a part of the image isn’t visible in the preview—this is because of the ‘Face Occluder’ object present under the Head Binding.
You may delete the ‘Face Occluder’ object by right-clicking > delete because we don’t need it in this effect. An occluder basically hides unnecessary parts of an image when it doesn’t need to be shown on the screen—for example, when the user’s head turns to one side, the rear side of objects like sunglasses or spectacles should not be visible.
We don’t need to occlude our bunny ear image, as it’s supposed to overlap the user’s face at all angles.
Follow the steps for adding and adjusting an image for the teeth Head Binding and delete the face occluder after changing the texture property.
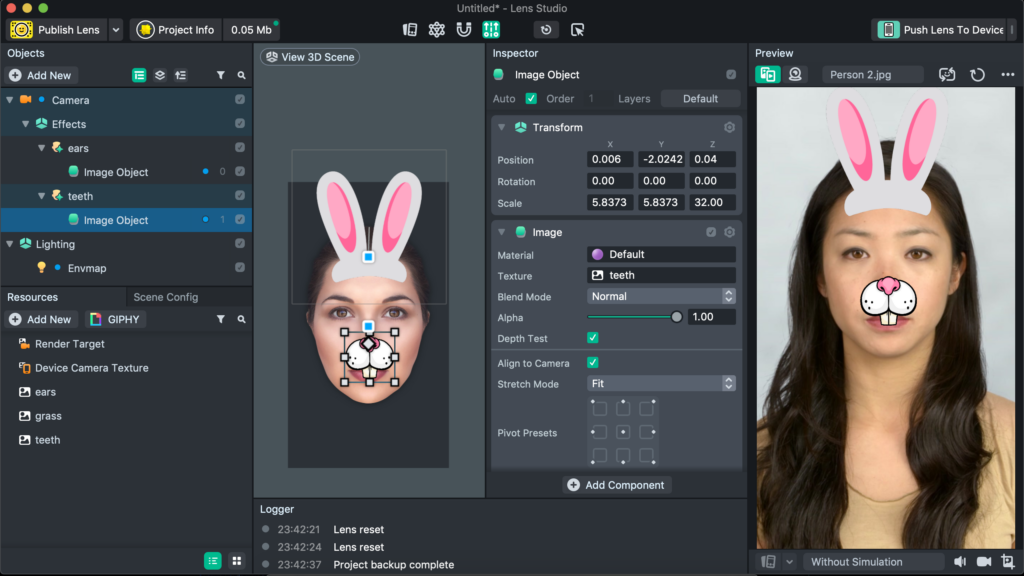
You may check the ‘Align to camera’ property for both the image objects if you’d like the images to always face forward when the user turns their head in any direction.
Now our effect is starting to look appealing and shareable (which, of course, is the ultimate goal, right?).
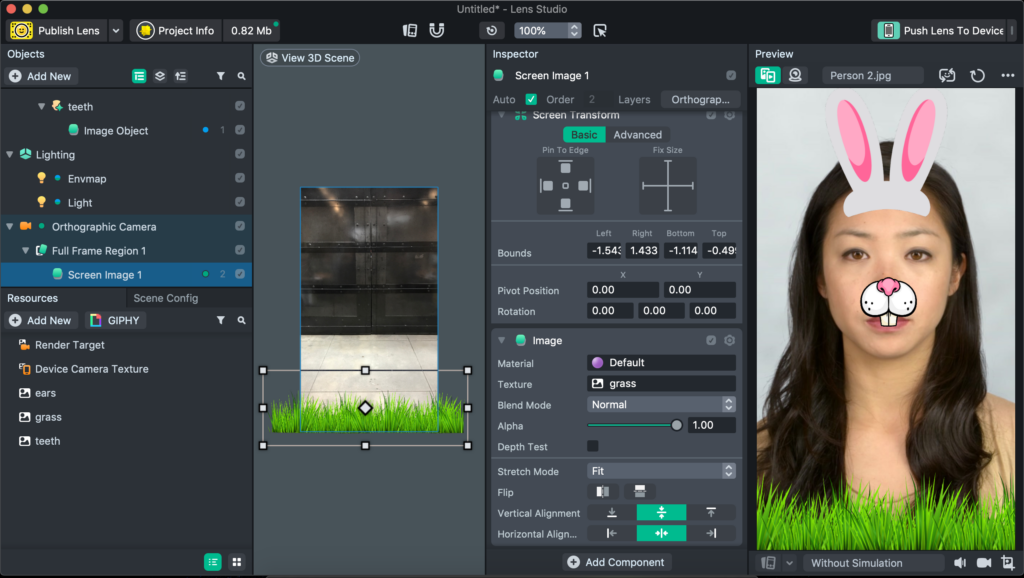
Next, we need to add the grass. We’ll add it as a ‘Screen Image’ object. By now, you should be familiar with the method for adding new objects. Add a new ‘Screen Image’ object from the ‘general’ tab, and then change the ‘texture’ property of the Image to the grass image asset in the Inspector panel.
Just like the image objects in the Head Bindings, adjust the position and size of the screen image in the Scene panel using the adjustment handles.
We’re now only left with 2 more objects to add to complete this effect and share it with our friends and family!
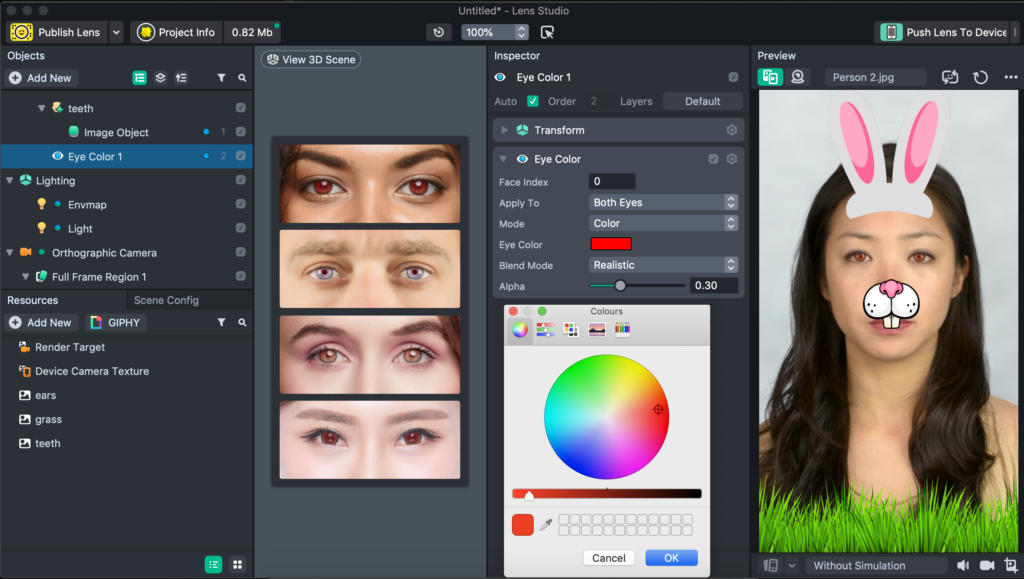
To make the effect more realistic, let’s change the color of the eyes to red. We can do this very easily using the ‘Eye color’ object under the ‘Face effects’ tab in the new object dropdown.
Add the ‘Eye color’ object and set the eye color property to red using the color editor.
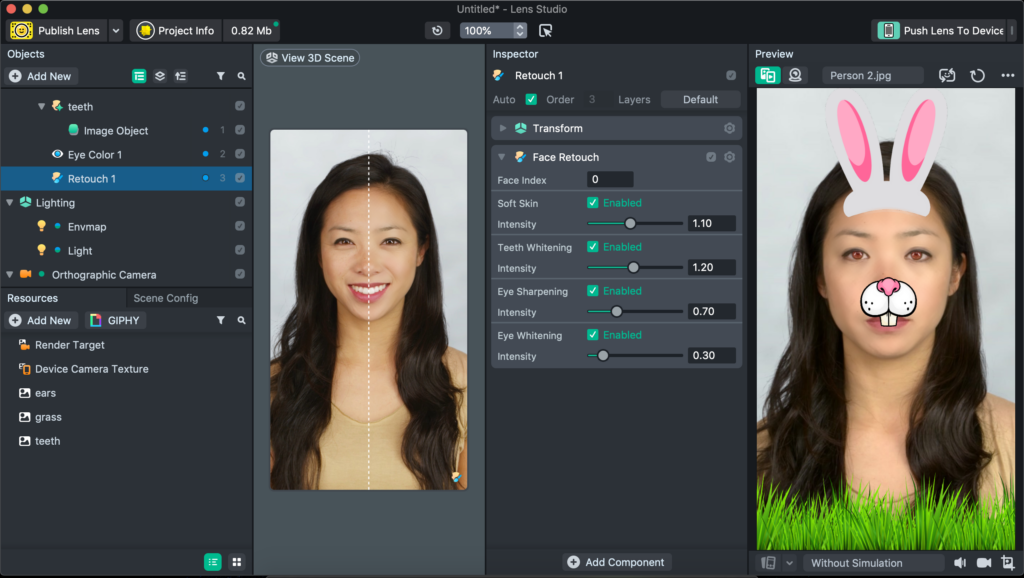
Now for a few final touches, let’s make the user’s skin smoother and their teeth whiter so everyone using the effect looks a bit more attractive than usual—and thereby more willing to share the picture with others.
Add the ‘Face Retouch’ object available under the ‘Face effects’ tab and adjust the sliders for ‘Soft skin’ & ‘Teeth whitening’ property, according to your preference.
Congratulations! You’ve successfully completed your first AR camera filter. Before publishing it for anyone to use, you should preview this effect in the Snapchat app on your phone. You can follow this guide to do that.
Once you’re done testing your effect on your phone, you can move forward and publish your effect. The official guide to submitting your effect is simple and straightforward and will help you get your effect live in just a few minutes!
Once your effect is live, you can share your the effect with your friends and family with a Snapcode or a Lens link.
You may try my published Bunny effect on Snapchat using this lens link.
Conclusion
Creating a Snapchat Lens for the first time seems a bit overwhelming after looking at the Lens Studio interface, given its multitude of features, but soon you realize it is pretty straightforward. Diverse types of effects can be created by mixing various objects and tweaking their properties—the possibilities are endless.
Because Snapchat is such a popular platform, its Lenses are used by popular celebrities, not only by regular people. Some international popstars like singer & songwriter Ed Sheeran have launched several time-locked Lenses in the past as a way to promote recently released songs and reach a broader audience.
In the next few posts in this series, we’ll learn to create more advanced Snapchat effects with particle systems and user interactions using Scripts that involve JavaScript code to manipulate objects. We’ll also learn to use Spark AR studio to create Instagram & Facebook effects!

Comments 0 Responses