
One of the most popular languages in the data science and machine learning world is Python, and most Python tasks usually involve at least 5 packages that need to be installed. However, these packages typically have their own dependency packages for them to function well. And some of these dependency packages must be in a specific version. This is where a Python virtual environment comes into play.
A Python virtual environment is like an isolated container that runs on Python, and it helps make projects self-contained and reproducible without any existing version interference. In other words, it’s like creating your own Python world in your terminal that’s customizable to the point of even specifying what version of Python you want it to run on, be it 2.7 or 3.8.
Why is this useful?
Python virtual environments help resolve dependency issues by allowing you to use different versions of a package for different projects. For example, a project may require that you install a special package that can only run with a Pandas 0.15 dependency, but you already have a Pandas 0.21 dependency.
This means that if you install the package directly, it may break. You don’t need to delete your existing Pandas to accommodate the special package. It will be best to create a virtual environment for this purpose.
Another reason is it helps keep your global directory environment tidy by removing the need to install packages that you might only need for one project.
How can we create a Python virtual environment?
There are multiple ways to create an environment, which include using virtualenv or venv (built into the Python 3 standard library), but my favorite method (with the least hassle in my opinion) is using conda, the package manager associated with Anaconda.
Before moving further, make sure you have Anaconda already installed. For more info about that, check out this link. Also please note that all instructions below should be executed in your bash command line (for Linux), terminal (for Mac) or Anaconda prompt (for Windows).
There are two popular ways to create a virtual environment using conda.
1. The first is what I call the “customize as you go “method. It’s the quickest way, as you need just one line of code:
conda create –name env_name python=3.7
The above line literally says: Create an environment using the conda create command whose name is env_name (you can choose any name) that runs on python=3.7
Using this method, although fast, would require that you install all the packages needed after creating the environment, be it pip install or conda install. It’s a good method when, at the moment of creating the environment, you aren’t completely sure of what major package you’d need. You can install as you go.
2. The second method is what I call the “ready-made” method. Although similar to the first method, it requires an additional step—calling the conda create command. This method requires a configuration file that has some (or all) of the packages you want in the environment. For this method, you need to first create a .yml file. An example of what this should look like is shown below:
This is what it means: The environment to be created should be called env_name, which should be located in the default channel conda directory. And in this environment, the following dependencies /packages should be installed as the environment is being created. And this environment should have “/Users/your_username/anaconda3/envs/your_env_name” as the absolute path. After creating and saving the file, return to your terminal and type the following:
In simple words, the code above says: conda create this environment that has the following specification in the file called file.yml.
Please note that the above code would work based on the following assumptions: Firstly, the name of the file mentioned should be aligned with the one created; and secondly, your current directory should also be where the .yml file is located. The .yml extension is best for this configuration file.
- Although this method helps shorten the process of installing packages, it has a tendency to break when the packages specified in your file require other packages that aren’t explicitly stated to be installed in your configuration file.
- Apart from shortening the installation process, another advantage of this method is to be able to update all the packages specified using this single command:
Please note that this method also allows you to add more packages as you go.
How to navigate the virtual environment
If your environment is successfully created, you should get a concluding message that looks like this:
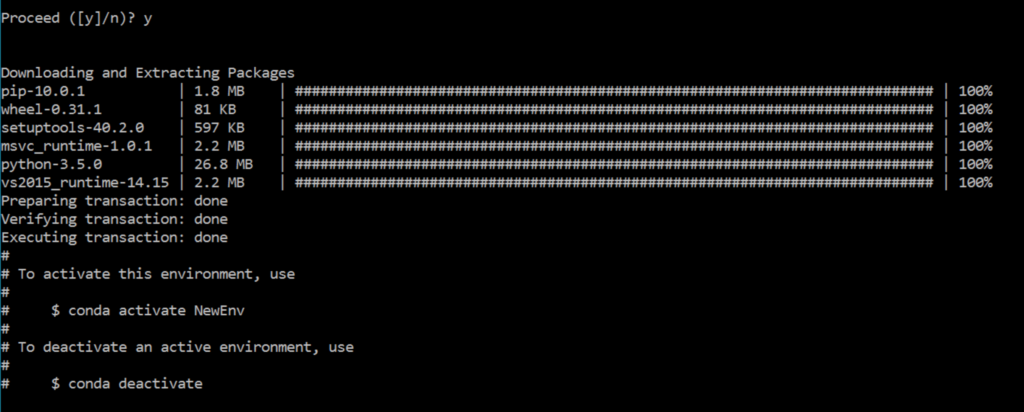
As soon as you get that message, you can switch to your new environment using the following command:
And switch back using this command:
To see your existing environment or verify if the new environment was created, use this command:
To delete or remove the environment, type the following in your terminal:
The — all option helps remove all packages from the environment named.
Conclusion
Creating a Python virtual environment is always a good option when embarking on a project that would require new packages you aren’t familiar with or when the packages’ usage is just a one-time thing. These environments can be created in a variety of ways, but conda is the most popular and efficient tool to use.

Comments 0 Responses