
Instagram is one of the leading social media platforms in the world with over a billion monthly users. It’s great for sharing pictures, connecting with friends and family, getting updates about our favorite celebrities, and posting stories using AR camera filters.
Recently, publishing your own filters on the platform became a possibility when Instagram opened up its beta program, and since then there have been thousands of new filters circulating around.
In this tutorial, we’ll learn how to create and publish our own Instagram filters like the ones you see at the bottom of the Instagram camera.
Why create AR Instagram filters?
We all love filters—they make us or our surroundings look good or funny or scary or whatever you can imagine. But why should we consider creating them?
There are 2 main reasons for this:
- The fact that these filters catch the attention and engagement of users makes them a great way for brands to reach a broad audience. Leave alone brands, pop singers like Camila Cabello, Nial Horan, and many others have recently used Instagram filters while launching their songs to get more attention. If you can learn to develop these filters, you might get a chance to create filters for big brands or celebrities.
2. Filters at the core are augmented reality (AR) experiences. AR is one of today’s cutting edge technologies, and it has a great future ahead. Having it in your CV may give rise to amazing new opportunities. Read more about the AR landscape here.
Keeping these reasons in mind, let’s dive into the development process.
Creating Instagram (and Facebook) filters
Spark AR Studio is the tool used to create Instagram as well as Facebook filters. You only need to develop a filter once and it can be published on both Insta and FB.
Spark AR Studio is a wonderful piece of software, and any filter you have come across on Instagram was created using it. It’s very powerful and does not require prior programming knowledge; however, it does have quite a steep learning curve.
The documentation is great for learning certain techniques like segmentation, optimization of textures and materials, etc.; however, we’re going to create a publishable filter from start to finish.
Taking advantage of the Halloween season, let’s create a Halloween themed filter that will look like this:
You can check this filter out on my Instagram profile (@harshhc5) here
Step 1:
Download & install the latest version (v74.0 at the time of writing of this tutorial) of Spark AR studio from the official website.
Step 2:
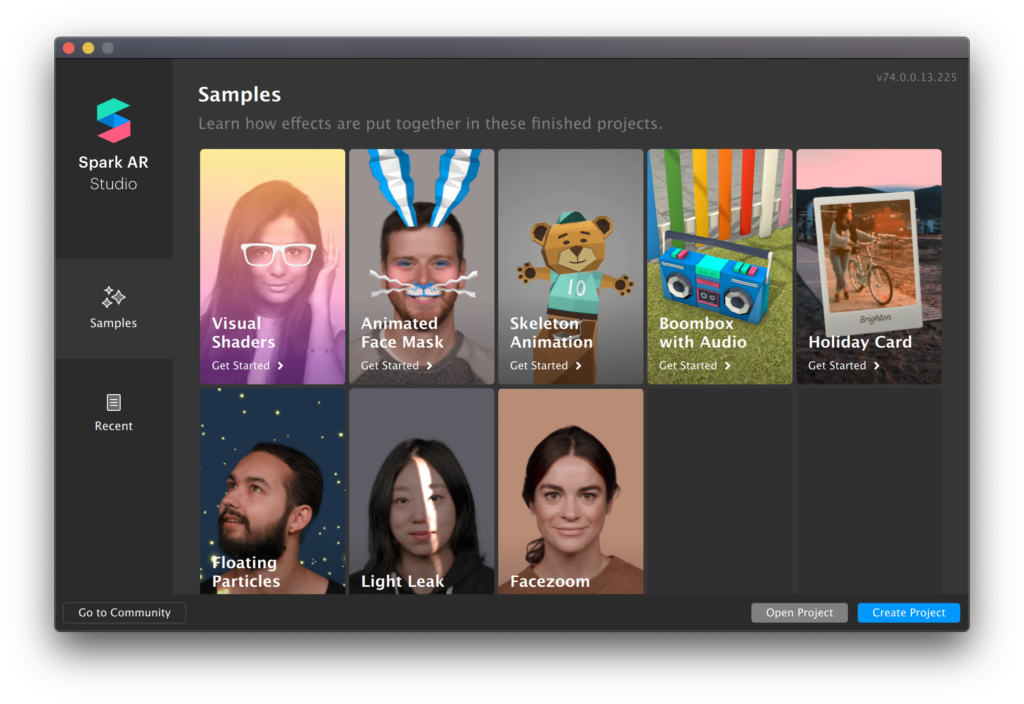
Once installed, the first screen of Spark AR Studio should appear listing various samples (screenshot below). These samples are worth checking out and are a great way to learn how things are done in SparkAR. You can learn more about samples here.
Step 3:
Samples sometimes serve as templates to build upon, but usually starting fresh is a good idea. So let’s start a fresh project by clicking the ‘Create Project’ button at the bottom right. You should now see the development environment, as shown below:
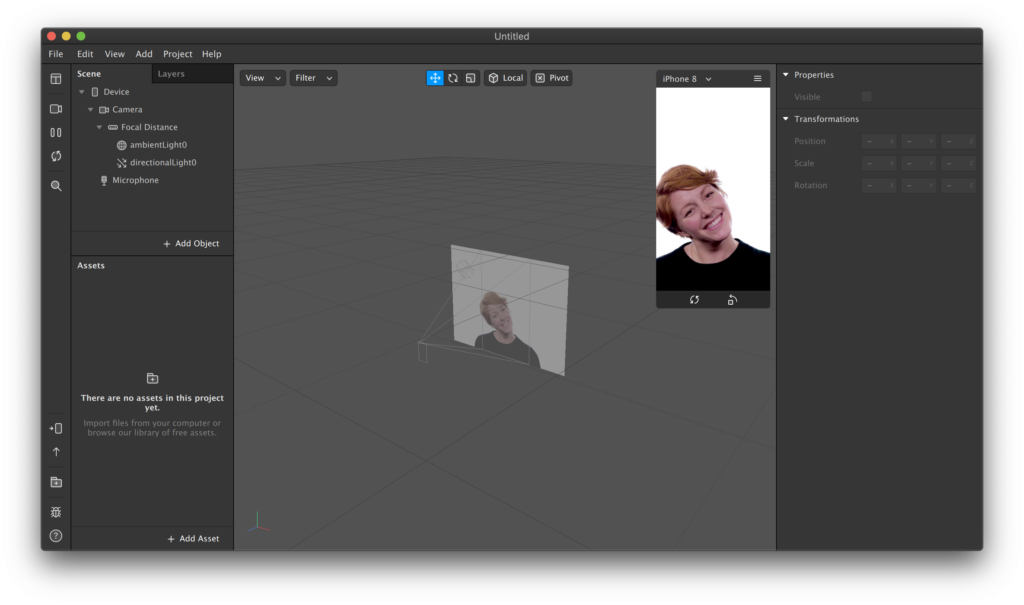
Before we start developing, let’s familiarize ourselves with the interface. The left panel consists of the Scene hierarchy on the top and the assets panel on the bottom. The central area is the 3D viewport, and the right panel is called the Inspector, which consists of the object properties.
The Scene panel contains objects—in Spark AR Studio, all visual elements are called objects. We’ll discuss them in detail later. The 3D viewport is where we can visualize our effects and see the live preview in the floating mobile simulator. And finally, the Inspector panel on the right is where we can edit the selected object’s properties. You can learn more about the interface here.
Objects, Materials, & Textures
As stated earlier, all visual elements in Spark AR are called objects. Some objects can hold materials. Materials are special elements that control in a very advanced way how something appears. Textures are just images that could be applied to materials. They can be external images or live images captured by the camera.
Let us look at the objects that we’re going to use for our Halloween effect:
- Face Tracker: As the name suggests, it tracks the user’s face.
- Face Mesh: This is an object that can hold material so that we can show an image on the face.
- Spot Light: This object is one of the few artificial lighting options available in Spark. We can use the spotlight in our effect to illuminate the face mask on the dark overlay.
- Canvas: The canvas object is mainly used to hold a rectangle or plane object. It allows the positioning of flat surface images on the screen or in 3D world space.
- Rectangle: Used as a flat surface to show images or overlays. We use a rectangle in our effect to cover the whole screen with a translucent black overlay.
- Device, Camera, Focal Distance, Microphone: These are a few of the essential default objects present in our scene.
Now that we know our ingredients, it’s time to start cooking.
Step 4:
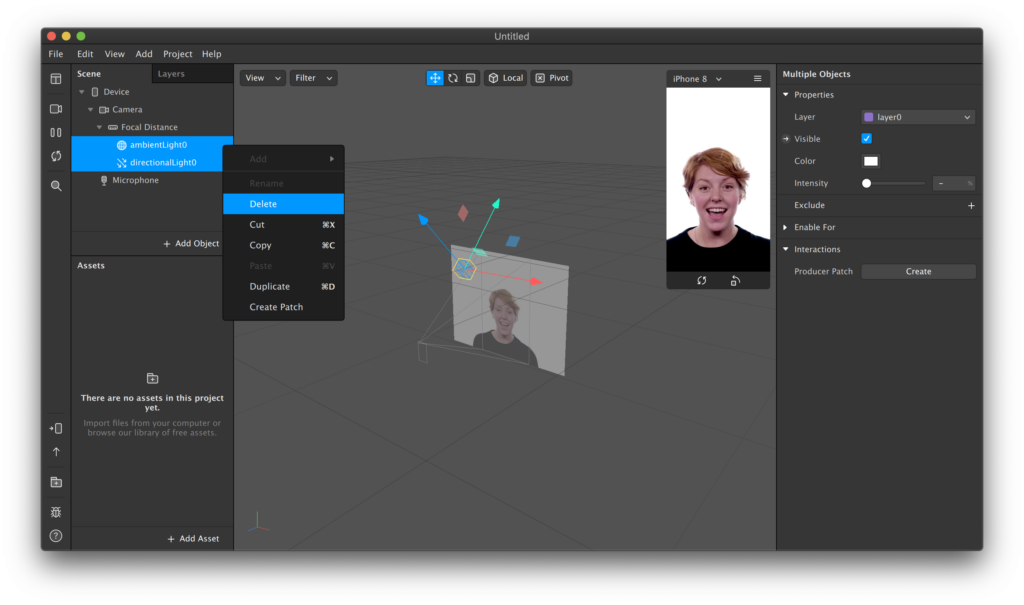
Delete the default ambientLight and directionalLight objects, as we don’t need them in our effect. You can delete an object by right-clicking on it and then selecting delete.
Step 5:
Now let’s implement our dark overlay. We’re going to use a ‘Rectangle’ object for this, as discussed earlier. Click on the ‘Add Object’ button at the bottom of the scene panel and select ‘Rectangle’.
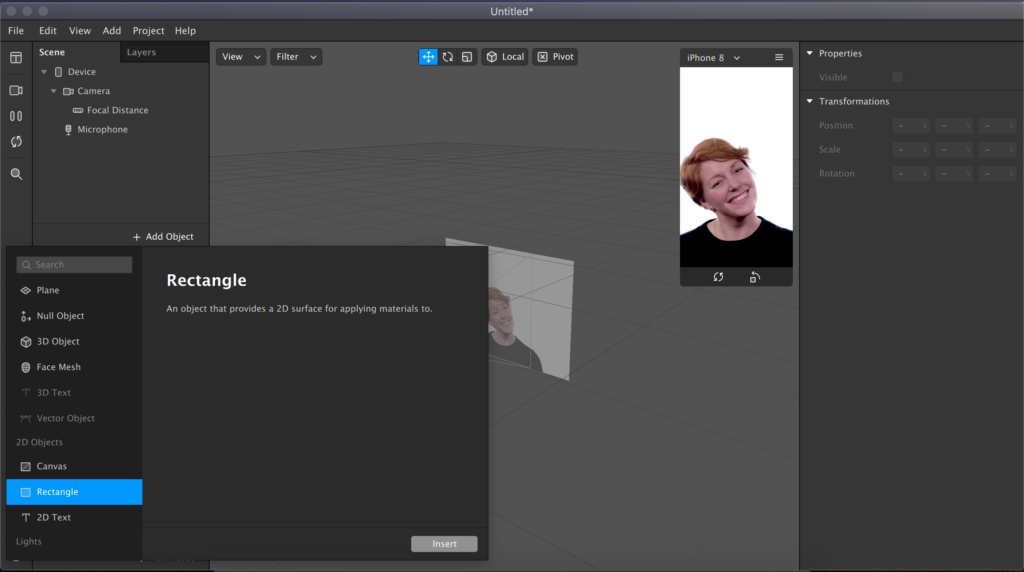
Spark AR should automatically add a Canvas along with the Rectangle inside it. This is because a Rectangle object cannot exist independently.
Step 6:
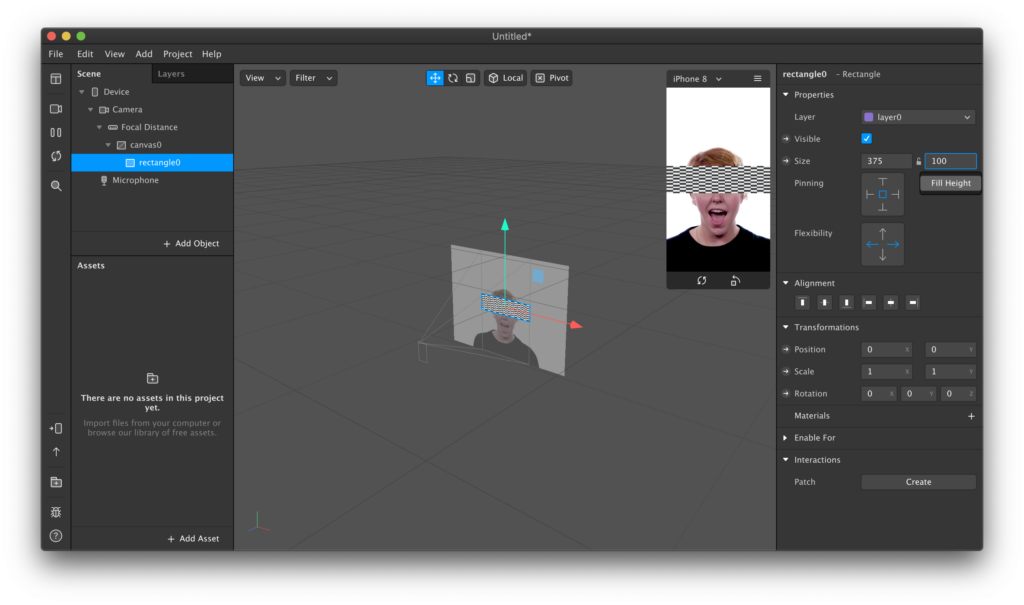
We need the rectangle to cover the entire screen. To do this, we need to change its size property in the inspector panel on the right. Next to the size property, you’ll see 2 text boxes for width and height with numbers in them. Click on each property and select ‘fill width’ from the drop-down menu. This should make your rectangle fullscreen.
Step 7:
Now it’s time to add a Material to this rectangle. We do this by clicking on the ‘+’ icon next to the Material property in the Inspector panel on the right.
This will create a new material that’s white and opaque by default. You should be able to see this newly created material in your assets panel on the bottom left named ‘material0’
The material appears to be black in color because we deleted the artificial lights at the beginning, but if you select ‘material0’ in the Assets panel, you will notice that its color property is set to white. You can click on the white color tab and select the black color from the color picker window.
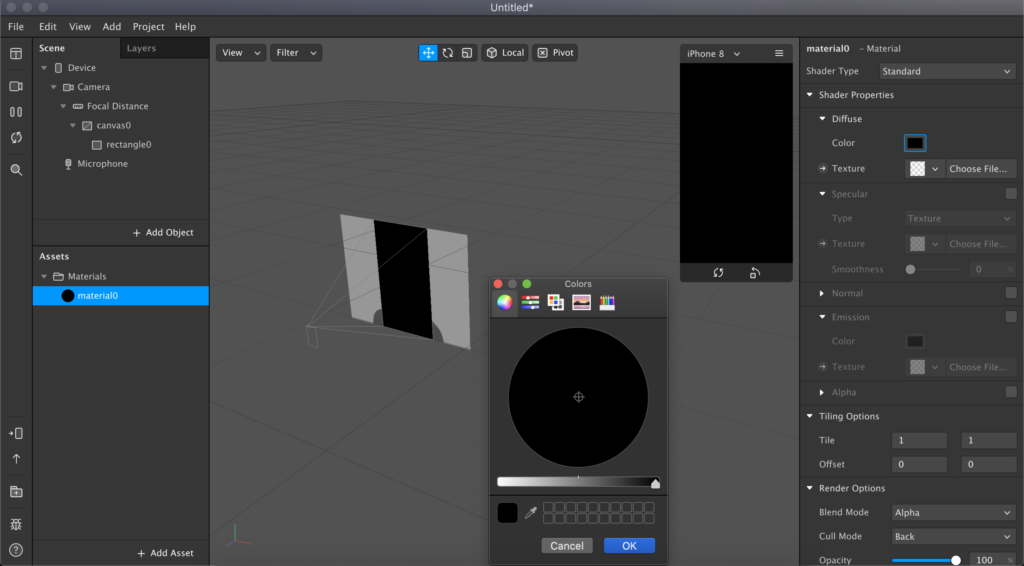
Now we need to make the rectangle translucent so we can see a bit of the original camera image. We can do this simply by lowering the opacity property slider in the Material, which is located at the very bottom of the screenshot above in the Inspector panel. You can lower it as much as you’d like.
Step 8:
Next, it is time for the face. We need to start by adding the Face Tracker object. You can add it by simply clicking the ‘Add Object’ button in the scene panel. Anything under the Face Tracker hierarchy is attached to the user’s face and moves along with the user’s movements.
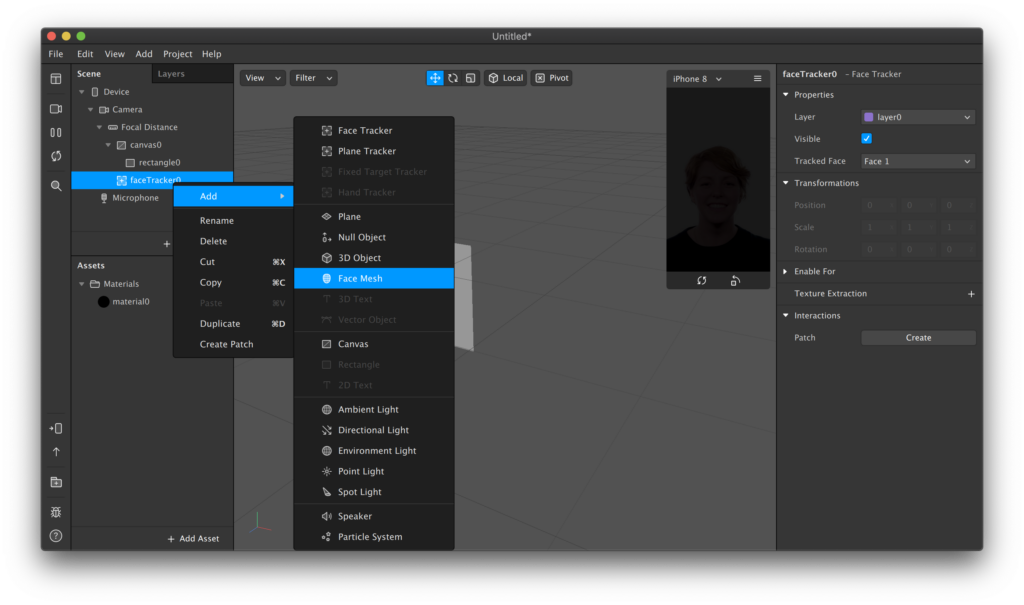
We need to add a Face Mesh object under this tracker. Select the Face Tracker in the Scene panel and add the Face Mesh like all other objects with the ‘Add Object’ button. You may also right-click the Face Tracker, select ‘add’, and choose the Face Mesh (shown in the screenshot below)
Step 9:
Now we need the image texture we want to apply on the face. I used an image from www.pixabay.com and resized it into a 1024 x 1024 px image and imported it into the Assets panel by simply dragging and dropping it there. You can get the image I used here.
Note: Spark AR Studio supports PNG and JPG texture files. Files can be a maximum of 1024×1024 pixels in size. I resized the image and aligned it with the face reference image provided by Spark.
Next, we need to add a material to our Face Mesh. We add a material the same way we did for the rectangle; however, this time in the drop-down menu, select ‘Create a New Material’
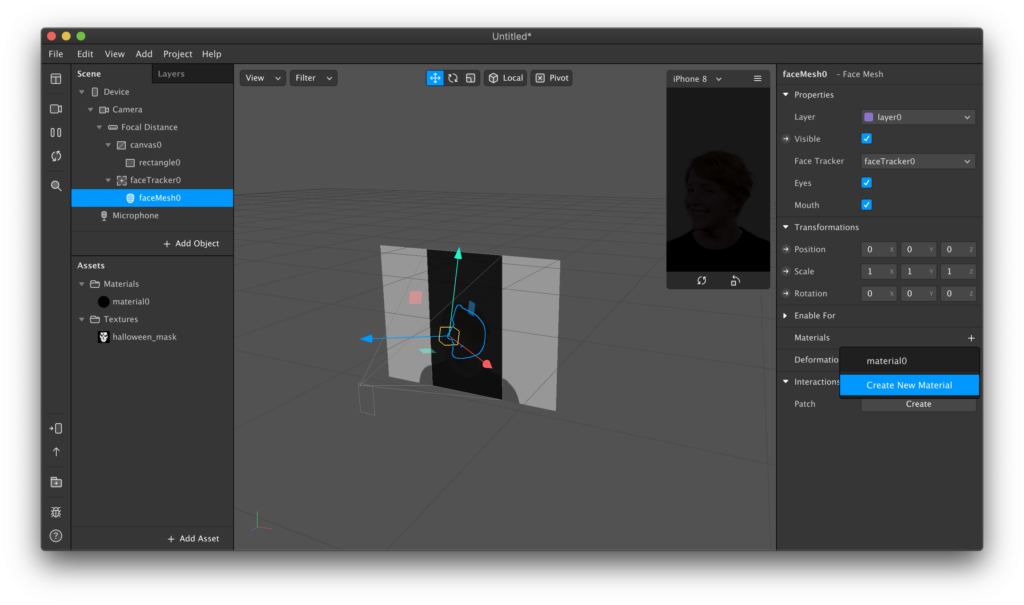
This should add a new Material in your Assets panel named ‘material1’
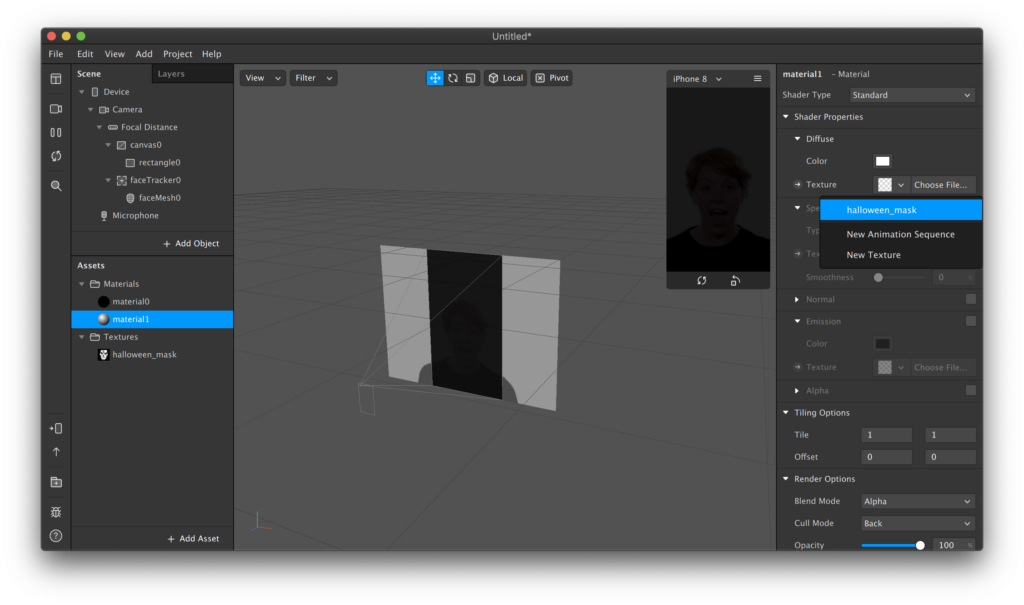
Select ‘material1’, and this time instead of changing the color, choose a texture by clicking the button below the color tab and then selecting the texture you just imported.
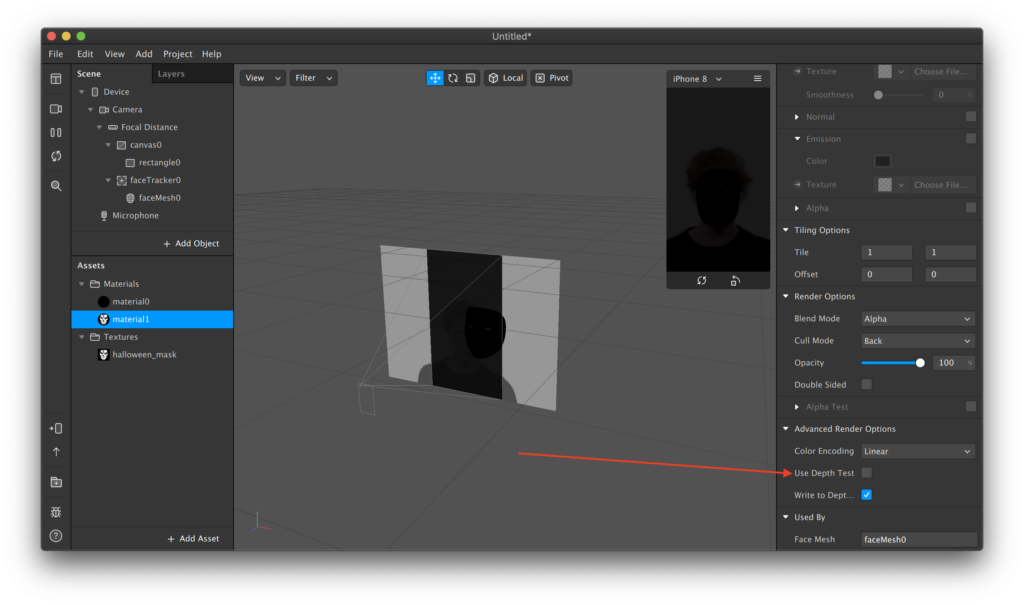
You won’t notice any change after applying the texture because of the render options. We can fix this by unchecking the ‘Use Depth Test’ checkbox for the ‘Advanced Render Options’ property of our material. This is located at the very bottom of the Inspector panel.
Step 10:
Even after fixing the render options, we see a dark black mask on the face. This is because our material shader type is set to ‘standard’ by default and we have no artificial lights to illuminate the object. You can learn more about material shader types and render options here.
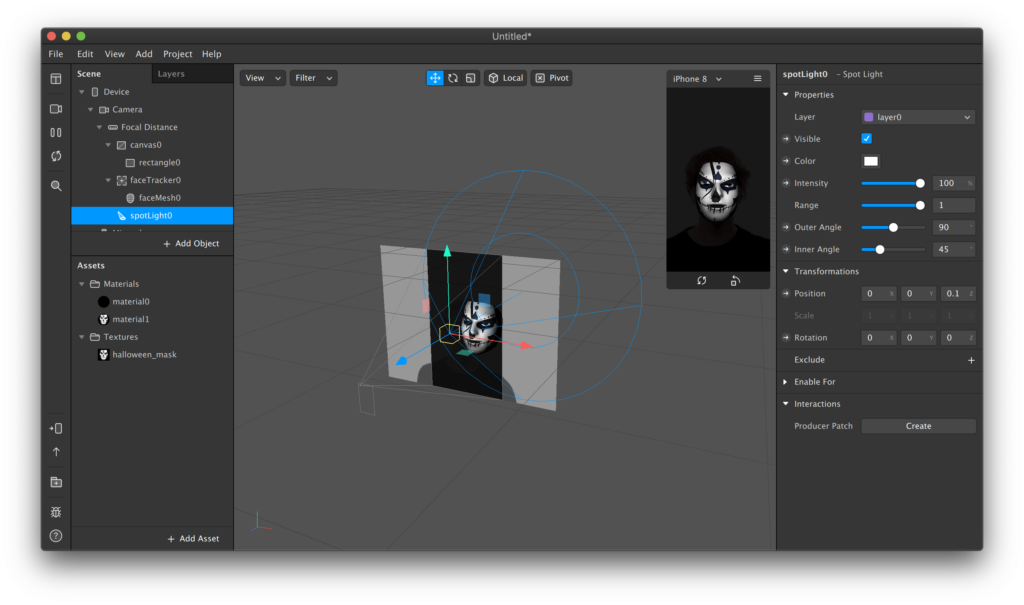
To make the mask visible, we need to add lights. We’ll add a Spot Light object in our case. You can learn about different types of lights in Spark AR by following this tutorial.
Add the Spot Light object using the ‘add object’ button in the Scene Panel.
The default Spot Light position should be perfect for our effect. You can still play with its properties to try different styles. You may want to increase the ‘Range’ property so the light covers the entire face.
Conclusion
Congratulations! you completed your first effect on Spark AR Studio, and now you’re ready to share it with your friends and family and show off your virtual Halloween costume! You can publish your effect not only on Instagram but also on Facebook.
You can follow this guide to learn about testing the effect on your device and this one for publishing.
You can check out my Instagram effects on my Instagram profile (@harshhc5).
Part 2 of this tutorial can be found here.
Future posts in this AR series will be based on advanced concepts in Spark AR, such as using the patch editor for complex effects, using 3D objects and more.
You can also check out the beginner tutorial for creating Snapchat filters here.

Comments 0 Responses