
Following up on my last blog post on training an image labeling model using Google Cloud AutoML (linked below), in this second blog post in the series; we’ll look into how to train yet another model to identify and locate objects within an image instead—an object detection model!
If you haven’t read my blog on image labeling, you can read it here:
Series Pit Stops
- Training a TensorFlow Lite Image Classification model using AutoML Vision Edge
- Creating a TensorFlow Lite Object Detection Model using Google Cloud AutoML (You are here)
- Using Google Cloud AutoML Edge Image Classification Models in Python
- Using Google Cloud AutoML Edge Object Detection Models in Python
- Running TensorFlow Lite Image Classification Models in Python
- Running TensorFlow Lite Object Detection Models in Python
- Optimizing the performance of TensorFlow models for the edge
Contrary to image labeling (or image classification), where the model labels an input image according to certain classes or categories, an object detection model will instead detect the objects (that you have trained) from an image along with their location(s).
Here’s an image showcasing the differences between these two techniques:
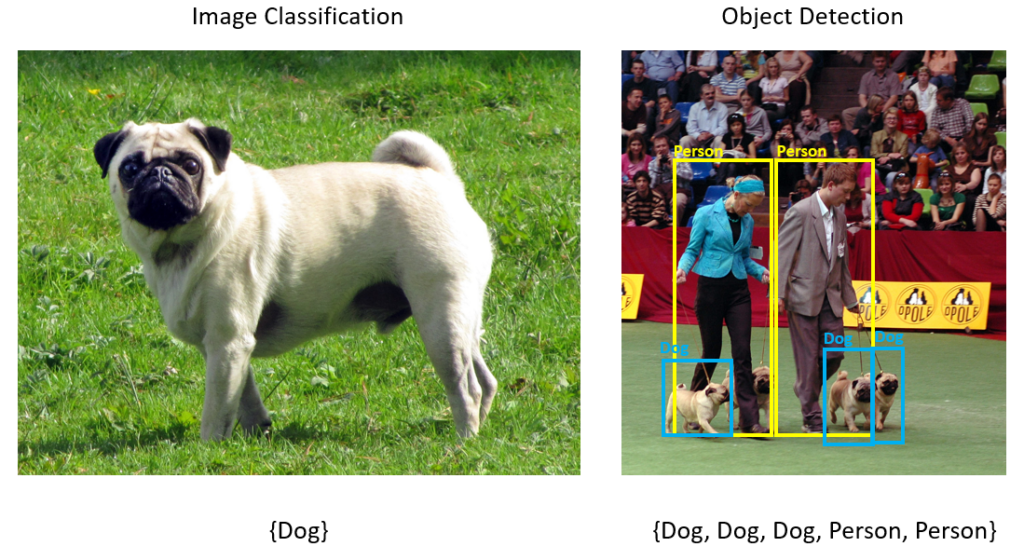
As you can see, on the right image, we not only get the detected object (a dog), but we also get the bounding box around the area containing a dog.
Such models are extremely useful when you want to do manipulate the detected objects—for example, maybe you want to extract the image of a dog from the image and replace it with something else. For such scenarios, this kind model and ML task can be extremely useful!
Training such a model might sound difficult. But thankfully, to help democratize machine learning, we have Google’s Cloud AutoML Vision, which is a tool provided by Google that can help make the process of training such a machine learning model much easier, without having to write a single line of code!
Using AutoML also eliminates the need for a high-end PC to train your model. You can quickly offload the training process to Google‘s servers and then export the trained edge flavor of the model as a tflite file to run on your Android/iOS apps.
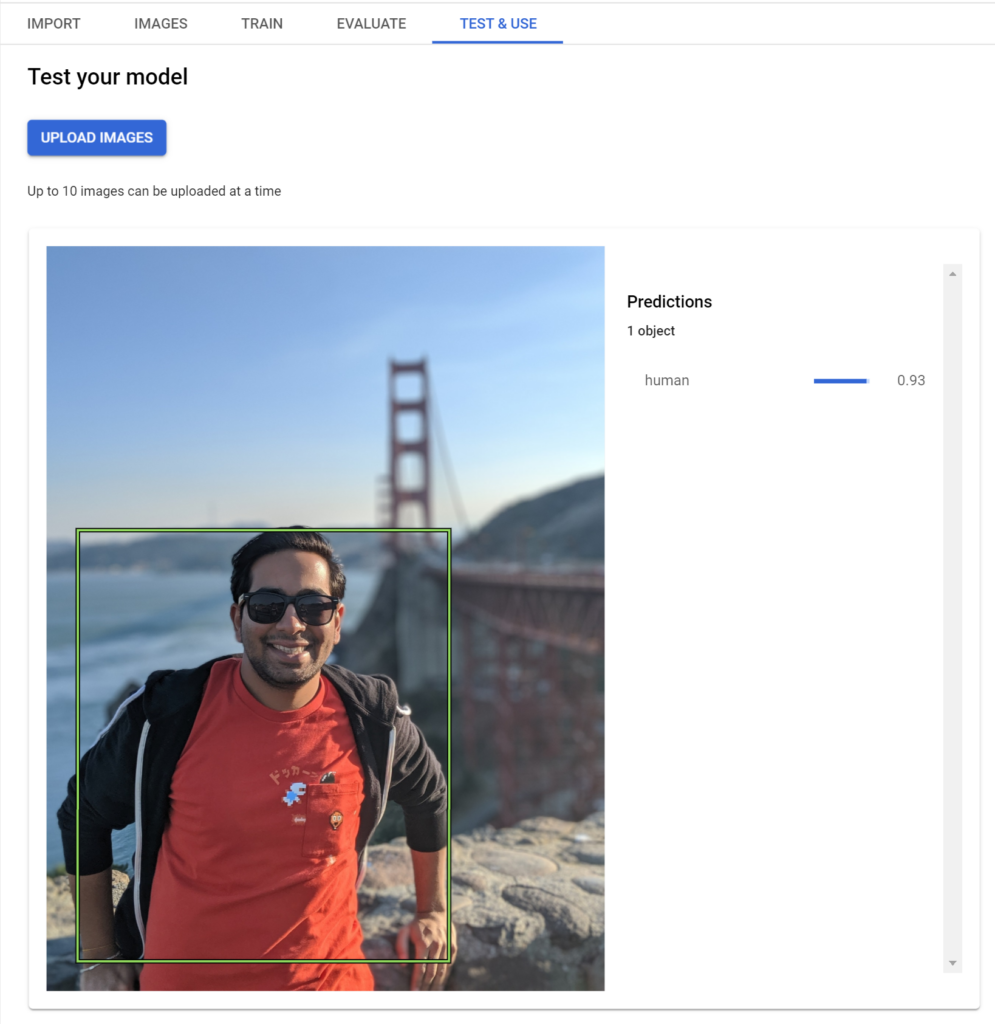
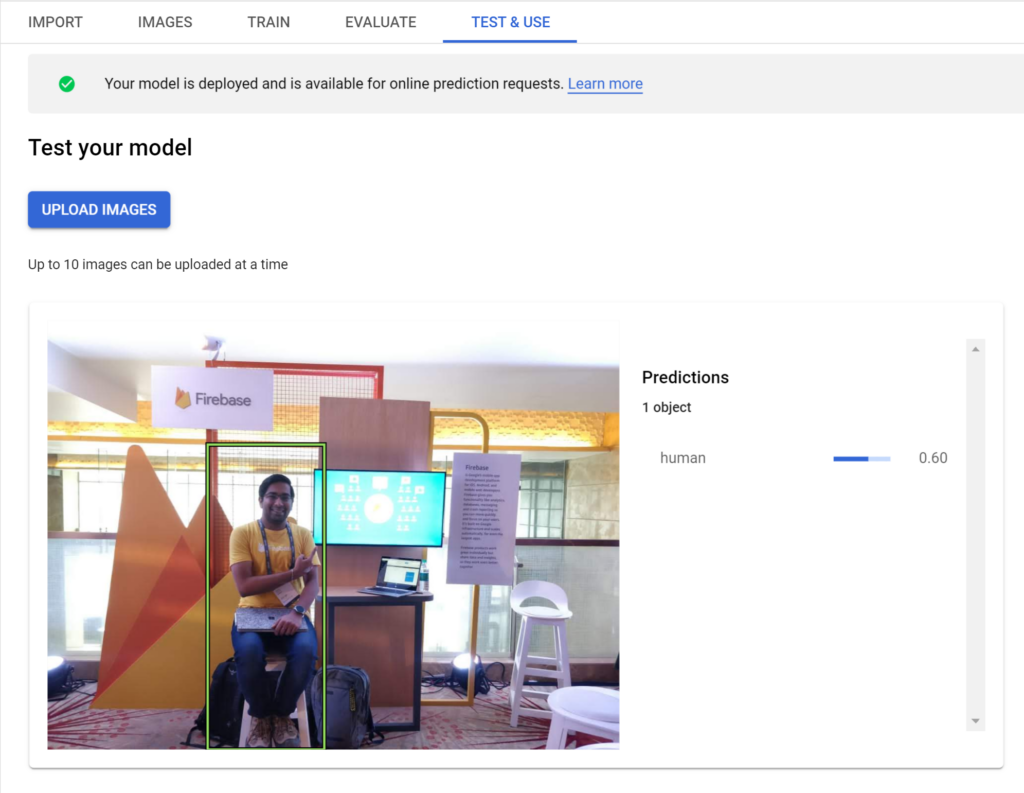
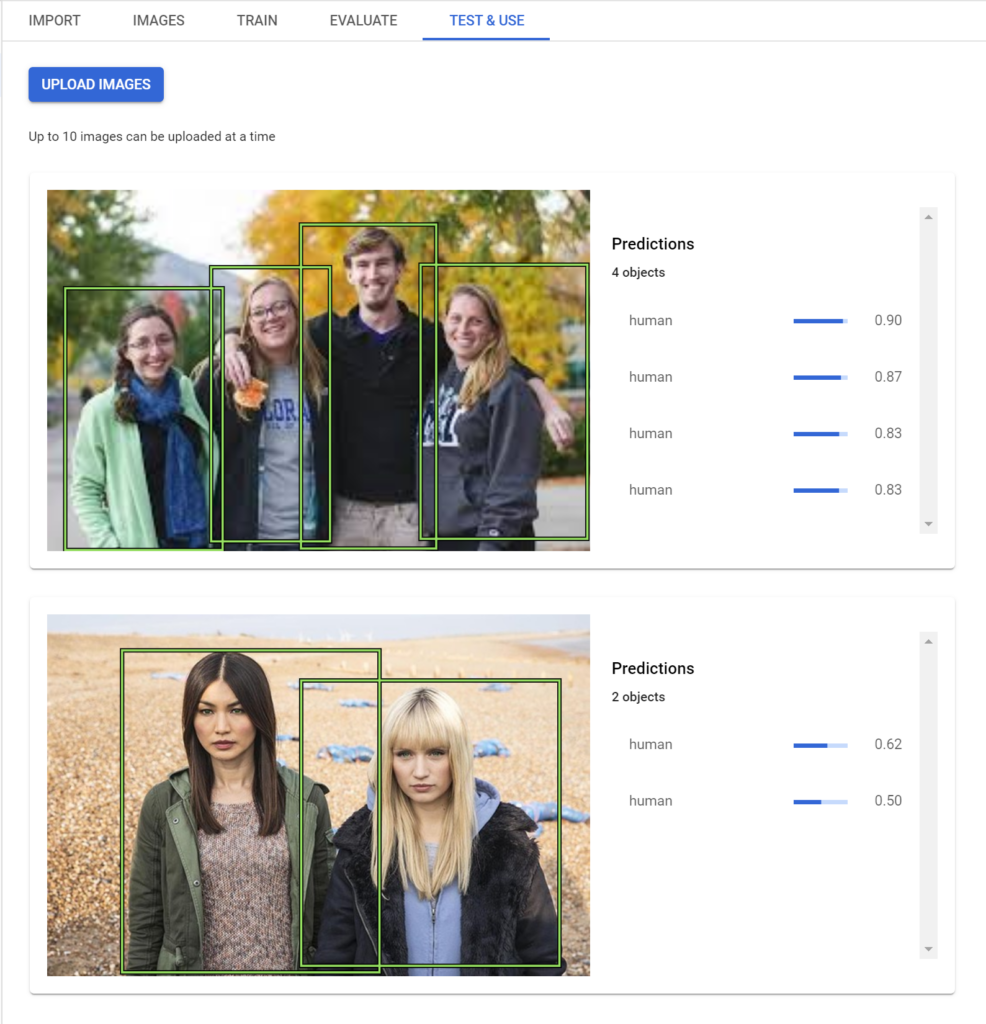
I recently used this product to train a custom object detection model for my AfterShoot app that can identify human beings from a given image. Here’s how the model performs:
Let’s now explore how we can train a similar model of our own in less than 30 minutes 🙂
Step 1: Create a Google Cloud Project
Go to https://console.cloud.google.com and log in with your account or sign up if you haven’t already.
All your Firebase projects use parts of Google Cloud as a backend, so you might see some existing projects in your Firebase Console. Either select one of those projects that are not being used in production or create a new GCP project.
Step 2: Create a new dataset for object detection
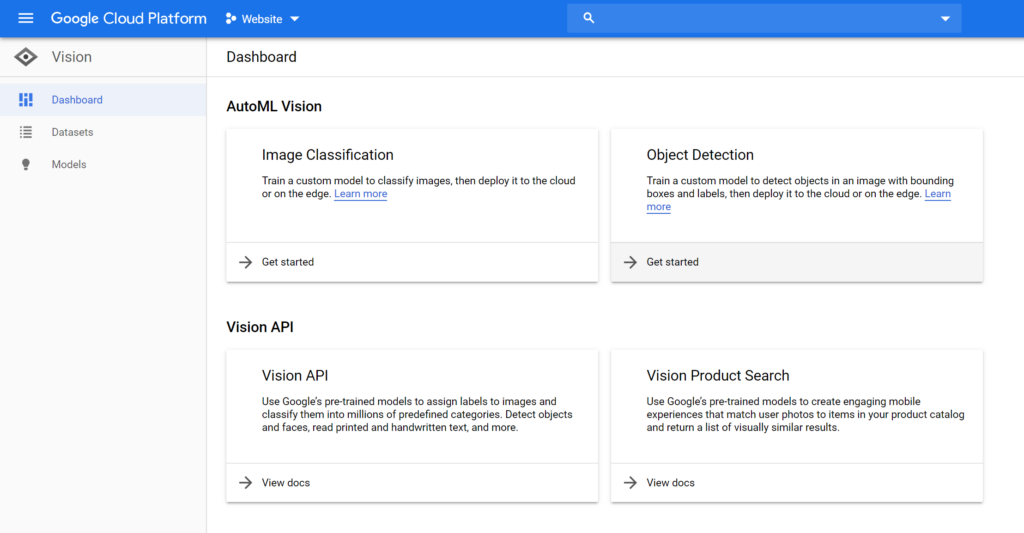
Once in the Console, open the sidebar on the right and navigate to the very bottom till you find the Vision tab. Click on that.
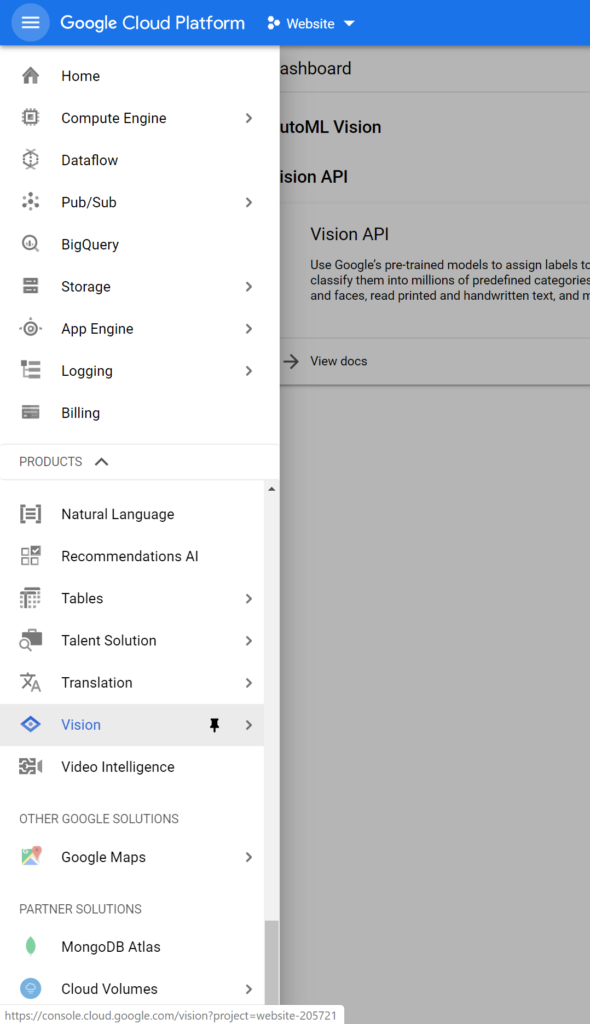
Once here, click on the Get Started button displayed on the Object Detection card. Make sure that your intended project is being displayed on the top dropdown box:
You might be prompted to enable the AutoML Vision APIs. You can do so by clicking the Enable API button displayed on the page.
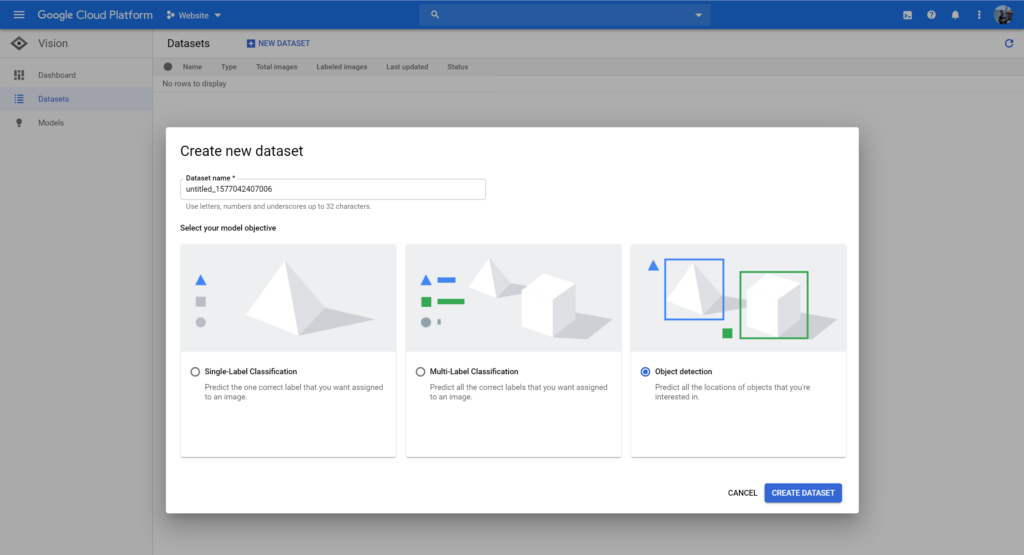
Lastly, click on the New Dataset button, give it a proper name, and then select Object Detection in the model objectives.
Step 3: Importing images
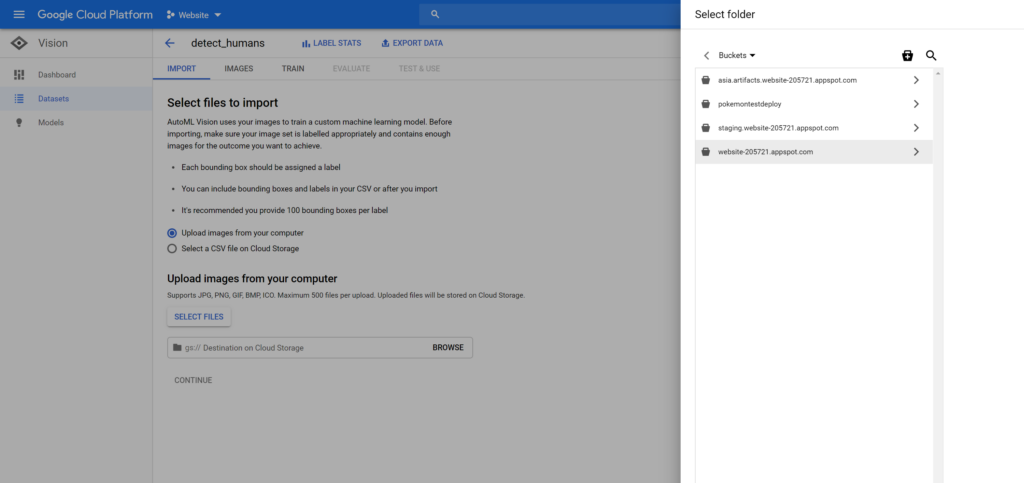
Once the dataset is created, you’ll be asked to upload some images to be used in the training process, along with the location of the Cloud Storage Bucket used to store those images.
Since this model will be used to detect humans, I’ve already prepared a dataset containing images of humans. If you want to prepare your own dataset easily, I’ve explained how to do so in a previous blog post, which you can find here:
Once you have your dataset prepared locally, click on Select Images and choose all the images that you need your model to be trained on. After this, click on the Browse button next to the GCS path and select the folder named your-project-name.appspot.com:
Once done, press Continue and wait for the import process to complete.
Step 4: Outline objects to be identified
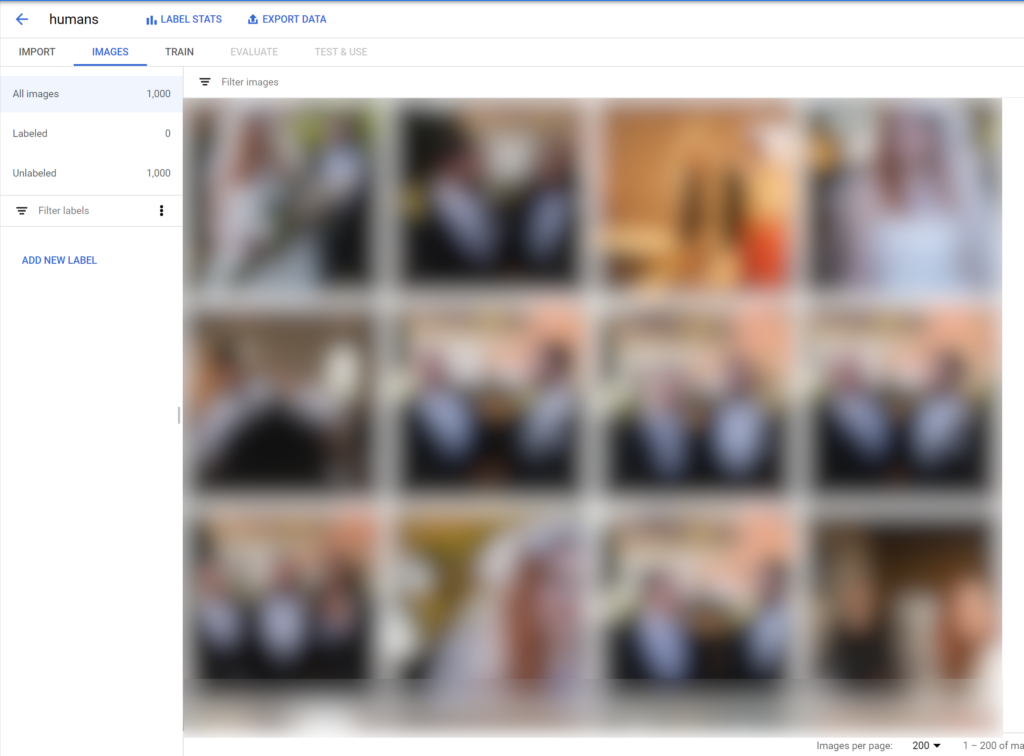
Once the importing is finished, click on the Images tab and you should see all your imported images there. From here, click on the Add New Label button and name the label(s) that you want to identify in the image. I personally want to identify humans from a picture, so I will create a single label called “human”:
Once you’ve created a label, the next step is to teach the model what a human looks like! To do this, open the imported images and start drawing bounding boxes around humans in each image:

You need to do this for at least 10 images, but Google recommends that you do it for 100 images to have better accuracy. Once you have enough images labeled, we then move on to the next and final step.
Step 5: Training the TensorFlow Lite model
Once you’ve annotated enough images, it’s time to train the model. To do this, head over to the Train tab and click the button that says Start Training.
You will be prompted with a few choices once you click on this button. Make sure that you select Edge in the first choice as opposed to Cloud-Based if you want tflite models that you can run locally.
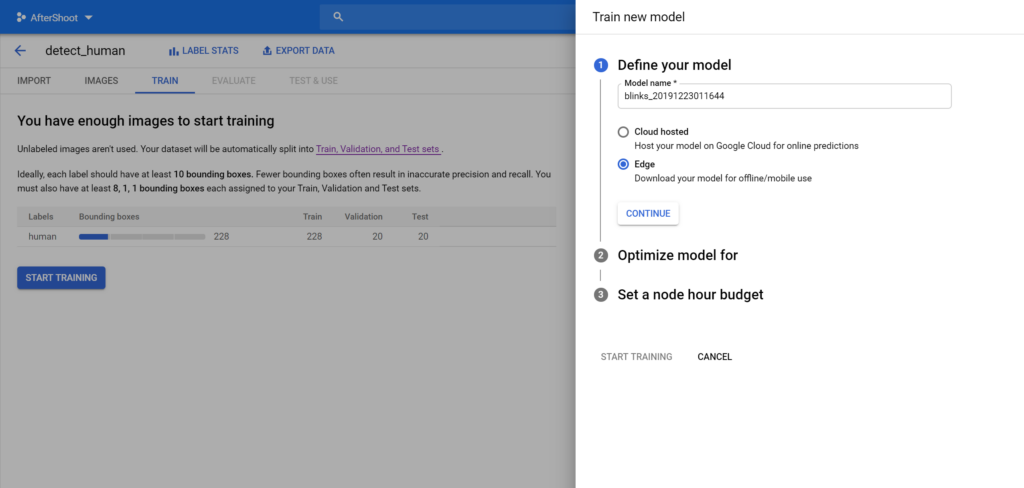
Press Continue and choose how accurate you need the model to be. Note that more accuracy means a slower model and vice versa:

Lastly, select your preferred budget and begin training. For Edge-based models, the first 15 hours of training is free of cost :

Once model training has started, sit back and relax! You’ll get an email once your model has been trained.
Step 6: Deploying and testing the trained model
Once the model has been trained, you can proceed to the Test & Use tab and deploy the trained model.
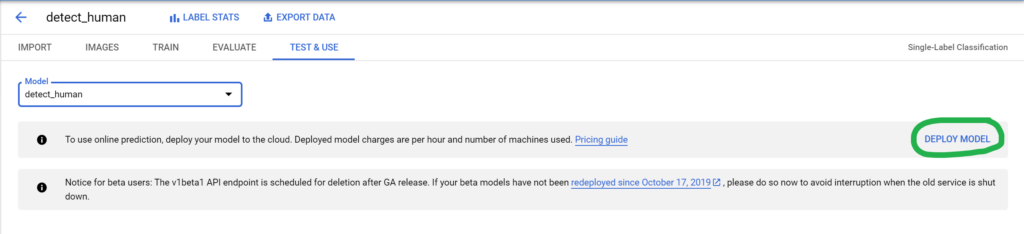
Once the model has been deployed, you can upload your images to the Cloud Console and test the model’s accuracy.
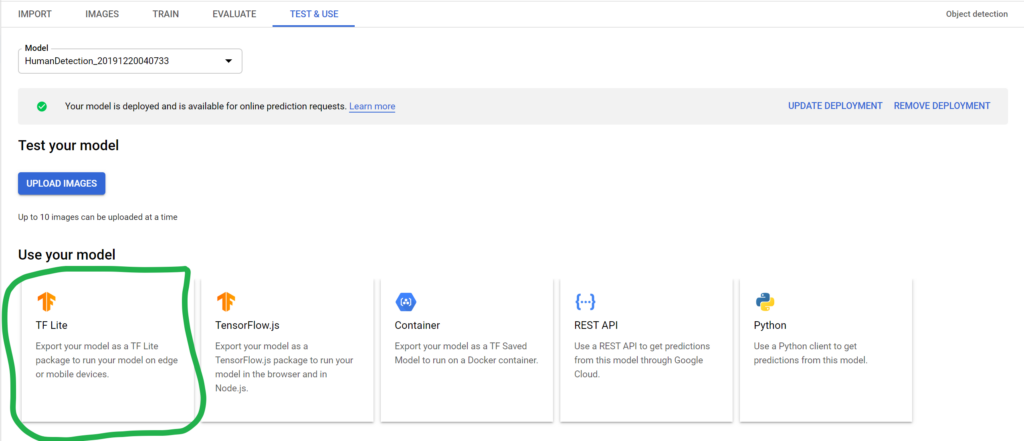
You can also download the tflite file on your local system and load it in your app to implement the same functionality there:
And that’s it! You can add more images to your dataset, annotate them, and retrain the model if you want to detect more objects or want a more accurate model.
I’ll be writing another blog post soon on how to use the obtained tflite model to detect objects in an Android app—so keep an eye out for that!
Thanks for reading! If you enjoyed this story, please click the 👏 button and share it to help others find it! Feel free to leave a comment 💬 below.
Have feedback? Let’s connect on Twitter.

Comments 0 Responses