
Welcome back to part 5 of our series exploring how to build a side-scroller mobile game with Unreal Engine 4. If you haven’t yet read part 4, I’d recommend reading it here:
In the last part, we integrated our winning and losing mechanisms. Here, we’ll work on creating a boss enemy to make our game a bit more challenging.
Creating AI enemy
To get started, open up the project in the Unreal editor. Right click on the content browser section and create a new blueprint of type “character” in in Blueprints folder (Content->SideScrollerBP->Blueprints).
Up until now, we’ve only used blueprints of type “Actor”. Whenever we want something stationary or an object in our world we should use Actor. This time we don’t want our object (enemy) to be stationary. We want it to have movement and be controlled too. A character blueprint provides us necessary API and tools to do so. Thus we have used “character” blueprint this time.
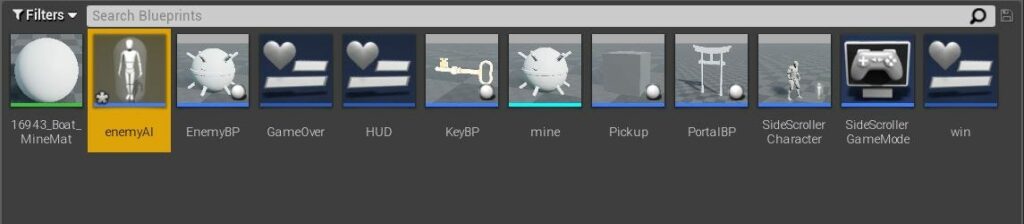
Rename it to “EnemyAI” and open it.
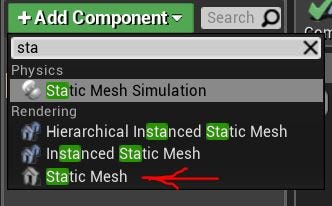
Add a static mesh component from the “add component” button.
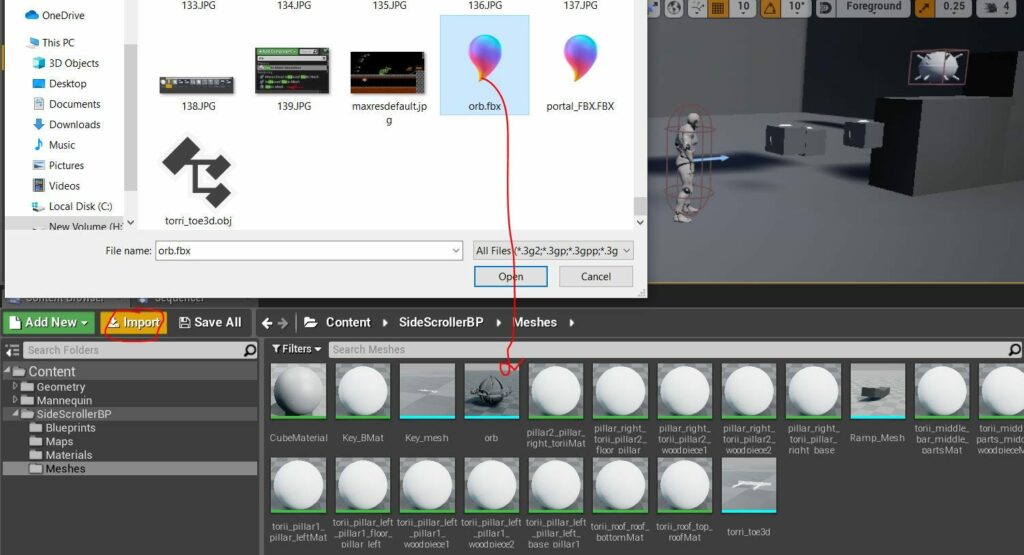
Download the “orb.fbx” asset from here:
Import it into the Unreal editor under the mesh folder. Whenever you want to use assets, think about whether the asset will fit with your game’s context. I can very well use a tank or a giant robot for the boss enemy, but it will look out of place in this game. This asset looks good enough (by good enough, I mean distinct from our current enemy) and not outside the context of this game scene.
(Note: When we turn to polishing our game—in future posts—we’ll address these kinds of things/decision more)
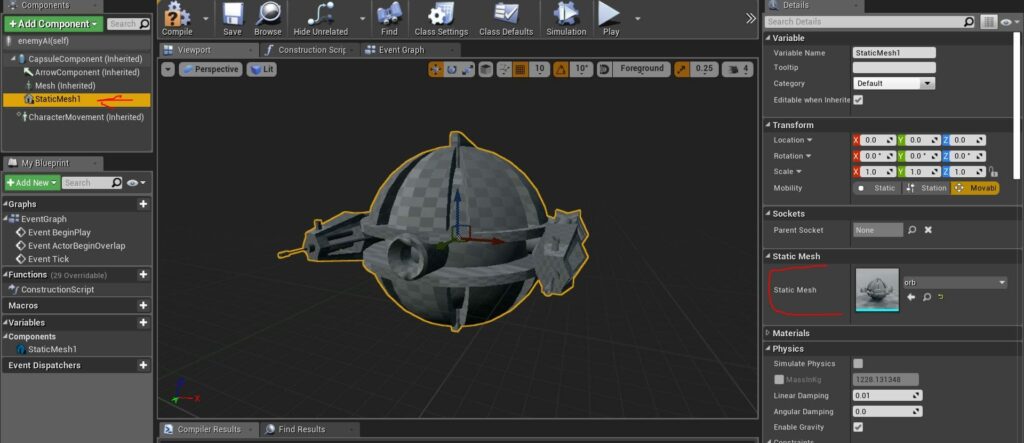
Add the orb asset to “EnemyAI” via the static mesh” component.
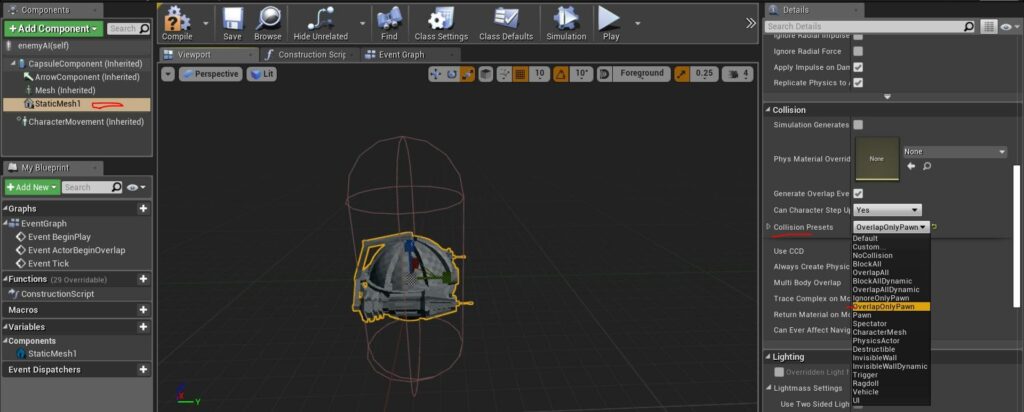
We want our enemy to only collide with our player. To make sure this is the case, we change the collision presets from “BlockAllDynamic” to “OverlapOnlyPawn”.
You can refer to this previous post on handling collisions:
Currently, our enemy looks dull, as it has no material. To fix this, set the material to “key_mat”
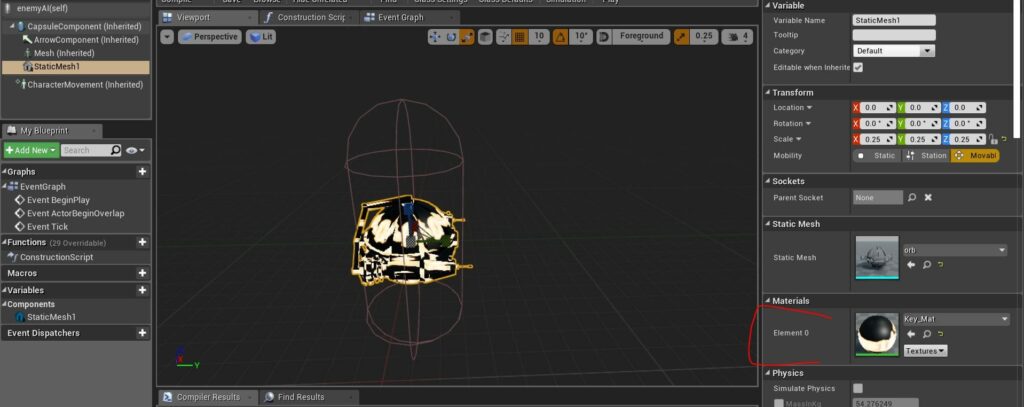
It looks better now 😀
All right…here comes the juicy part of the tutorial. Using the “add component” button, add a “pawn sensing” component.
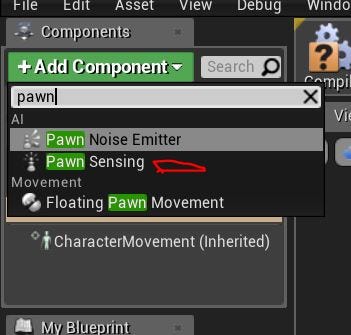
Pawn sensing provides hearing and vision sensory elements to a character. Pawn sensing is one of the basic AI components that Unreal provides to us. There are far more advanced AI tools at our disposal, like behavior trees, AI perception, etc. For our needs, though pawn sensing is enough—it’s a simple component that’s also extremely useful and powerful in creating dynamic character AIs.
The other components (behavior trees, AI perception) are really advanced but complex, too. We can use them in our case, but it will be unnecessary overhead to us. It’s like using flamethrower to light a candle—surely you can do it but it’s not feasible. A simple matchstick can do that job.

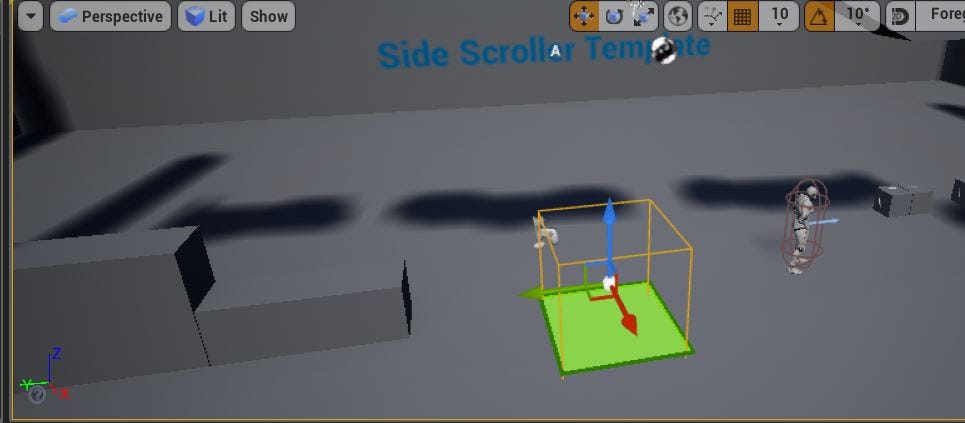
Click on compile button to see the pawn sensing properties in the editor.
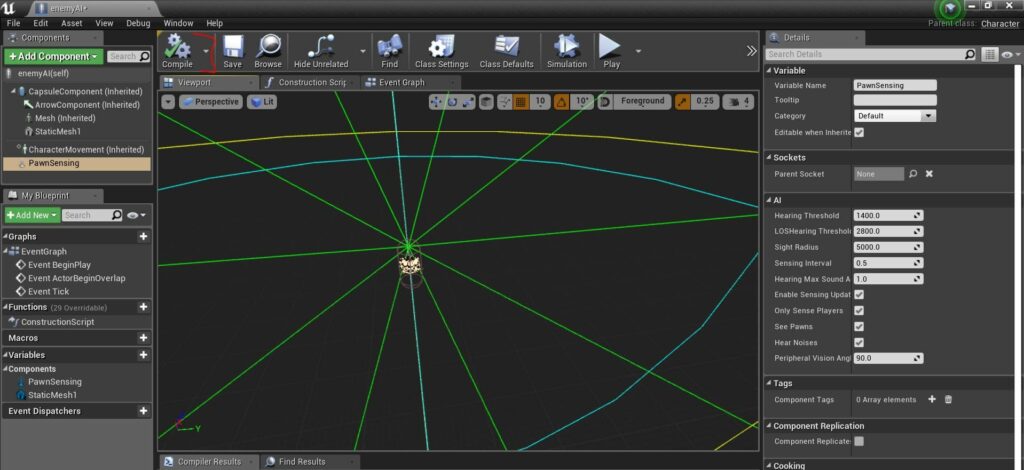
Whoa! What happened right there? To summarize:
- Green lines are the vision property of the pawn sensing component.
- Yellow lines and blue lines represent the hearing property of the pawn sensing component.
We only need a vision property for our EnemyAI. Look at the AI properties in the right panel and change the peripheral vision angle to 180.
Why 180? I want the AI to have almost same the vision as humans. This value is something I have found to be suitable for our level. There is just one simple rule that you must keep in mind when using the peripheral vision angle—the higher the angle, the bigger the field of vision.
The sight radius, then, is directly proportional to how far your AI can see.
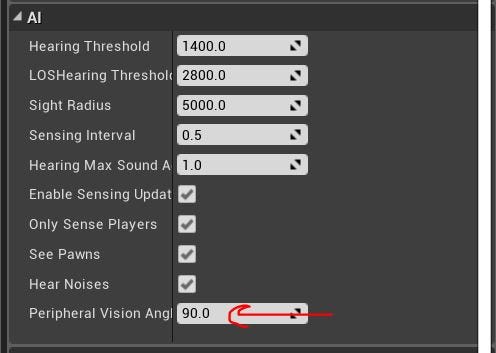
Change the sight radius to 2000 units. 1 unit equals 1cm, so 2000 units equals 20m. Compile and save. Now click on the “on see pawn” event.
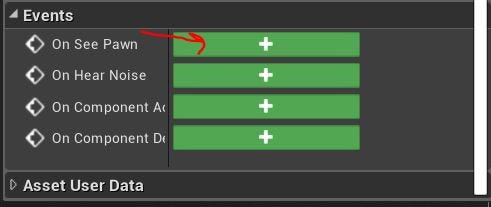
Go to event graph section of the blueprint, and you’ll see the “on see pawn” event.

Drag a node from this event and type “cast to SideScrollerCharacter”.
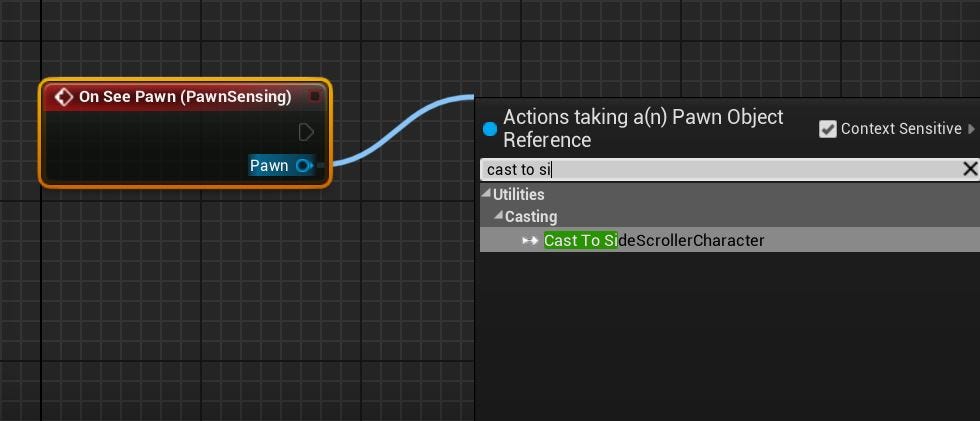
Why are we casting to SideScrollerCharacter? We want our enemy to move to our player when it senses it (i.e. sees it). For that, we’ll need the location of our player in the world. To access that information, we need to cast to the SideScrollerCharacter. Next, right click and type “AI move to”
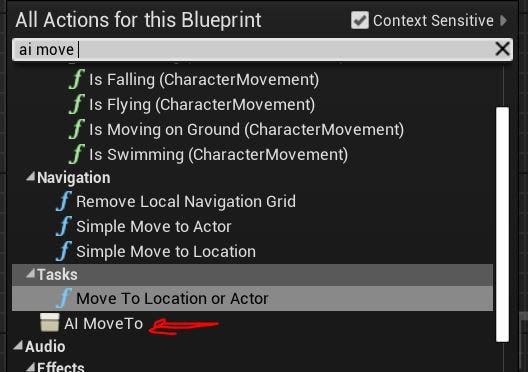
and connect the nodes as shown below.
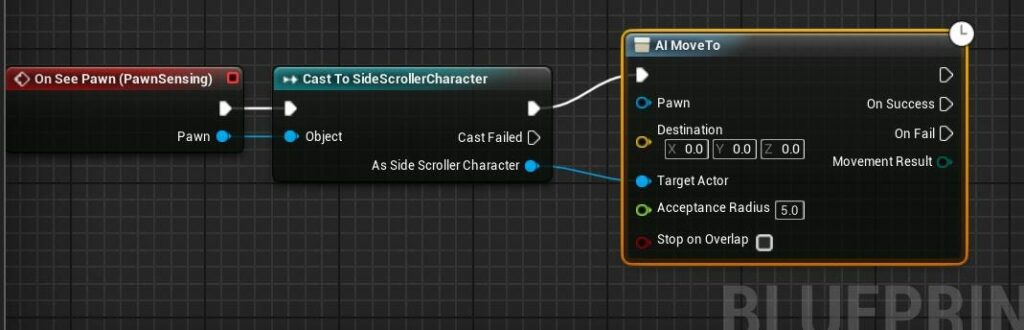
Like I mentioned previously, we want our AI to move to our player when it senses it. That’s why we connected the SideScrollerCharacter to the target actor node.
There’s one more node that we need to set— pawn. Right click anywhere in empty space and type “self”. Connect self to the pawn node. “Ai MoveTo” needs areference to which pawn should move. Self(reference to self) provides that reference to it.
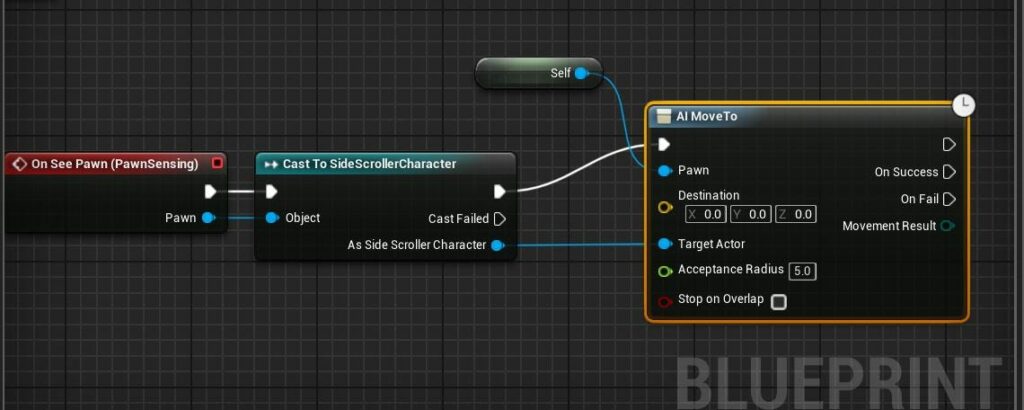
Hit compile and save. Drop the “EnemyAI” blueprint into the game scene.
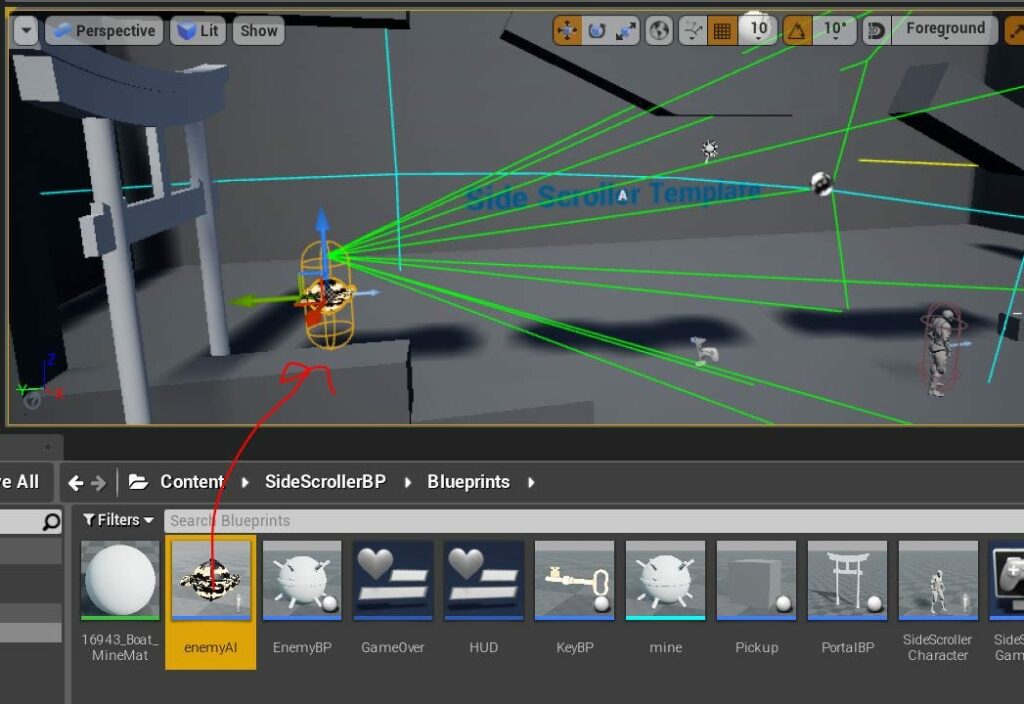
Hit the play button to test this out. You’ll notice that our EnemyAI isn’t moving at all.
If you’ll recall, at the beginning of this series, we addressed the need to tell computers everything—and that is true for game engines, too. We’ve told our AI to move to our player when it sees it, but we haven’t told it how to move. Just like we use key combinations to move our player, our AI also needs something similar.
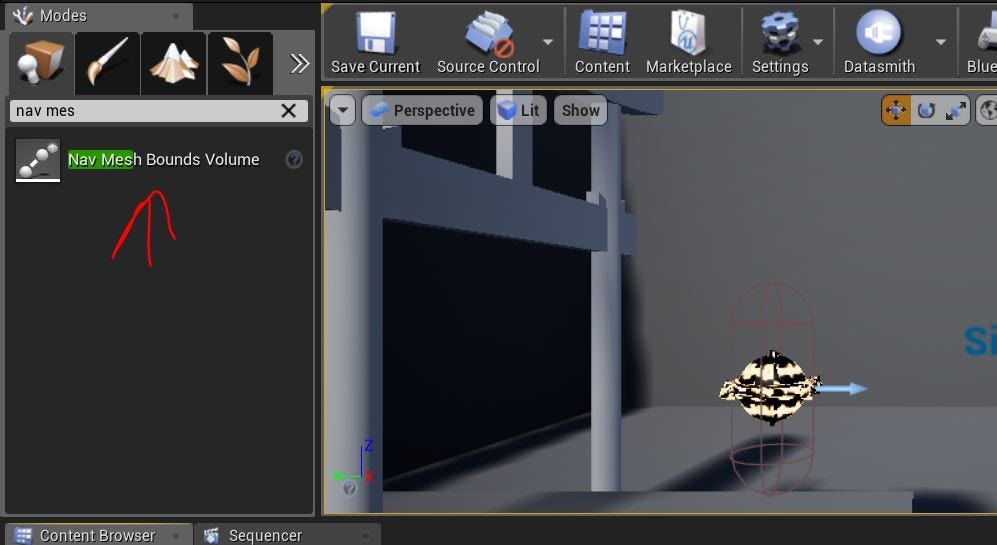
From the basic geometry section/modes, search for “nav mesh bounds volume”, and drop it in the game scene. Nav mesh bounds volume basically creates a path for our AI. It tells the AI how to move in the world. Remember your AI will only move inside the “nav mesh bounds volume”.

Now press the “p” key, and you’ll notice a green floor on the nav mesh. Make sure that “nav mesh bounds volume” is a bit below the floor level.
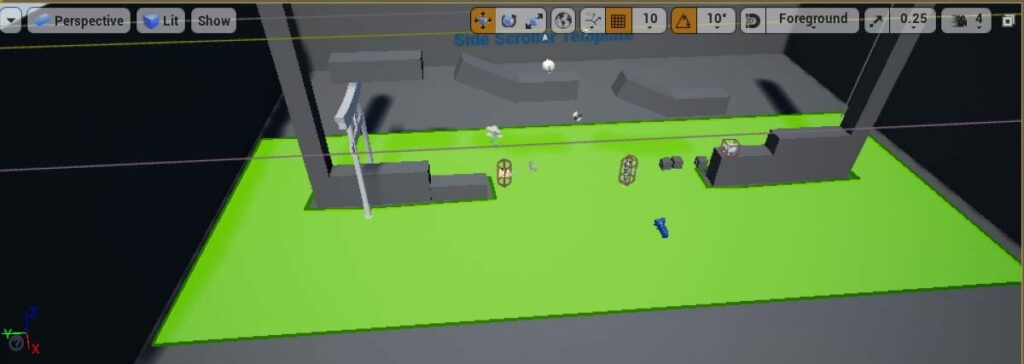
Now expand the “nav mesh volume” so that it covers the whole level. To expand, press “r” and expand the volume on all three axes (x, y, and z).
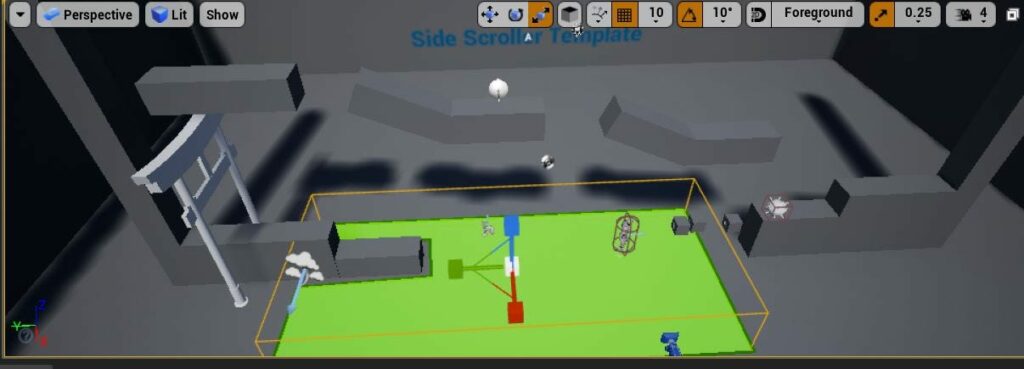
Keep expanding it until it looks something like below. Essentially, this green area represents where your AI can move on the floor.
Hit the play button to test, and you’ll see that the EnemyAI will chase your player.
Awesome! But there’s still one key thing missing. Right now, the AI is only chasing—it isn’t doing any damage to our player. Let’s fix that.
Damaging the player
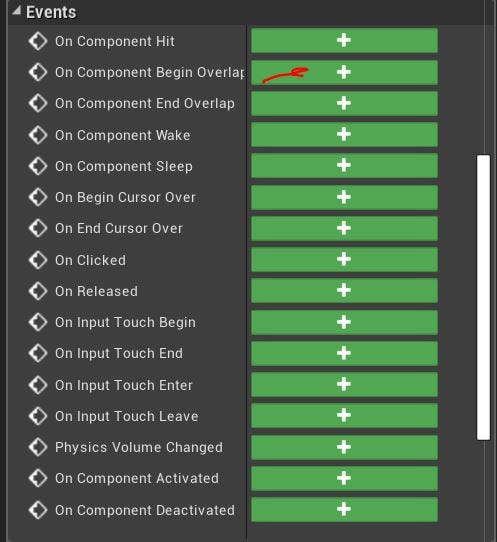
Open up the EnemyAI blueprint, go to right panel and look for the “on component begin overlap” event. Click on the “+” button.
From here, it’s pretty similar to how we calculated the damage in previous tutorials. You can refer to that tutorial here:
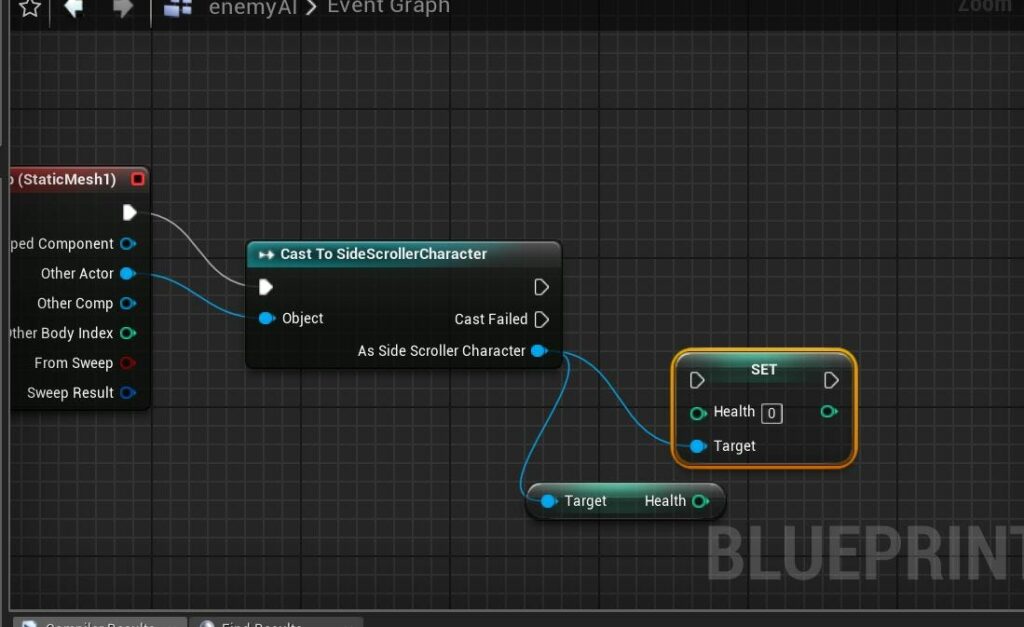
First, drag a node from “other actor” and cast it to “SideScrollerCharacter”.

Next, bring out the “get health” and “set health” from the “As side scroller character” node.
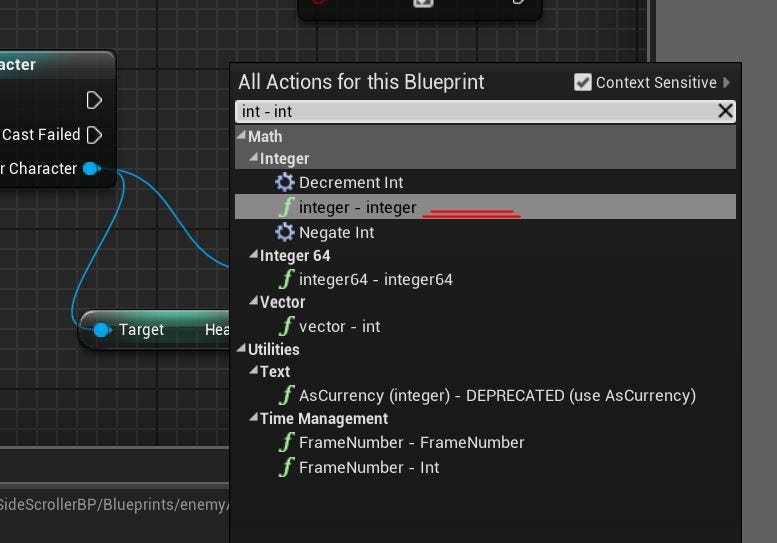
Create a branch node by pressing “Ctrl + B”. Also create an “int-int” , “int > int” node by again right clicking and typing “int-int” and “int > int” respectively. We need to calculate the damage and update the existing health. If the health reaches zero we want the player to die.
From here onward, it’s similar to how we connected nodes for previous enemies. Your final BP should look something like this
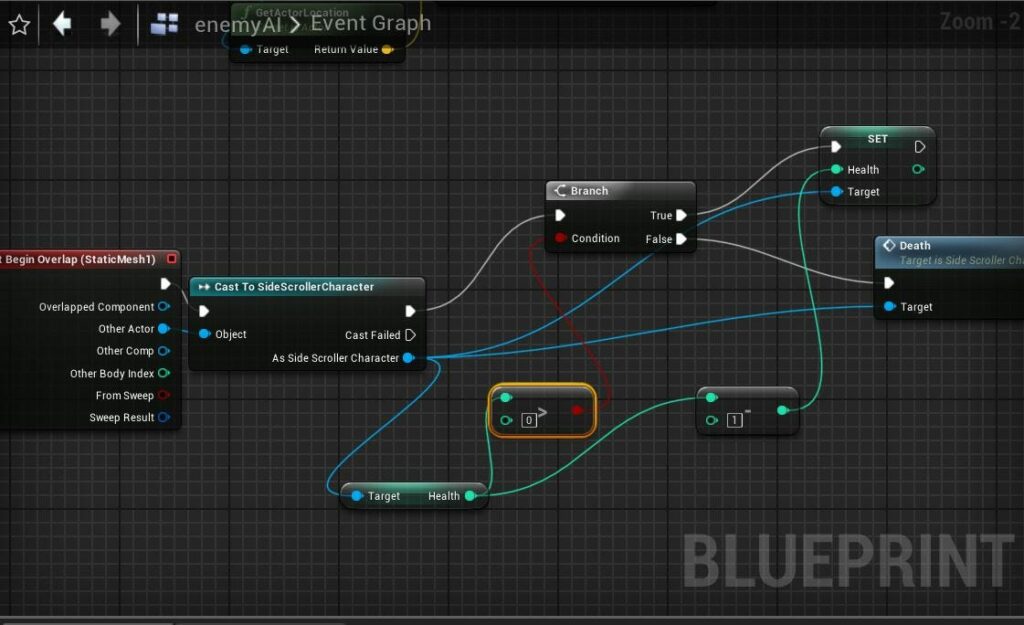
Change the value of “1” from “int-int” to do more damage to player. I will change it to “10” .
Compile and save. Hit the play button to see the AI in action. Notice how the various elements we’ve added here are working together:
- Our EnemyAI can move and chase our character.
- Our EnemyAI can deal damage to our player when colliding with our player.
Defeating the boss enemy
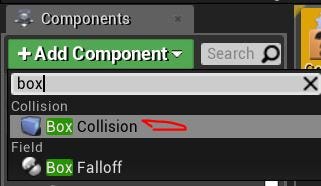
We don’t want our “boss enemy” to be invincible. If you’ve played Mario in the past, I hope you remember how to kill an enemy. You jump on top of it’s head. We’ll create that same mechanism for our “boss enemy”. Open the “EnemyAI” blueprint and add a new “box collision” component. We’ll use an invisible box that can detect collision.
Next, adjust the box on top of our mesh.
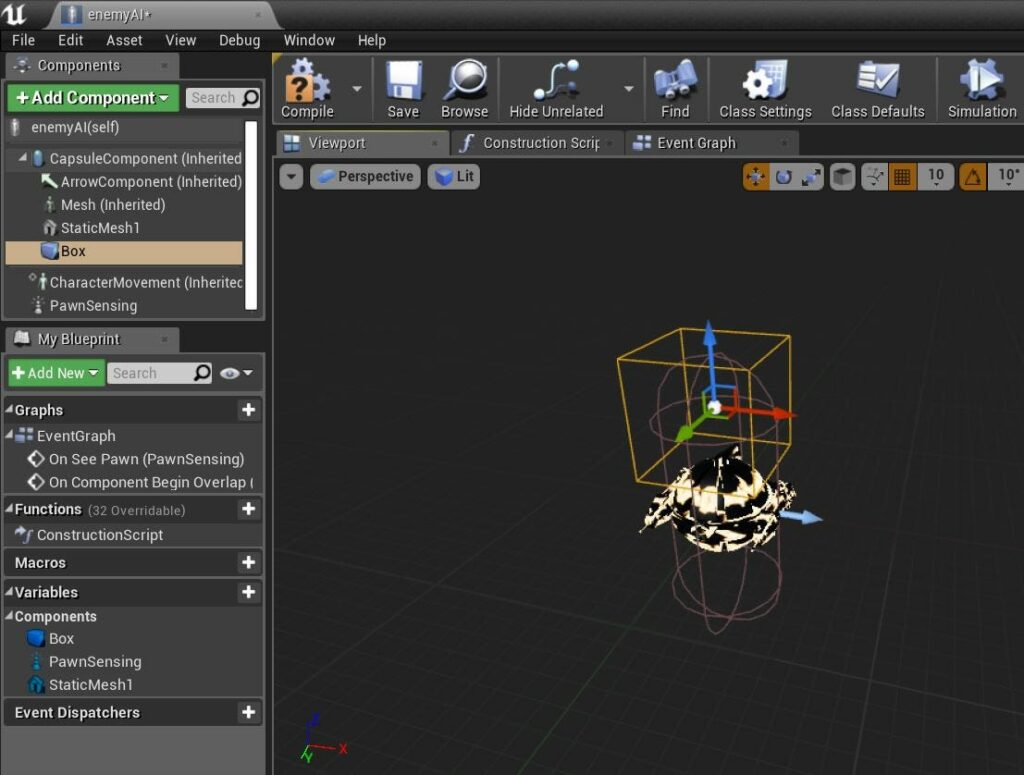
The box is currently too big. Adjust it’s dimensions like below so that it just fits the head of our mesh.

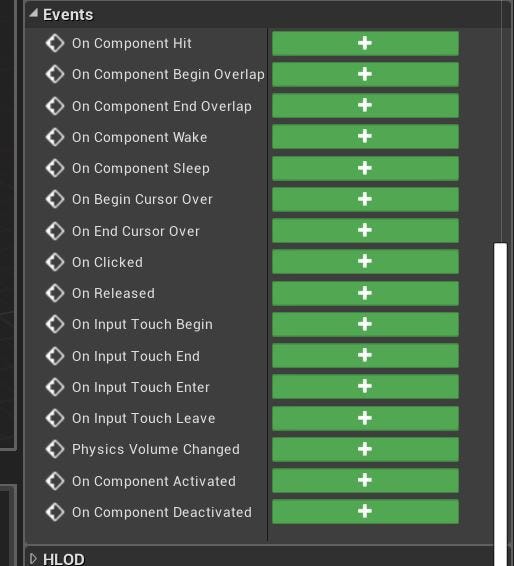
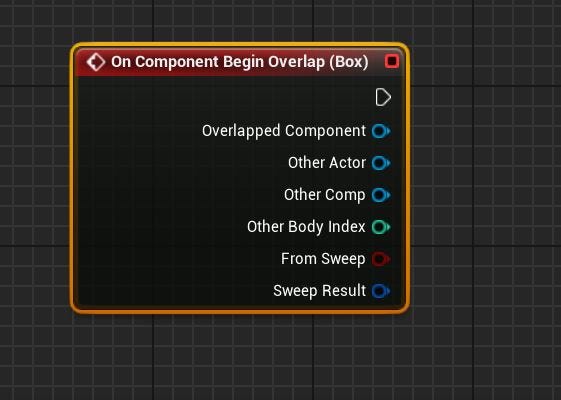
Scroll down the right panel and find the event “on component begin overlap” and click on the “+” icon.
Switch to event graph section of blueprint you will see a new node: “on component begin overlap”.
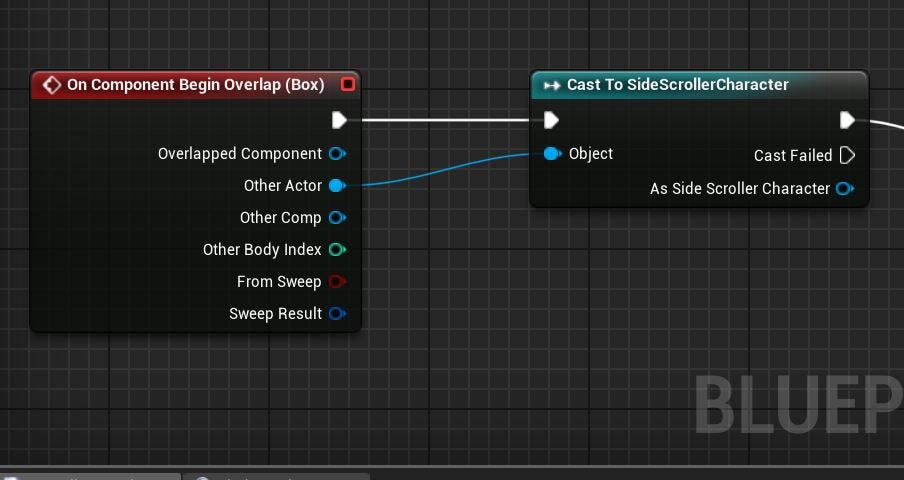
Cast it to “SideScrollerCharacter”—we want to kill our boss only when our player jumps on top of it.
Next, right click on empty space and type “destroy”. Connect the nodes like below.
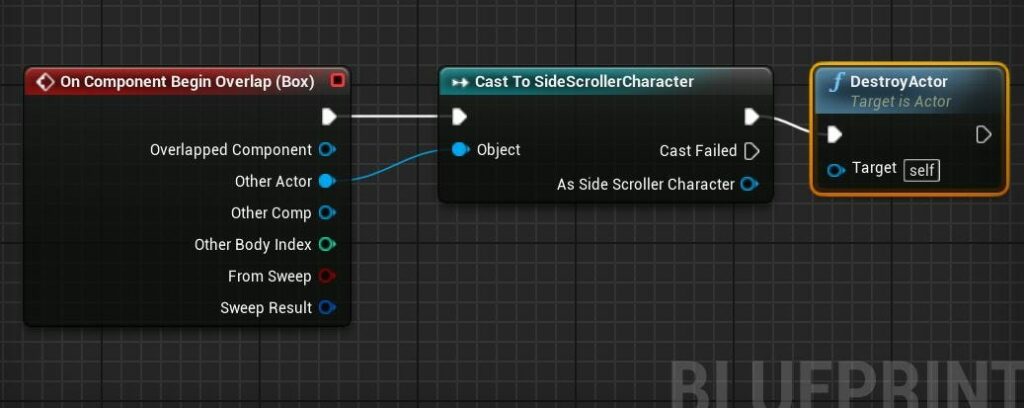
Compile and save. Hit the play button.
Awesome! we can kill our boss enemy.
What’s Next
Our “boss enemy” is now complete. In the next part of this series, we’ll finally try to run our game on an Android device. Following that implementation, we’ll explore some ways we can add polish to our game.
Have some suggestions ? Let’s connect Twitter, Github, LinkedIn

Comments 0 Responses