
In this blog post, I’ll be covering the steps to create an Android app that’s able to detect and count objects from the Camera Preview in real time.
There are tons of real-time object detection tutorials out there, so you might be wondering, How is this one any different? One key difference is that, instead of just detecting objects, we’ll also be counting objects in a given frame, opening up a much wider range of possible applications.
For example, imagine you’ve developed an app that suggests recipes to users based on the items they have at their disposal. By counting objects using camera-based, real-time object detection, you could empower your users to simply point the camera at the ingredients they have, and voilá!
Using an algorithm like this, the app would not only detect the ingredients but also identify the correct amounts needed for a recipe. So for instance, users could easily and seamlessly determine they don’t have enough apples for a pie or that they need more garlic for a delicious pasta sauce.
The magic of mobile machine learning has just made your users’ cooking or baking experience more convenient, more personalized, and more fun.
The best part about counting objects using real-time object detection is that inference happens on the device, without an active Internet connection. And the good news for us developers is, it won’t take us very long to do! We’ll try to finish the app in less than 5 minutes of coding!
Here’s a video showing what the finished app will look like:
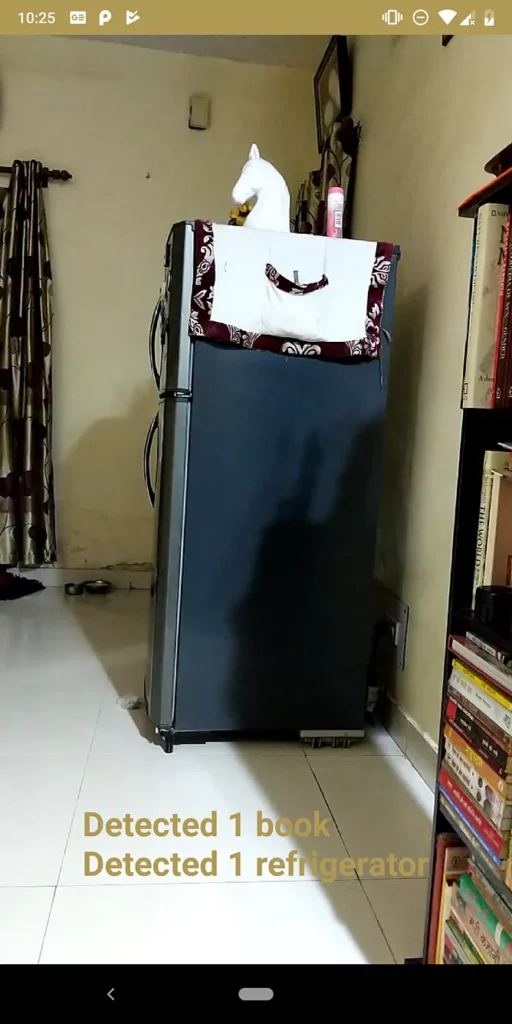
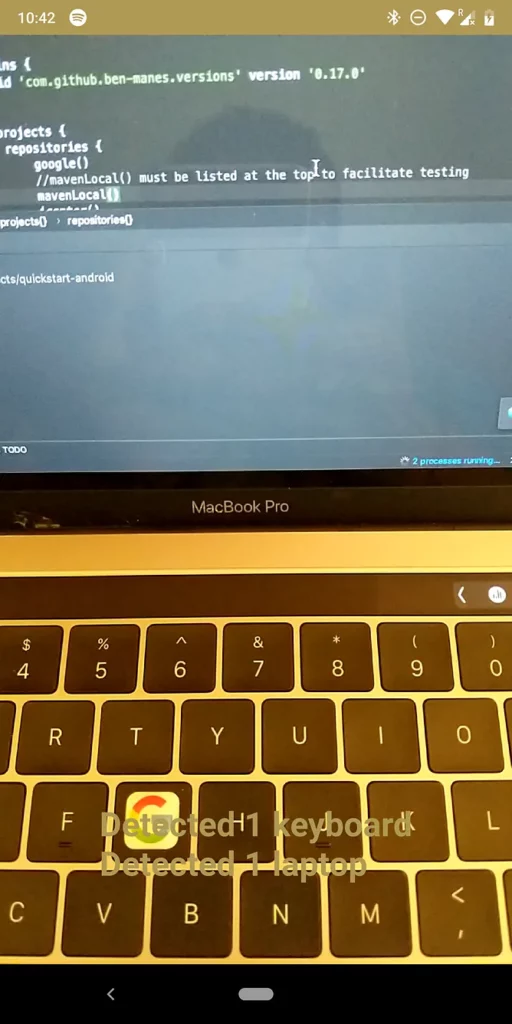
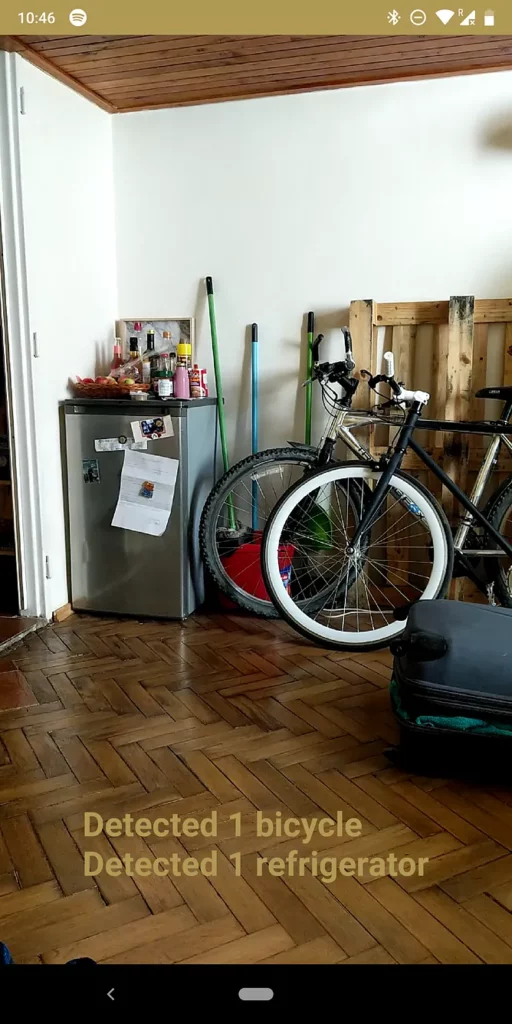
Some Screenshots :
If that’s got you excited, then let’s start with the implementation part of the app!
Step 1: Create a new Android Studio Project and add the necessary dependencies
First, we need to create a new Android Studio project and add the relevant dependencies to it:
- Fritz Object Detection:
2. CameraView to get the camera preview:
Step 2: Creating a basic layout and adding the camera preview
We need to create a basic layout in our app that hosts a Camera Preview and lets us interact with it.
<?xml version="1.0" encoding="utf-8"?>
<FrameLayout xmlns:android="http://schemas.android.com/apk/res/android"
    xmlns:tools="http://schemas.android.com/tools"
    android:layout_width="match_parent"
    android:layout_height="match_parent"
    tools:context=".MainActivity">

    <com.otaliastudios.cameraview.CameraView
        android:id="@+id/cameraView"
        android:layout_width="match_parent"
        android:layout_height="match_parent" />

    <TextView
        android:textSize="24sp"
        android:textStyle="bold"
        android:textColor="#fff"
        android:id="@+id/tvDetectedItem"
        android:layout_width="wrap_content"
        android:layout_height="wrap_content"
        android:layout_gravity="center" />

</FrameLayout>
Step 3 : Start the Camera Preview
This is super simple: go to your activity and start the preview in your onStart lifecycle method.
class MainActivity : AppCompatActivity() {

  override fun onCreate(savedInstanceState: Bundle?) {
        super.onCreate(savedInstanceState)
        setContentView(R.layout.activity_main)
        Fritz.configure(this) //Initialize the Fritz SDK
    }

      override fun onStart() {
        super.onStart()
        cameraView.start()
    }

    override fun onStop() {
        super.onStop()
        cameraView.stop()
    }
}
At this point, if you run the app, you should see a screen that shows you a continuous preview of your Camera.
Next up, we’ll be adding a method that gives us these preview frames so we can perform some machine learning magic on them!
Step 4 : Add a FrameProcessor to your CameraView to get the live frames from the preview
On our CameraView, we can add a FrameProcessor that gives us the captured frames and lets us perform ML inference on those frames.
The code for doing that is pretty straightforward:
class MainActivity : AppCompatActivity() {

  override fun onCreate(savedInstanceState: Bundle?) {
        super.onCreate(savedInstanceState)
        setContentView(R.layout.activity_main)
        Fritz.configure(this)

        cameraView.addFrameProcessor { frame ->
             //This returns a frame, which cann be used to retrieve the preview
        }
    }
}
Step 5 : Convert the frame to a Bitmap
This step is somewhat tricky because the frame that we receive contains the ByteArray for preview, but that ByteArray is of NV21 format.
The Fritz SDK reads only bitmaps, so we need to convert this ByteArray to a Bitmap readable format.
The following code does this, but in case you want to know more about the process, please check the following Stack Overflow discussion thread.
class MainActivity : AppCompatActivity() {

    private lateinit var renderScript: RenderScript
    private lateinit var yuvToRGB: ScriptIntrinsicYuvToRGB
    private var yuvDataLength: Int = 0
    private lateinit var allocationIn: Allocation
    private lateinit var allocationOut: Allocation
    private lateinit var bitmapOut: Bitmap

    override fun onCreate(savedInstanceState: Bundle?) {
        super.onCreate(savedInstanceState)
        setContentView(R.layout.activity_main)
        Fritz.configure(this)
         cameraView.addFrameProcessor { frame ->
            if (yuvDataLength == 0) {
                //Run this only once
                initializeData()
            }
            //Camera Preview returns NV21, so convert it to Bitmap :
            //https://stackoverflow.com/a/43551798/5471095
            allocationIn.copyFrom(frame.data) //Take the NV21 format
            yuvToRGB.forEach(allocationOut)  //Convert it to Bitmap readable format
            allocationOut.copyTo(bitmapOut)   //Set it to the empty Bitmap created earlier
        }
    }

  private fun initializeData(){
        yuvDataLength = cameraView.previewSize?.height!! * cameraView.previewSize?.width!! * 3 / 2
        renderScript = RenderScript.create(baseContext)
        yuvToRGB = ScriptIntrinsicYuvToRGB.create(renderScript, Element.U8_4(renderScript))
        allocationIn = Allocation.createSized(renderScript, Element.U8(renderScript), yuvDataLength)
        bitmapOut = Bitmap.createBitmap(cameraView.previewSize?.width!!, cameraView.previewSize?.height!!, Bitmap.Config.ARGB_8888)
        allocationOut = Allocation.createFromBitmap(renderScript, bitmapOut)
        yuvToRGB.setInput(allocationIn)
    }
}
Step 6 : Perform inferencing on the converted Bitmap
To get this up and running, we first need to create an instance of the FritzVisionObjectPredictor class we’re using. You can do that easily, as follows:
class MainActivity : AppCompatActivity() {

    private lateinit var renderScript: RenderScript
    private lateinit var yuvToRGB: ScriptIntrinsicYuvToRGB
    private var yuvDataLength: Int = 0
    private lateinit var allocationIn: Allocation
    private lateinit var allocationOut: Allocation
    private lateinit var bitmapOut: Bitmap

    //Rest of the code
    override fun onCreate(savedInstanceState: Bundle?) {
        val onDeviceModel = new ObjectDetectionOnDeviceModel();
        val objectPredictor = FritzVision.ObjectDetection.getPredictor(onDeviceModel);
        //Rest of the code

    }
    //Rest of the code
}
Next up, we need to create a FritzVisionImage from the Bitmap that we just converted above. The code for this is super simple as well:
class MainActivity : AppCompatActivity() {

    override fun onCreate(savedInstanceState: Bundle?) {
        val onDeviceModel = new ObjectDetectionOnDeviceModel();
        val objectPredictor = FritzVision.ObjectDetection.getPredictor(onDeviceModel);
        var fritzVisionImage: FritzVisionImage
        cameraView.addFrameProcessor { frame ->
            if (yuvDataLength == 0) {
                //Run this only once
                initializeData()
            }
            //Camera Preview returns NV21, so convert it to Bitmap :
            //https://stackoverflow.com/a/43551798/5471095
            allocationIn.copyFrom(frame.data) //Take the NV21 format
            yuvToRGB.forEach(allocationOut)  //Convert it to Bitmap readable format
            allocationOut.copyTo(bitmapOut)   //Set it to the empty Bitmap created earlier
            //Create a fritzVisionImage
            fritzVisionImage = FritzVisionImage.fromBitmap(bitmapOut)
        }
    }
}
Lastly, we need to run this FritzVisionImage through the FritzVisionObjectPredictor we created earlier:
class MainActivity : AppCompatActivity() {
    //Map that will contain a key-value combination of detected items
    private val itemMap by lazy {
        hashMapOf<String, Int>()
    }

    override fun onCreate(savedInstanceState: Bundle?) {
        val onDeviceModel = new ObjectDetectionOnDeviceModel();
        val objectPredictor = FritzVision.ObjectDetection.getPredictor(onDeviceModel);
        var fritzVisionImage: FritzVisionImage
        cameraView.addFrameProcessor { frame ->
            //Rest of the code
            fritzVisionImage = FritzVisionImage.fromBitmap(bitmapOut)
            //Get a list of items that were detected in the Image
            val visionResult = objectPredictor.predict(fritzVisionImage)

            //Clear the existing map
            itemMap.clear()

            //Convert the list of objects detected into a Map so that we can track count of similar items
            visionResult.visionObjects.forEach { visionObject ->
                if (itemMap.containsKey(visionObject.visionLabel.text))
                    itemMap[visionObject.visionLabel.text] = itemMap[visionObject.visionLabel.text]!! + 1
                itemMap[visionObject.visionLabel.text] = 1
            }

            //Print the detected items on the screen
            runOnUiThread {
                tvDetectedItem.text = ""
                itemMap.forEach { map ->
                    tvDetectedItem.append("Detected ${map.value} ${map.key}n")
                }
            }
    }
}
And that’s it!
If you run the app now, you should see that your app is able to detect and identify the objects in the preview frame in close to real time. Isn’t that cool?!
The Object Detection API provided here can detect over 90+ daily use items from an image and also runs without Internet connectivity, so it’s a perfect tool for someone looking to add a bit of smartness to their apps 😉
The complete Kotlin code for the Activity can be found below:
class MainActivity : AppCompatActivity() {

    private lateinit var renderScript: RenderScript
    private lateinit var yuvToRGB: ScriptIntrinsicYuvToRGB
    private var yuvDataLength: Int = 0
    private lateinit var allocationIn: Allocation
    private lateinit var allocationOut: Allocation
    private lateinit var bitmapOut: Bitmap

    private val itemMap by lazy {
        hashMapOf<String, Int>()
    }

    override fun onCreate(savedInstanceState: Bundle?) {
        super.onCreate(savedInstanceState)
        setContentView(R.layout.activity_main)
        Fritz.configure(this)

        val onDeviceModel = new ObjectDetectionOnDeviceModel();
        val objectPredictor = FritzVision.ObjectDetection.getPredictor(onDeviceModel);
        var fritzVisionImage: FritzVisionImage

        cameraView.addFrameProcessor {

            if (yuvDataLength == 0) {
                //Run this only once
                initializeData()
            }

            //Camera Preview returns NV21, so convert it to Bitmap :
            //https://stackoverflow.com/a/43551798/5471095
            allocationIn.copyFrom(it.data)
            yuvToRGB.forEach(allocationOut)
            allocationOut.copyTo(bitmapOut)
            fritzVisionImage = FritzVisionImage.fromBitmap(bitmapOut, it.rotation)
            val visionResult = objectPredictor.predict(fritzVisionImage)

            //Clear the existing map
            itemMap.clear()

            //Convert the list of objects detected into a Map so that we can track count of similar items
            visionResult.visionObjects.forEach { visionObject ->
                if (itemMap.containsKey(visionObject.visionLabel.text))
                    itemMap[visionObject.visionLabel.text] = itemMap[visionObject.visionLabel.text]!! + 1
                itemMap[visionObject.visionLabel.text] = 1
            }

            //Print the detected items on the scree
            runOnUiThread {
                tvDetectedItem.text = ""
                itemMap.forEach { map ->
                    tvDetectedItem.append("Detected ${map.value} ${map.key}n")
                }
            }
        }
    }

    private fun initializeData() {
        yuvDataLength = cameraView.previewSize?.height!! * cameraView.previewSize?.width!! * 3 / 2
        renderScript = RenderScript.create(baseContext)
        yuvToRGB = ScriptIntrinsicYuvToRGB.create(renderScript, Element.U8_4(renderScript))
        allocationIn = Allocation.createSized(renderScript, Element.U8(renderScript), yuvDataLength)
        bitmapOut = Bitmap.createBitmap(cameraView.previewSize?.width!!, cameraView.previewSize?.height!!, Bitmap.Config.ARGB_8888)
        allocationOut = Allocation.createFromBitmap(renderScript, bitmapOut)
        yuvToRGB.setInput(allocationIn)
    }

    override fun onStart() {
        super.onStart()
        cameraView.start()
    }

    override fun onStop() {
        super.onStop()
        cameraView.stop()
    }
}
The app shown in the video above can be found in my GitHub Repository:
Thanks for reading! If you enjoyed this story, please click the 👏 button and share to find others! Feel free to leave a comment 💬 below.
Have feedback? Let’s connect on Twitter.
Do you want to start building similar amazing Android Apps? Check out my course on Coding Bocks .
Discuss this post on Hacker News

Comments 0 Responses