
In photograph and video editing, color grading is an important step in the process to enrich the content and make it look more appealing. This is done by adjusting the image/video in specific ways to create a stylistic effect, giving the content a cinematic look. One common way of achieving this consistently across various editing software is by using a LUT (Look Up Table).
A LUT is basically a conversion profile that takes a color value in your original file, looks it up in a table, and returns a new color value.
This technique can be applied in Lens Studio as a post-effect to make lenses that are colorful, using color correction post-effects. There are two ways to use LUTs in Lens Studio: using built-in LUTs or importing your own custom LUT. Let’s look at both options, starting with the built-in LUTs provided. Make sure you create a blank project to start.
Built-in LUTs
This is the easiest path to success if you want to create color adjustments to your lens without leaving Lens Studio. In the object’s panel, click the “+,” select color correction, then pick one of the many built-in options. You can add more than one color correction effect to your project. For the purpose of this demo, select Flower, Retro Game, and Warm Effects (in that order) to create a bright retro style. Note that the order of the effects impacts the final result. If you select one effect, like Flower, you can adjust the alpha value in the inspector panel to control the opacity of the effect

Look at the resources panel where you will see three textures added, one for each effect added. These images are the LUTs we’ve been talking about and, if you look at it closely, it seems like it has various shades of color. That’s how the lookup tables are represented.
Make sure you test your color correction post effects with people with different skin color tones
Custom LUTs
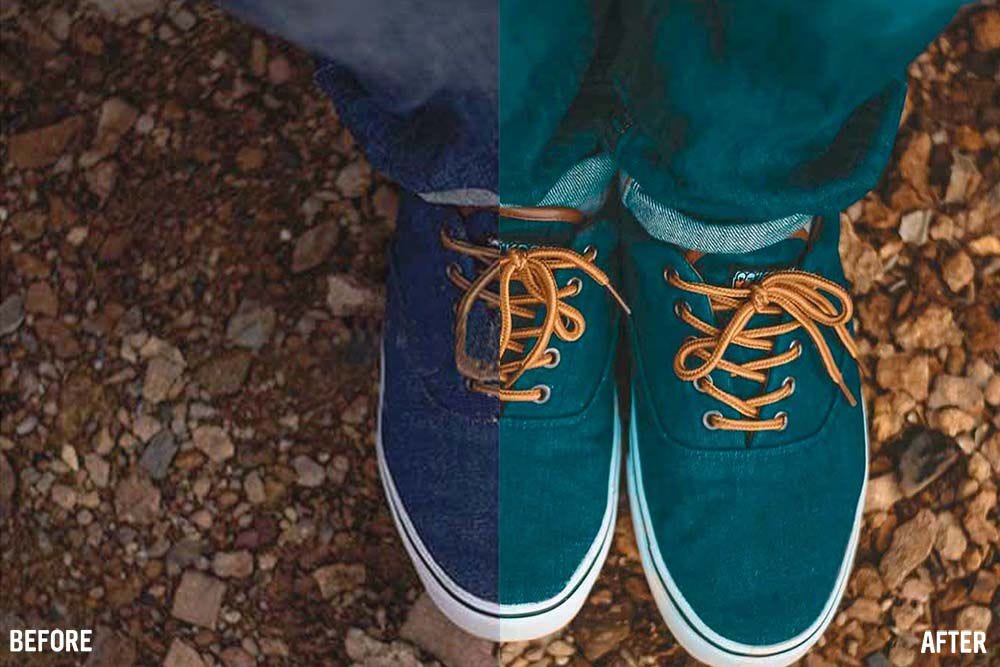
Lens Studio provides a base LUT on their post effect page that you can download and use to create a custom one. With this file, you will need to select a photo-editing tool of your choice. For this tutorial, Adobe Photoshop is used to create the custom LUT. Let’s create a LUT for the popular teal-orange effect for photos and port it into Lens Studio. Check out this YouTube video to get started with creating custom LUT files using Photoshop.
Once the edits are complete, make sure you export the new adjusted LUT. First, add an empty color correction post-effect Resources Panel -> + -> Color Correction Texture -> Empty. To add the LUT texture, in the resources panel, click the “+” and select from the files button to upload your custom LUT file. In the objects panel, select the empty post effect you added and, in the inspector panel, change the main texture property to the newly added texture. You can now view the adjustments applied to your lens.
Conclusion
Color grading can be achieved in Lens Studio by using built-in or custom LUTs and they are helpful in telling a story by manipulating colors to create a new tone/mood or to achieve a certain look. Color affects people emotionally and psychologically, often without them being aware, making it an essential tool in passing a message or telling a story. Combine this post-effect with other elements like text or interactive backgrounds to create an awesome story-telling lens.

Comments 0 Responses