
As developers, we love exploring concepts and mechanisms while working with a new framework. As a cross-platform development framework, React Native has matured quite a lot since I started playing around with it. Understanding the fundamentals when learning it is something very helpful and—I believe—essential.
Thus, by applying the basic fundamentals of React Native knowledge, I’m going to walk you through how to build a to-do list application using an offline storage functionality. This storage functionality is provided by a native module in React Native called AsyncStorage.
In the journey of building this application, you’re going to use a UI component library known as Native Base, which is one of the most popular libraries to build user interfaces among React Native developers. Out of the box, this library speeds up the development process by providing pre-defined UI components that can either be used as they are, or customized according to your needs.
What are we building?
The outcome from following this tutorial is going to be a complete React Native application that works with real-time offline data from storage on the device.
Table of Contents
- Prerequisites
- Create an Expo app
- Exploring AsyncStorage
- Utilizing the AsyncStorage API
- Organizing the application
- Adding navigation
- Creating a Floating Action Button (FAB)
- Navigating between two screens
- Customize the header component
- Rendering a list of items using FlatList
- Reading data using the AsyncStorage API
- Adding a to-do list item
- Deleting a to-do list item
- Mark an item ‘check’ or ‘uncheck’ upon completion
- Passing data between different screens using the navigation
- Display each to-do list item
- Bonus section: Adding a segment
- Conclusion
Prerequisites
To follow this tutorial, please make sure you have the following installed on your local development environment and have access to the services mentioned below:
- Node.js (>=8.x.x) with npm/yarn installed.
- expo-cli (>=3.0.4), previously known as create-react-native-app.
It will be best if you use the same exact versions or higher of each utility tool described above. To run and test the React Native application, all you need is an Expo client installed either on your device, or an iOS simulator or Android emulator.
Create an Expo app
To get started, you’ll need to generate a new Expo project. This could be done by opening a terminal window, navigating to a suitable location where you develop projects, and running the following commands in the order they’re described.
expo init offline-todolist-app

# navigate inside the app folder
cd offline-todolist-app

# install the following dependencies
yarn add react-navigation native-base [email protected] lodash.values uuid
The last command, as described in the above snippet, installs five dependencies that the application is going to use. yarn is currently being used as the package manager. You can also use npm instead of yarn. The use of each dependency will be made clear throughout this tutorial as they’re used. If this is your first time building a React Native application, try not to get overwhelmed by them.
Exploring AsyncStorage
AsyncStorage is a simple, asynchronous key-value pair used in React Native applications. It’s used for a variety of scenarios but mainly to store data when your app is not using any cloud services, or when you want to implement features in your app that require data storage.
It operates globally in a React Native app and comes with its own limitations. As a React Native developer, you have to know what these limitations are. One limitation of an AsyncStorage API is that on Android the size of the database is set to a default of 6MB limit. Also, AsyncStorage storage is based on SQLite.
Thus, it’s important to keep SQLite limitations in mind, too. Also, it’s hard to store complex and nested data structures in the form of key-value pairs. Knowing about these limitations will help you to opt for the best solution when developing a mobile app.
According to the React Native’s official documentation:
Utilizing the AsyncStorage API
Before you dive deep into building the to-do list app, in this section, let’s build a small app that saves a value to AsyncStorage and fetches the value from the storage in the client-side React Native app. This will help you learn how to write basic operations using the storage API. Lastly, you’ll learn about how to clear the storage completely.
Open the App.js file and add the snippet below (block2.js). Start by importing the necessary components from the React Native API. The most important one here is AsyncStorage. After that, define a variable named STORAGE_KEY. This variable will be used to store and retrieve the stored data using the AsyncStorage API.
Think of it as an identifier for the value being stored or the name of the key in the key-value pair. Since you’re going to store only one value at the moment, there’s only the requirement for one key.
import React from 'react'
import { StyleSheet, Text, View, TextInput, AsyncStorage, TouchableOpacity } from 'react-native'

const STORAGE_KEY = '@save_name'
Next, let’s define an initial state with two empty strings. They’re going to be used to save the value of the user input and then retrieve the value to display it on the app screen. After defining the initial state, there’s going to be a lifecycle method that will load the data when the application starts for the first time, or when the App component renders.
class App extends React.Component {
  state = {
    text: '',
    name: ''
  }

  componentDidMount() {
    this.retrieveData()
  }

  // ...
}
In the above snippet, note that the App component is actually a class component and not the default functional component that comes with boilerplate Expo app.
There are three asynchronous methods that will help to store the data, retrieve the data, and clear the app data that’s stored. Each of these methods is going to utilize the appropriate API method from the AsyncStorage API. Every method in the AsyncStorage API is promise-based; hence, let’s use async/await syntax to follow best practices.
retrieveData = async () => {
    try {
      const name = await AsyncStorage.getItem(STORAGE_KEY)

      if (name !== null) {
        this.setState({ name })
      }
    } catch (e) {
      alert('Failed to load name.')
    }
  }
In the above snippet, the name of the method implies what it’s going to do in the app. The retrieveData method is what fetches the data from storage, if it exists. It uses the same identifier that you defined previously, outside the class function component. It utilizes the parameter in the state object name.
Later in the app, you’re going to use this parameter to display its stored value. Note that there’s an if condition inside this method. This condition makes sure that data is fetched only when a value for the name variable exists. This method also uses try/catch, as they are part and parcel of writing functions with modern async/await syntax. Lastly, this method is being invoked inside the lifecycle method.
The next function is going to save the data. In the below snippet, you’ll find that it uses a parameter name, which, on success, is the value that’s stored. An alert message will be shown when the input data is saved.
save = async name => {
try {
await AsyncStorage.setItem(STORAGE_KEY, name)
alert('Data successfully saved!')
this.setState({ name })
} catch (e) {
alert('Failed to save name.')
}
}
```
The last method that you are going to utilize from the `AsyncStorage` API is called `clear()`. This deletes everything that is previously saved. It is not recommended to use this method directly if you want to delete only a specific item from the storage. For that, there are methods like `removeItem` or `multiRemove` available by the API. You can read more about them in the official documentation [here](https://facebook.github.io/react-native/docs/asyncstorage#clear) or later when building the Todolist application.
```js
removeEverything = async () => {
try {
await AsyncStorage.clear()
alert('Storage successfully cleared!')
} catch (e) {
alert('Failed to clear the async storage.')
}
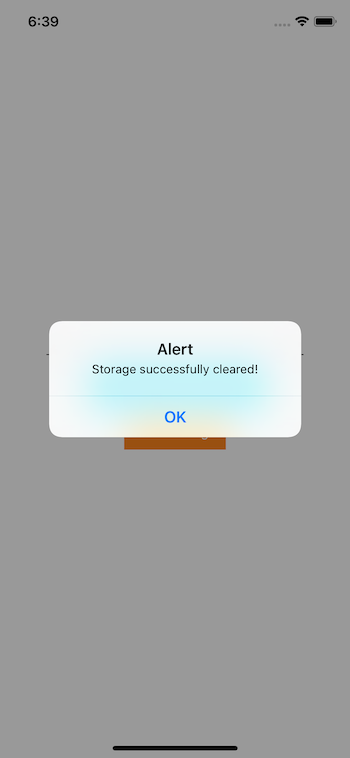
}This snippet will throw an alert box on the device screen when everything is cleared from storage.
The last two methods are going to be used to create a controlled input.
onChangeText = text => this.setState({ text })

onSubmitEditing = () => {
    const onSave = this.save
    const { text } = this.state

    if (!text) return

    onSave(text)
    this.setState({ text: '' })
}
After that, add the code snippet for the render method, followed by the styles for each UI component. Lastly, don’t forget to export the App component so it can run on the simulator or the real device.
render() {
const { text, name } = this.state
return (
<View style={styles.container}>
<TextInput
style={styles.input}
value={text}
placeholder='Type your name, hit enter, and refresh'
onChangeText={this.onChangeText}
onSubmitEditing={this.onSubmitEditing}
/>
<Text style={styles.text}>Hello {name}!</Text>
<TouchableOpacity onPress={this.removeEverything} style={styles.button}>
<Text style={styles.buttonText}>Clear Storage</Text>
</TouchableOpacity>
</View>
)
}
} // class component App ends here
const styles = StyleSheet.create({
container: {
flex: 1,
backgroundColor: '#fff',
alignItems: 'center',
justifyContent: 'center'
},
text: {
fontSize: 20,
padding: 10,
backgroundColor: '#00ADCF'
},
input: {
padding: 15,
height: 50,
borderBottomWidth: 1,
borderBottomColor: '#333',
margin: 10
},
button: {
margin: 10,
padding: 10,
backgroundColor: '#FF851B'
},
buttonText: {
fontSize: 14,
color: '#fff'
}
})
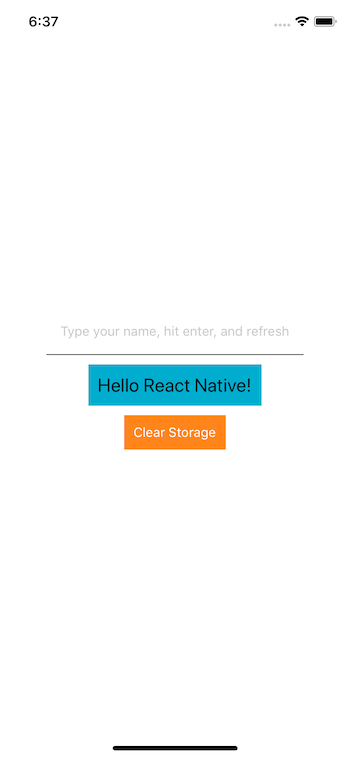
export default AppNow to run the application, go to the terminal window and execute the command expo start. After that, you’ll see the following screen on the simulator.

Since there’s no data stored right now, the text after the word Hello is empty. Use the input field to save a string or a name or anything you’d like, and then press the enter key. You’ll get the following output. Whatever input you entered, it will be displayed next to the word Hello.
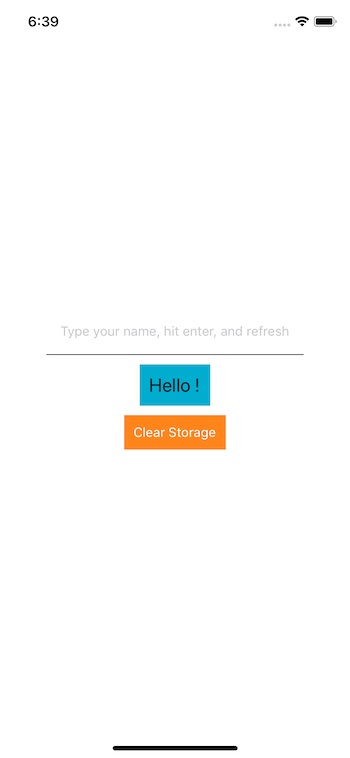
Even if you refresh the Expo client, the value stored doesn’t go away. Only when pressing the button below the Hello statement that says Clear Storage will the stored value be removed.
Refresh the Expo client after you clear the storage to get the following output.
This completes the section about using AsyncStorage API to save and fetch the data. From the next section onwards, you’ll be building the to-do list application.
Organizing the Application
Since a React Native application was already generated in the previous step, you can continue working with this app by modifying everything inside the App.js file. Or create a new one if you’d like to start with a clean slate.
You’ve already installed the necessary npm modules. This is the time to start using them in order to build the offline to-do list app. Before beginning with the development of the app, create the following folders and files inside them. This will provide a structure to manage the app later or if you want to extend it by adding new features.
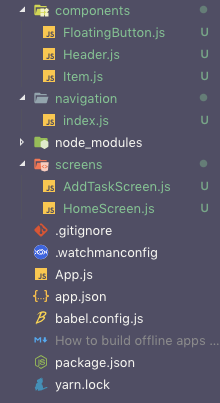
From the structure, notice that there are three new folders being created. This structure represents the separation of concerns between the different aspects of a mobile app. Such files or configurations related to navigation should be separated from the screens. The above structure is also a common pattern that many React Native developers have started to follow in their work.
Adding navigation
Inside the navigation folder, there’s an index.js file that’s going to hold all the configuration that needs to be defined. The reason the react-navigation module is used is to create a stack navigator that allows the user to visit the application’s two screens. The navigation mode is going to be modal. Yes, you can utilize pre-defined navigation modes or animation patterns.
Let’s start by importing the necessary components inside the index.js file:
import React from 'react'
import { createStackNavigator, createAppContainer } from 'react-navigation'
import HomeScreen from '../screens/HomeScreen'
import AddTaskScreen from '../screens/AddTaskScreen'
From the above snippet, notice that createStackNavigator is a function that returns a React component. It takes a route configuration object. The createAppContainer is responsible for linking the current React Native app while maintaining the navigation state from the top-level component. The top-level component in your app is App.
With the help of createAppContainer, you’re going to create a provider and wrap the App component inside it. This will benefit the entire application, as every screen or component defined is going to have a navigation state. You’ll learn some of the many benefits provided by the navigation state later.
Lastly, in the above snippet, there are screen components, which are going to hold the business logic necessary to run the to-do list app. You can think of them as containers.
Right now, the route configuration object is going to look like this:
const StackNav = createStackNavigator(
  {
    Home: {
      screen: HomeScreen
    },
    AddTask: {
      screen: AddTaskScreen
    }
  },
  {
    mode: 'modal'
  }
)
The mode is important to specify here. It defines the style for rendering the next screen component. In the above case, it’s the AddTask screen. In an iOS or Android app, the default transition is always a card. You’re changing this default transition by specifying the mode property and setting its value to modal.
The modal pattern makes the screens slide in from the bottom, which is a common iOS pattern. This only works on iOS but has no effect on Android.
Lastly, you’ll need to export the app container that utilizes the StackNav. Here’s the code for that:
const RootNavigator = createAppContainer(StackNav)

export default RootNavigator
Now, open the App.js file and add the following content:
import React from 'react'
import RootNavigator from './navigation'

export default function App() {
    return <RootNavigator />
}
Before running the app, make sure there’s a mock component to render inside the files HomeScreen.js and AddTaskScreen.js. Otherwise, it will throw an error. You can add the dummy component for now:
// HomeScreen.js
import React, { Component } from 'react'
import { Text, View } from 'react-native'

export class HomeScreen extends Component {
    render() {
        return (
            <View>
                <Text> Offline Todolist App</Text>
            </View>
        )
    }
}

export default HomeScreen

// AddTaskScreen.js
import React, { Component } from 'react'
import { Text, View } from 'react-native'

export class AddTaskScreen extends Component {
    render() {
        return (
            <View>
                <Text>Add Task Screen</Text>
            </View>
        )
    }
}

export default AddTaskScreen
Now run the app using expo start command, and you’ll get the following result.
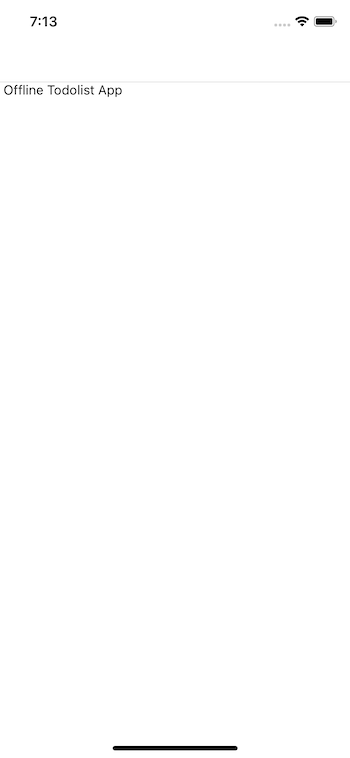
This completes the navigation section.
Create a floating action button (FAB)
Inside the components/FloatingButton.js file, you’re going to create a floating action button, commonly known as a FAB in mobile development. These type of buttons are often distinguished by a circled icon floating above the UI in a fixed position. If you’re an Android user or have seen a mobile app following any material design specifications, you might have noticed them.
In the current app, this FloatingButton is going to be responsible for navigating from the HomeScreen to the AddTaskScreen. Since it’s going to be a presentation component, you should define it as a functional component that accepts only one prop. This prop, actionOnPress, is going to be a method defined inside the HomeScreen.js file that will contain the logic of navigating between the two screens later.
One important thing to notice in the snippet below is that the component library native-base is being used to create the FAB. It saves a good amount of time and lines of code to create and style a component like below:
import React from 'react'
import { StyleSheet } from 'react-native'
import { Icon, Fab } from 'native-base'

const FloatingButton = ({ actionOnPress }) => (
    <Fab direction='up' style={styles.button} position='bottomRight' onPress={actionOnPress}>
        <Icon name='ios-add' />
    </Fab>
)

const styles = StyleSheet.create({
    button: {
        backgroundColor: '#5859f2'
    }
})

export default FloatingButton
Navigating between two screens
Once you’ve defined it, go to the HomeScreen.js file and add the following snippet of code:
import React, { Component } from 'react'
import { View, Text, StyleSheet } from 'react-native'
import { AppLoading } from 'expo'
import * as Font from 'expo-font'
import FloatingButton from '../components/FloatingButton'

export class HomeScreen extends Component {
    state = {
        isDataReady: false
    }
    componentDidMount = () => {
        this.loadFonts()
    }

    loadFonts = async () => {
        try {
            await Font.loadAsync({
                Roboto: require('../node_modules/native-base/Fonts/Roboto.ttf'),
                Roboto_medium: require('../node_modules/native-base/Fonts/Roboto_medium.ttf'),
                Ionicons: require('../node_modules/native-base/Fonts/Ionicons.ttf')
            })
            this.setState({ isDataReady: true })
        } catch (err) {
            alert('Application Error. Cannot load fonts.')
        }
    }

    onPressFab = () => {
        this.props.navigation.navigate('AddTask')
    }

    render() {
        const { isDataReady } = this.state

        if (!isDataReady) {
            return <AppLoading />
        }
        return (
            <View style={styles.container}>
                <Text>Home Screen</Text>
                <FloatingButton actionOnPress={this.onPressFab} />
            </View>
        )
    }
}

const styles = StyleSheet.create({
    container: {
        flex: 1
    }
})

export default HomeScreen
In the above snippet, the first and important thing to notice is the loadFonts method. This asynchronous method is required to make the Native Base UI library work in any React Native and Expo-generated application. Native Base uses some custom fonts that are loaded using the Font.loadAsync function. This function is provided by the Expo module expo-font, which allows you to use any available fonts or icons in React Native components.
The AppLoading method is a React component that tells Expo to keep the app loading screen visible until the Font.loadAsync() method has run successfully. In general, this a useful method when your app is using custom fonts, logos, icons, and so on.
In the current application, you’re going to use this React component again when fetching data from the AsyncStorage API (you’ll see this API in action later in this tutorial). The AppLoading method will only stop running when the boolean value for the state variable isDataReady is set to true. This boolean value is only set to true when Font.loadAsync() has finished running.
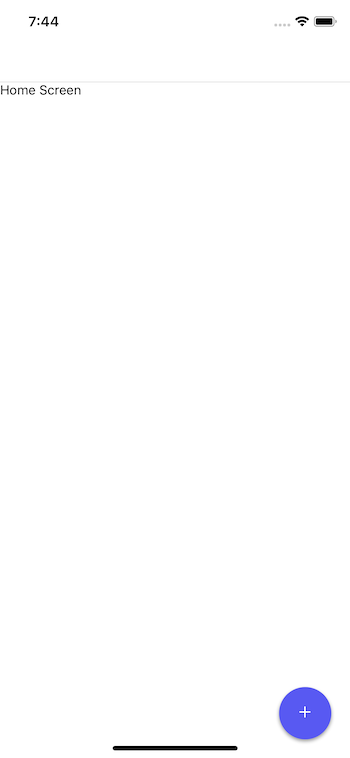
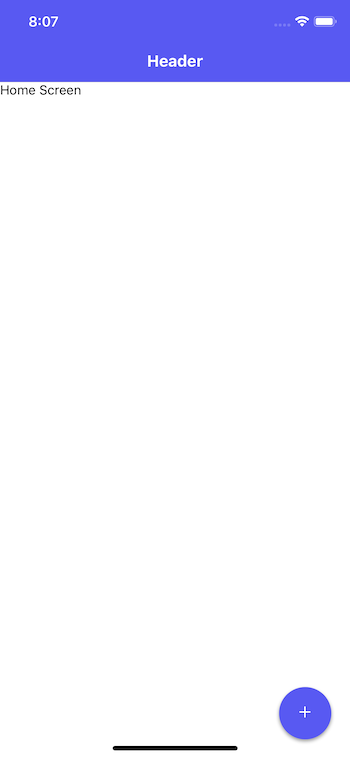
Once the application has loaded all necessary fonts and icons, you’ll get the following result.
From the above snippet, take a look at the method onPressFab, which is being passed to the FloatingButton component as the prop actionOnPress. This function uses a navigation method provided called navigation.navigate() with the value of the screen being passed as the argument: AddTask.
Do note that the value of the argument being passed should be the exact name of the screen defined earlier when configuring StackNavigator. Click on the button, and you’ll be directed to the next screen.
Did you notice the back button on the AddTaskScreen? This is again where react-navigation comes in handy. While working on a real-time React Native application, you often want to use the react-navigation library if it suits your requirements. It provides simple solutions out-of-the-box.
Customize the Header Component
With the Native Base components library, it’s easy to customize a header component in few lines of code. Inside the file Header.js, add the following snippet. Again, this is a functional component since it’s going to enhance the UI and is not running business logic.
import React from 'react'
import { Header as NBHeader, Body, Title } from 'native-base'

const Header = () => {
    return (
        <NBHeader style={{ backgroundColor: '#5859f2' }}>
            <Body>
                <Title style={{ color: '#ffffff' }}>Header</Title>
            </Body>
        </NBHeader>
    )
}

export default Header
The Header component from the native-base library takes a Body as an input. The Body can further contain the rendering logic to modify the existing default Header component from the Native Base library itself.
You can use inline styles or even a StyleSheet object from react-native to customize the Header component as above, or any other Native Base UI component in general. Take a look at backgroundColor and color to the Title. Title is where the text to be displayed on this component goes.
Import this component inside the HomeScreen.js file. Also, import the StatusBar component from react-native. Since the background of the Header component is going to be a customized blue color, it’s better to change the default dark StatusBar style into something pleasing and light.
import { View, Text, StyleSheet, StatusBar } from 'react-native'
import Header from '../components/Header'
Inside the class component, the first thing you have to do is hide the header that’s provided by the stack navigator from the react-navigation library. The object navigationOptions is used to customize the default navigators that react-navigation renders.
static navigationOptions = {
        header: null
  }
Next, inside the render() method, add the following before the omnipresent Text component:
<Header />
<StatusBar barStyle='light-content' />
<Text>Home Screen</Text>
The rest of the code inside the `HomeScreen.js` file remains unchanged. TheStatusBar is modified by defining the a value using its pre-defined prop barStyle. When using a Header component from Native Base UI library, the StatusBar from React Native comes after you define the JSX code for the header. Notice this in the above snippet. This is how it works with Native Base library. The following screen is what you get as the result of the above snippets.
Rendering a list of items using FlatList
In this section, you are going to set up a List component that accepts mock or dummy data from an array defined as a property of the initial state. Open the HomeScreen.js file and modify the state for now.
state = {
  isDataReady: false,
  mockItems: ['First Item', 'Second Item', 'Third Item']
 }
Why the dummy data? Later, when you’re going to hook the AsyncStorage API to save and fetch data from the database (or in other words, play around with real-time data operations), there are going to be separate methods to handle each of the data operations. For now, let’s hook up the business logic to display a list of items, as well as the ability to add a new item using the modal screen you set up in the previous steps.
The FlatList component is the ideal way to display a list of items in a React Native application. It’s a cross-platform component, and by default a vertical way to display a list of data items. It requires two props: data and renderItem. data is the source of information for the list in the form of an array. renderItem takes items from the source, iterates over them, and returns a formatted component to render those items.
Styles can be applied to a FlatList component by using the prop contentContainerStyle that accepts the value of the StyleSheet object. The reason to use FlatList is that it’s performant-effective.
Of course, you can use ScrollView, but it renders items from memory, which is not a very performant-effective way to display a lengthy list of items. ScrollView is a wrapper on the View component that provides the user interface with scrollable lists inside a React Native app.
In the file HomeScreen.js, replace the Text component with the following FlatList component, and don’t forget to import it and the custom presentational component Item that’s going to display each item in the list.
// import statements
import { View, FlatList, StyleSheet, StatusBar } from 'react-native'
import Item from '../components/Item'

// in render method, replace <Text> with the following
    <FlatList
                    data={this.state.mockItems}
                    contentContainerStyle={styles.content}
                    renderItem={row => {
                        return <Item text={row.item} />
                    }}
                    keyExtractor={item => item.id}
                />
Now open the file components/Item.js and add the following snippet:
import React from 'react'
import { View, Text, StyleSheet, TouchableOpacity, Dimensions } from 'react-native'

const { width } = Dimensions.get('window')

const Item = ({ text }) => {
    return (
        <View style={styles.container}>
            <View style={styles.rowContainer}>
                <Text style={styles.text}>{text}</Text>
            </View>
        </View>
    )
}

const styles = StyleSheet.create({
    container: {
        borderBottomColor: '#5859f2',
        borderBottomWidth: StyleSheet.hairlineWidth,
        flexDirection: 'row',
        alignItems: 'center',
        justifyContent: 'space-between'
    },
    rowContainer: {
        flexDirection: 'row',
        width: width / 2,
        alignItems: 'center'
    },
    text: {
        color: '#4F50DC',
        fontSize: 18,
        marginVertical: 20,
        paddingLeft: 10
    }
})

export default Item
Another new React Native component to notice in the above snippet is Dimensions. It helps set the initial width and height of a component before the application runs. We are using its get() method to acquire the current device’s width and height.
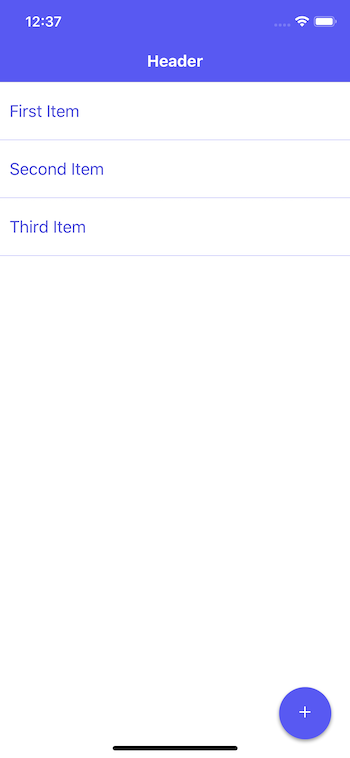
In the simulator, you’ll get the following result.
Reading data using the AsyncStorage API
In this section, you’re going to add all methods that will contain business logic to save and fetch the data from the AsyncStorage. This logic will be composed with three operations:
- add a to-do list item
- fetch all items to display
- delete an item from the list
- check the state of each list item to see whether it’s marked as completed or not
These operations are going to communicate with the real-time data on the device. You’re going to use objects instead of an array to store these items. AsyncStorage operates on key-value pairs and not arrays. Each object is going to be identified through a unique ID. In order to generate unique IDs, you’ll use a module called uuid, which was installed earlier.
The structure of each to-do item is going to look like this:
45745c60-7b1a-11e8-9c9c-2d42b21b1a3e: {
  id: 45745c60-7b1a-11e8-9c9c-2d42b21b1a3e,           // same id as the object
  textValue: 'New item',     // name of the ToDo item
  isCompleted: false,   // by default, mark the item unchecked
  createdAt: Date.now()
}
But if you’re going to use objects instead of an array, how are you going to iterate over each item in the object? The FlatList component only takes an array to iterate. Well, do you remember installing a utility package called lodash.values? That package is going to be really helpful in converting the object into an array.
First, let’s start by importing all components and custom components required in order to build the application inside the HomeScreen.js file.
import React, { Component } from 'react'
import { FlatList, View, StatusBar, StyleSheet, AsyncStorage } from 'react-native'
import uuidv1 from 'uuid/v1'
import _values from 'lodash.values'
import { Button, Text as NBText } from 'native-base'
import { AppLoading } from 'expo'
import * as Font from 'expo-font'
import Header from '../components/Header'
import Item from '../components/Item'
import FloatingButton from '../components/FloatingButton'
After writing these import statements, let’s modify the initial state:
state = {
        todos: {},
        isDataReady: false,
    }
From the above snippet, note that the dummy array of data is replaced by the object todos. Next, you’re going to write an asynchronous method to load the to-dos items from the object that’s stored using the AsyncStorage API.
Also, let’s merge the previous asynchronous method to load all the fonts with the current method that’s going to load all the to-dos. The value of the initial state isDataReady is set to the boolean true only once. You’ll also have to modify the contents of the lifecycle method.
componentDidMount = () => {
        this.loadTodos()
    }

loadTodos = async () => {
        try {
            await Font.loadAsync({
                Roboto: require('../node_modules/native-base/Fonts/Roboto.ttf'),
                Roboto_medium: require('../node_modules/native-base/Fonts/Roboto_medium.ttf')
            })

            const getTodos = await AsyncStorage.getItem('todos')
            const parsedTodos = JSON.parse(getTodos)
            this.setState({ isDataReady: true, todos: parsedTodos || {} })
        } catch (err) {
            alert('Application Error. Cannot load data.')
        }
    }
AsyncStorage.getItem() reads anything saved on the device database. It’s essential to parse the data incoming from storage into JSON. If you’re not parsing the data, the application is going to crash. When setting the state in the above snippet, the todos object is getting the default value of an empty object, as there isn’t any data from storage. This is also an essential step to perform and keep in mind for other use cases with similar scenarios.
Adding a to-do list Item
Now, let’s add the second method, addTodo, which is actually going to add the new item to storage. The method saveTodos defines before addTodo is actually storing the items in the storage. Again, you’re using JSON.stringify() since AsyncStorage requires the data to be a string inside the single object. So when saving the item, if you aren’t using JSON.stringify(), your app is going to crash.
The AsyncStorage.setItem() is the function from the API that’s similar to any key-value paired database. It takes the first argument, todos, in the snippet below. This argument value is going to be the name of the store.
The parameter newTask passed to the addTodo function is going to be the object. Using an if statement, there’s a check to make sure the to-do item being entered isn’t empty. this.setState uses a callback method that has access to the prevState object. It gives any to-do item that has been previously added to the list.
Inside the callback, you’re first creating a new ID using the uuidv1 method. Then you’ll create an object called newTodoObject, which uses the ID as a variable for the name. This object represents each item in the to-do list.
Next, create a new object called newState, which uses the prevState object, and finally adds a newTodoObject object in the to-do list of items. It might sound overwhelming since a lot is going on, but try implementing the code, and you’ll understand it better.
saveTodos = newToDos => {
 const saveTodos = AsyncStorage.setItem('todos', JSON.stringify(newToDos))
 }
addTodo = newTask => {
 const newTodoItem = newTask
if (newTodoItem !== '') {
 this.setState(prevState => {
 const ID = uuidv1()
 const newToDoObject = {
 [ID]: {
 id: ID,
 isCompleted: false,
 textValue: newTodoItem,
 createdAt: Date.now()
 }
 }
 const newState = {
 …prevState,
 todos: {
 …prevState.todos,
 …newToDoObject
 }
 }
 this.saveTodos(newState.todos)
 return { …newState }
 })
 }
}
Deleting a to-do list item
Similar to the addTodo method, you’re going to add another method called deleteTodo. This will take care of removing an individual item from the list on the basis of the id of that item object.
Since you’re using the id of the object both to identify the object inside the bigger object todos and assign each individual object the same id, the following code saves a lot of time. At last, by using the saveTodos method, the storage will be updated with the remaining number of items.
deleteTodo = id => {
        this.setState(prevState => {
            const todos = prevState.todos
            delete todos[id]
            const newState = {
                ...prevState,
                ...todos
            }
            this.saveTodos(newState.todos)
            return { ...newState }
        })
    }
Mark a to-do item ‘check’ or ‘uncheck’ upon completion
The last two methods that are going to take care of whether each individual item is checked or not are going to be represented by inCompleteTodo and completeTodo methods. Both of these methods will track which items in the to-do list have been marked completed by the user—or have been left unmarked.
They’re going to act as a toggle and will only update the value of isCompleted rather than updating the whole to-do list item object. Again, this is possible because of each object’s unique id. Before each method returns the new state, using the saveTodos method, the storage gets updated.
inCompleteTodo = id => {
        this.setState(prevState => {
            const newState = {
                ...prevState,
                todos: {
                    ...prevState.todos,
                    [id]: {
                        ...prevState.todos[id],
                        isCompleted: false
                    }
                }
            }
            this.saveTodos(newState.todos)
            return { ...newState }
        })
    }

    completeTodo = id => {
        this.setState(prevState => {
            const newState = {
                ...prevState,
                todos: {
                    ...prevState.todos,
                    [id]: {
                        ...prevState.todos[id],
                        isCompleted: true
                    }
                }
            }
            this.saveTodos(newState.todos)
            return { ...newState }
        })
    }
Passing data between different screens using navigation
In this section, you’re going to edit each render method that’s responsible for displaying the interface for the operations you defined in the previous sections, to happen in real-time. Let’s start by editing the onPressFab method inside the HomeScreen.js file.
This method navigates to the AddTaskScreen. By passing an object to add a new item to the list (hence, pass the method addTodo), you’re going to use another advantage that the sleek react-navigation library provides. That is, passing data between different screens.
First, edit the onPressFab method, as shown in the below snippet:
onPressFab = () => {
        this.props.navigation.navigate('AddTask', {
            saveItem: this.addTodo
        })
    }
Next, open AddTaskScreen.js and add the following snippet:
import React, { Component } from 'react'
import { View } from 'react-native'
import { Form, Item, Input, Button, Text as NBText } from 'native-base'

export class AddTaskScreen extends Component {
    state = {
        text: ''
    }

    onChangeText = event => {
        this.setState({ task: event.nativeEvent.text })
    }

    onAddTask = () => {
        this.props.navigation.state.params.saveItem(this.state.task)
        this.props.navigation.goBack()
    }

    render() {
        return (
            <View>
                <View style={{ marginRight: 10 }}>
                    <Form>
                        <Item>
                            <Input
                            value={this.state.task}
                                placeholder='Enter a new task...'
                                autoFocus
                                clearButtonMode='always'
                                autoCorrect={false}
                                onChange={this.onChangeText}
                                onSubmitEditing={this.onAddTask}
                                returnKeyType={'done'}
                            />
                        </Item>
                    </Form>
                </View>
                <View style={{ marginTop: 20 }}>
                    <Button
                        style={{ backgroundColor: '#5067FF', margin: 25, justifyContent: 'center' }}
                        onPress={this.onAddTask}
                    >
                        <NBText style={{ fontWeight: 'bold' }}>Add Task</NBText>
                    </Button>
                </View>
            </View>
        )
    }
}

export default AddTaskScreen
The snippet above uses the Native Base library to create a controlled input form to let the user add a new item to the to-do list. Next, we’ve included a button to add the item. Since the Input component from Native Base is based on React Native’s TextInput component, you can use all of the component’s available props.
Also, take note that, to create an input field when using Native Base as the UI library, the Input component has to be wrapped by an Item, which is further wrapped inside a Form element.
Here’s a brief overview of the props used in the above snippet.
- value: The value of the text input. By default, it will be an empty string since we’re using the local state to set it. As the state updates, the value of the text input updates as well.
- placeholder: Just like in HTML, a placeholder is used to define a default message in the input field.
- onChange: is a callback that’s called when the text input’s text changes. Changed text is passed as an argument to the callback handler onChangeText. This handler accepts the text value from event.nativeEvent.
- clearButtonMode: A clear button should appear on the right side of the text view. The default value is never, and you are modifying it to always in the above component.
- returnKeyType: Determines how the return key on the device’s keyboard should look. You can find more values or platform-specific values here. Some of the values are specific to each platform.
- autoCorrect: This prop lets us decide whether to show the autocorrect bar along with the keyboard or not. In the current case, we’ve set it to false.
- onSubmitEditing: Contains the business the logic in the form of a callback, indicating what to do when the return key or input’s submit button is pressed. We’ll be defining this callback in Main.js.
Lastly, take a look at the method onAddTask, which uses navigation state to save the text value of the to-do item. After the user presses the button or the handler, onSubmitEditing triggers, which will further run the method addTodo from HomeScreen and navigate back to the HomeScreen itself, using the navigation props method goBack().
On clicking the FAB, you’ll see the following screen:
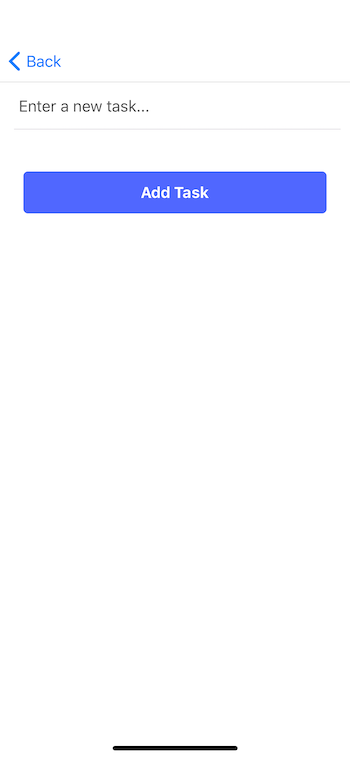
Try typing an input. You’ll notice a small cross, which is the clear text button on the right side of the input field.
Display each to-do list item
To display each to-do list item, you’ll have first to pass the props as shown below using renderItem in the FlatList component:
<Item
    isCompleted={row.item.isCompleted}
    textValue={row.item.textValue}
    id={row.item.id}
    deleteTodo={this.deleteTodo}
    completeTodo={this.completeTodo}
    inCompleteTodo={this.inCompleteTodo}
/>
Next, go to the Item.js file and add the following snippet:
import React from 'react'
import { View, Text, StyleSheet, TouchableOpacity, Dimensions } from 'react-native'
import { Icon } from 'native-base'

const { width } = Dimensions.get('window')

const Item = ({ inCompleteTodo, completeTodo, textValue, id, deleteTodo, isCompleted }) => {
    toggleItem = () => {
        if (isCompleted) {
            inCompleteTodo(id)
        } else {
            completeTodo(id)
        }
    }

    return (
        <View style={styles.container}>
            <View style={styles.rowContainer}>
                <TouchableOpacity onPress={this.toggleItem}>
                    <Icon
                        name={isCompleted ? 'checkmark-circle' : 'radio-button-off'}
                        style={{ paddingLeft: 10, color: '#7A7AF6' }}
                    />
                </TouchableOpacity>

                <Text
                    style={[
                        styles.text,
                        {
                            opacity: isCompleted ? 0.5 : 1.0,
                            textDecorationLine: isCompleted ? 'line-through' : 'none',
                            color: isCompleted ? '#7A7AF6' : '#4F50DC'
                        }
                    ]}
                >
                    {textValue}
                </Text>
            </View>
            <TouchableOpacity onPressOut={() => deleteTodo(id)}>
                <Icon name='md-trash' style={{ color: '#ABADF9', paddingRight: 10 }} />
            </TouchableOpacity>
        </View>
    )
}

const styles = StyleSheet.create({
    container: {
        borderBottomColor: '#5859f2',
        borderBottomWidth: StyleSheet.hairlineWidth,
        flexDirection: 'row',
        alignItems: 'center',
        justifyContent: 'space-between'
    },
    text: {
        color: '#4F50DC',
        fontSize: 18,
        marginVertical: 20,
        paddingLeft: 10
    },

    rowContainer: {
        flexDirection: 'row',
        width: width / 2,
        alignItems: 'center'
    }
})

export default Item
As shown in the above snippet, using Native Base, you can use the Icon component (since you are already loading the Ionicons library in the parent component asynchronously). Next, the props the Item components receive are to toggle an item’s state (complete or not), display the text value of the item, and lastly, a button to delete the item itself.
Save the component file, hop back on the simulator, and try adding one or more items to the list.

Everything works! Even upon refreshing the app, and the items don’t disappear.
Bonus section: Adding a segment
In this section, you’re going to separate the UI for managing the completed list of items and items that are pending. To include this feature, you’re going to solely use the Native Base library.
Keeping the data source same from the storage API, let’s modify the state by adding one more property. Open the HomeScreen.js file and add the following:
// add "filter" to existing the state
    state = {
        todos: {},
        isDataReady: false,
        filter: 'Todo'
    }
The value of the filter is going to be Todo by default. This means it’s going to show the pending to-do list items as the home screen to the user.
Next, you’re going to add another handler function called filteredItems. This method will evaluate the value of the state and filter the values from the todos to match the state. Again, to use the JavaScript filter method, you’re going to convert the todos object using the lodash method _values.
filteredItems = () => {
        if (this.state.filter === 'Todo') {
            return _values(this.state.todos).filter(i => {
                return !i.isCompleted
            })
        }
        if (this.state.filter === 'Complete') {
            return _values(this.state.todos).filter(i => {
                return i.isCompleted
            })
        }
        return this.state.todos
    }
Next, let’s modify the render method to achieve the desired result. Inside the render method, you’re going to add a new UI element from Native Base called Segment. This is going to display two buttons, each of which can be activated when pressed. The activation of each button depends on the value of the state property filter.
// import Segment from Native Base
import { Button, Text as NBText, Segment } from 'native-base'

// inside the render method...

const { isDataReady, filter } = this.state

// just before flatlist add a new view

    <View style={styles.contentHeader}>
        <Segment style={{ backgroundColor: '#ffffff' }}>
            <Button active={filter === 'Todo'} onPress={() => this.setState({ filter: 'Todo' })}>
                <NBText>Todo</NBText>
            </Button>
            <Button
                last
                active={filter === 'Complete'}
                onPress={() => this.setState({ filter: 'Complete' })}
            >
                <NBText>Complete</NBText>
            </Button>
        </Segment>
    </View>

// styles corresponding to the new View element

contentHeader: {
    alignItems: 'center',
    justifyContent: 'center'
}
Lastly, change the value of the data prop on FlatList and set it to the item returned from the method filteredItems().
<FlatList
    data={_values(this.filteredItems())}
    // rest remains same
    />
You’ll get the following result.
Conclusion
Congratulations! You’ve just learned how to build an offline mobile application using the latest tech stack and libraries like React Native, Expo, and the Native Base component UI library.
You’ve learned many key points in this tutorial, and I hope you enjoyed reading and following it. Use the knowledge you’ve gained in this tutorial in a real-time application and show it to your peers. The possibilities to enhance this application or to use the core knowledge provided is endless.
You can find the complete code for this tutorial at the GitHub repo 👇
⚛️📱 You can also try the demo of this application using an Expo client. Just scan the QR code at the link here.
If you’d like to dwell deep in React Native world, check out my other tutorials on the framework here.

Comments 0 Responses