
Math might be scary, but it’s an essential part of everyday life. Wouldn’t it be cool if we could build an app, point our phone’s camera at an expression, and let the app compute the result? Whenever I’ve needed to use math, I’ve wished this was possible. Now, with advances in machine learning and vision recognition in iOS, this is doable.
In this guide, I’ll provide some of the technical details for working with Vision in iOS, as well as my personal experiences using this technology.
You can find the final project on my GitHub (MathSolver). You can use it for reference when reading this guide. The project uses Swift 4.1 with base SDK in iOS 11. There are ViewController containment and multiple service classes to break down responsibilities, so you can easily follow along.
For reference, OCR stands for Optical Character Recognition — the process of converting images to readable text. We’ll use this abbreviation throughout.
What is Vision?
Vision is a computer vision framework introduced by Apple at WWDC 2017 for iOS 11 as part of Apple’s efforts to bring machine learning onto the iOS platform.
Vision is built on top of the Core ML framework and offers algorithms and utilities for working with vision tasks, such as face and landmark detection, image recognition, text detection, barcode recognition, and general feature tracking. Before the introduction of Vision, developers probably needed to use some 3rd party frameworks like OpenCV to achieve these features, but now we have everything we need for computer vision tasks in iOS.
At WWDC 2018, Apple introduced enhancements to the Vision framework, along with Core ML 2.0 for iOS 12. However, I chose to target iOS 11 in this article for 2 reasons: to support more devices as iOS 12 is still in beta and the version of Vision in iOS 11 supports text detection very well with VNDetectTextRectanglesRequest
First, let’s set up our project with AVFoundation for camera tracking.
Capturing the camera frame with AVFoundation
Firstly we need to set up a camera session, as we need to capture the picture for text recognition. The camera logic and its preview layer are encapsulated in a custom view controller, CameraController.
private func setupAVSession() {
  captureSession.beginConfiguration()
  captureSession.sessionPreset = .high

  defer {
    captureSession.commitConfiguration()
  }

  // input
  guard
    let backCamera = AVCaptureDevice.default(.builtInWideAngleCamera, for: .video, position: .back),
    let input = try? AVCaptureDeviceInput(device: backCamera),
    captureSession.canAddInput(input)
  else {
    return
  }

  captureSession.addInput(input)

  // output
  let output = AVCaptureVideoDataOutput()

  guard captureSession.canAddOutput(output) else {
    return
  }

  captureSession.addOutput(output)
  output.setSampleBufferDelegate(self, queue: DispatchQueue(label: "MyQueue"))
  output.alwaysDiscardsLateVideoFrames = true

  // connection
  let connection = output.connection(with: .video)
  connection?.videoOrientation = .portrait

  // preview layer
  cameraLayer.videoGravity = AVLayerVideoGravity.resizeAspectFill
  view.layer.addSublayer(cameraLayer)
  view.layer.addSublayer(overlayLayer)
}
Here we select the camera as the default capture input device. Remember to set videoGravity to resizeAspectFill to get a full screen preview layer. To get a captured buffer from the camera, our view controller needs to conform to AVCaptureVideoDataOutputSampleBufferDelegate.
Dealing with orientations is the most tricky because AVCaptureConnection, VNDetectTextRectanglesRequest in Vision, and UIImage have different orientation enums. For simplicity, let’s set videoOrientation to portrait, this property will become clear when we set up Vision.
Every captured frame reports buffer information through the delegate function func captureOutput(_ output: AVCaptureOutput, didOutput sampleBuffer: CMSampleBuffer, from connection: AVCaptureConnection).
Now that we have CMSampleBuffer, let ‘s work with Vision in our VisionService class.
Text detection with Vision
To instruct Vision to work, we need to pass VNDetectTextRectanglesRequest to VNImageRequestHandler, which can process image analysis requests. The VNImageRequestHandler accepts CVPixelBuffer, CGImage, and image Data. Here we convert from CMSampleBuffer to CGImage via CVImageBuffer. VNDetectTextRectanglesRequest is simply a request object for finding regions of visible texts within an image.
func handle(buffer: CMSampleBuffer) {
  guard let pixelBuffer = CMSampleBufferGetImageBuffer(buffer) else {
    return
  }

  let ciImage = CIImage(cvPixelBuffer: pixelBuffer)
  guard let image = ciImage.toUIImage() else {
    return
  }

  makeRequest(image: image)
}
Note that the orientation parameter for VNImageRequestHandler is important — more info on this can be found here.
private func makeRequest(image: UIImage) {
  guard let cgImage = image.cgImage else {
    assertionFailure()
    return
  }

  let handler = VNImageRequestHandler(
    cgImage: cgImage,
    orientation: CGImagePropertyOrientation.up,
    options: [VNImageOption: Any]()
  )

  let request = VNDetectTextRectanglesRequest(completionHandler: { [weak self] request, error in
    DispatchQueue.main.async {
      self?.handle(image: image, request: request, error: error)
    }
  })

  request.reportCharacterBoxes = true

  do {
    try handler.perform([request])
  } catch {
    print(error as Any)
  }
}
The orientation of the captured image depends on the orientation of the videoOrientation property, which defaults to .landscapeRight. If we purposely set connection.videoOrientation = .landscapeRight then we need to use CGImagePropertyOrientation.right for VNImageRequestHandler. Ideally, for multiple orientation support, we need to pay attention to the device orientation change and adjust the orientation for our AVCaptureConnection accordingly.
The result should be an array of VNTextObservation, which contains region information for where the text is located within the image. For this demo, I only selected results with big enough confidence. Let’s draw the region for the detected text in BoxService.
Drawing the detected text region
We can draw using drawRect, but a CALayer with a custom border should be easier. Let’s create a CALayer for each detected text region and draw that onto our overlayLayer in CameraController.
let layer = CALayer()
view.layer.addSublayer(layer)
layer.borderWidth = 2
layer.borderColor = UIColor.green.cgColor
VNTextObservation has an array of characterBoxes of type VNRectangleObservation, these contain information for individual character bounding box. This is for fine-grain control in case we want to highlight each letter individually. However, as VNTextObservation subclasses from VNDetectedObjectObservation, it also has the property boundingBox which is the box for the whole text. We will use this property to compute the frame for our CALayer.
We can use the helper method layerRectConverted from AVCaptureVideoPreviewLayer to convert boundingBox to view rect, but this does not seem to work as expected.
Let’s compute manually based on boundingBox.
The iOS coordinate originates at the top left, while boundingBox originates at the bottom left, just as in MacOS. We need to flip the coordinate, open our BoxService.swift, and add the following code
private func normalise(box: VNTextObservation) -> CGRect {
  return CGRect(
    x: box.boundingBox.origin.x,
    y: 1 - box.boundingBox.origin.y - box.boundingBox.height,
    width: box.boundingBox.size.width,
    height: box.boundingBox.size.height
  )
}
Since boundingBox has normalized values from 0 to 1, to map that in order to frame our rectangle CALayer, we simply multiply it by the size of the overlayLayer.
private func drawBox(overlayLayer: CALayer, normalisedRect: CGRect) {
  let x = normalisedRect.origin.x * overlayLayer.frame.size.width
  let y = normalisedRect.origin.y * overlayLayer.frame.size.height
  let width = normalisedRect.width * overlayLayer.frame.size.width
  let height = normalisedRect.height * overlayLayer.frame.size.height

  let outline = CALayer()
  outline.frame = CGRect(x: x, y: y, width: width, height: height).scaleUp(scaleUp: 0.1)
  outline.borderWidth = 2.0
  outline.borderColor = UIColor.red.cgColor

  overlayLayer.addSublayer(outline)
}
extension CGRect {
func scaleUp(scaleUp: CGFloat) -> CGRect {
let biggerRect = self.insetBy(
dx: -self.size.width * scaleUp,
dy: -self.size.height * scaleUp
)
return biggerRect
}
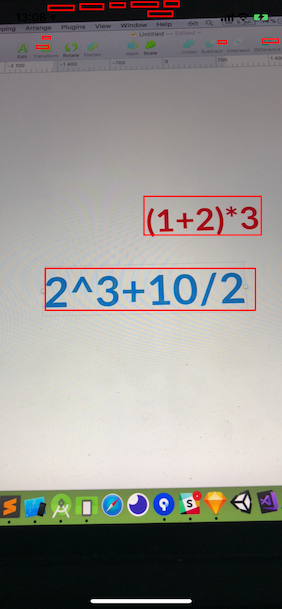
}Below is the screenshot taken from my iPhone X with some text written in Sketch.
We’re dealing with a portrait image for now, so the math is quite straightforward. If your project supports landscape images, then you may need to flip the coordinates of normalisedRect accordingly.
Still within the BoxService, we should crop the image in the detected rectangle for OCR. The rectangle of detected region by Vision matches the text tightly, so we need to increase the rectangle a bit to accommodate for top and bottom edges, this makes it easier for text recognition to work.
private func cropImage(image: UIImage, normalisedRect: CGRect) -> UIImage? {
    let x = normalisedRect.origin.x * image.size.width
    let y = normalisedRect.origin.y * image.size.height
    let width = normalisedRect.width * image.size.width
    let height = normalisedRect.height * image.size.height

    let rect = CGRect(x: x, y: y, width: width, height: height).scaleUp(scaleUp: 0.1)

    guard let cropped = image.cgImage?.cropping(to: rect) else {
      return nil
    }

    let croppedImage = UIImage(cgImage: cropped, scale: image.scale, orientation: image.imageOrientation)
    return croppedImage
  }
Cropping the detected text image
Vision can detect many texts on the screen, but for simplicity let’s deal with the biggest image, since that’s the one that usually contains the preferred expression. To get the frame for the cropped image, we multiple normalisedRect’s coordinates with the captured image size.
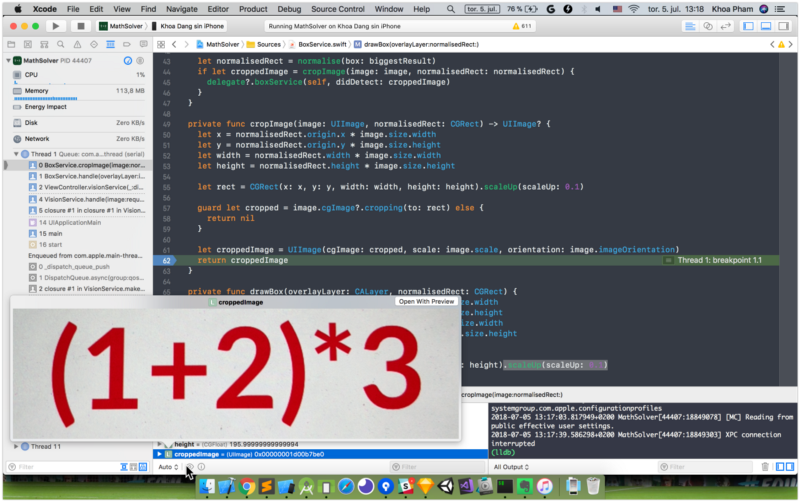
The croppedImage should contain text — you can use Quick Look in Xcode to check by selecting the croppedImage variable in the bottom expression panel, then by clicking on the eye icon to open Quick Look for the image.
Text recognition with an OCR framework
I personally like solutions that work well with Swift, so I tried SwiftOCR first. It’s written purely in Swift and the API is easier to get started. . The benchmark in the README even states that it performs even better than Tesseract.
let instance = SwiftOCR()

private func handleWithSwiftOCR(image: UIImage) {
  instance.recognize(image, { string in
    DispatchQueue.main.async {
      self.delegate?.ocrService(self, didDetect: string)
    }
  })
}
For some reason, SwiftOCR didn’t work well. It might because I used the font “Lato” in my initial Sketch. SwiftOCR allows custom training for new fonts, but because I was lazy, I tried Tesseract.

Tesseract “is an optical character recognition engine for various operating systems. It is free software, released under the Apache License, Version 2.0, and development has been sponsored by Google since 2006”.
The iOS port is open sourced on GitHub and has CocoaPods support. Simply pod install ‘TesseractOCRiOS’ in your Podfile and you’re good to go.
As explained in the README and in the TestsProject, tessdata is needed — it contains language information to make Tesseract work. Without this tessdata, the framework TesseractOCR will give you a warning about missing TESSDATA_PREFIX.
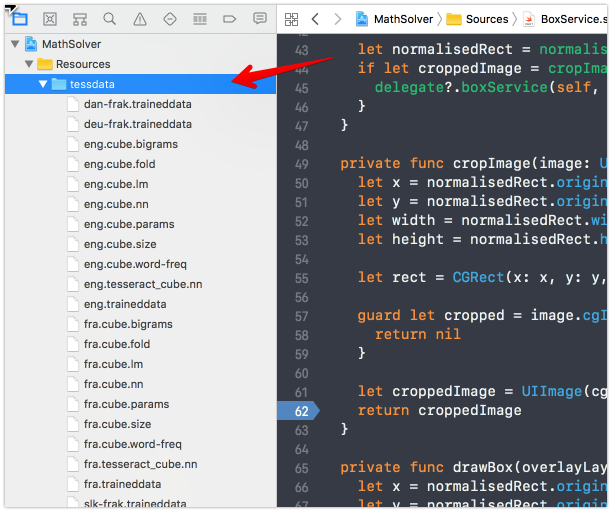
Download the tessdata here, and add it as a reference to your Xcode project. The color blue indicates that this folder has been added as a reference.
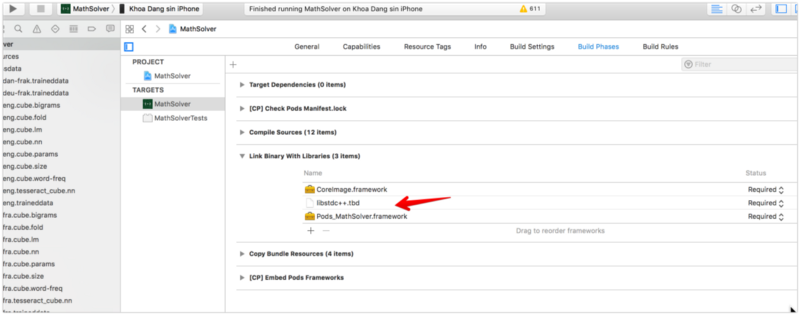
You may also need to add libstdc++.dylib and CoreImage.framework to your target. Additionally, this library isn’t compatible with Bitcode in Xcode, so you’ll need to disable Bitcode in your target settings.
Tesseract
Using Tesseract is easy. Remember to import TesseractOCR, not TesseractOCRiOS:
let tesseract = G8Tesseract(language: "eng")!

tesseract.engineMode = .tesseractCubeCombined
tesseract.pageSegmentationMode = .singleBlock

private func handleWithTesseract(image: UIImage) {
  tesseract.image = image.g8_blackAndWhite()
  tesseract.recognize()
  let text = tesseract.recognizedText ?? ""
  delegate?.ocrService(self, didDetect: text)
}
g8_blackAndWhite is a convenient filter to increase the contrast of the image for easy detection. For pageSegmentationMode, I use singleBlock, as our number should be in a uniform block of text (you can also try singleLine mode). Lastly, we set engineMode to tesseractCubeCombined, which is the most accurate, but it could take some time. You can set to tesseractOnly or cubeOnly to compromise for speed. In my test it recognizes well for handwritten texts and texts I put on the screen using popular fonts like Arial, Lato, and Helvetica.
If you need to support more languages and fonts, then head over to the Training Tesseract wiki page to learn more about it. I also hope that Apple provides proper OCR model to use together with Vision and Core ML, since text recognition is a popular task for mobile apps.
With the above captured image, Tesseract should be able to recognize the string “(1+2)*3”. Let’s validate it into a proper math expression and try to solve it.
Validating the expression
Sometimes Tesseract includes a new line or some other malformed characters in the result. As such, you should properly validate the expression. For now let’s perform a simple validation. In the demo, we support simple calculations for numbers from 0…9 and math operators +, -, *, / . You can base on the code to build even more complex expression like power, logarithm, sigma.
public func validate(expression: String) -> String {
  let set = Set("0123456789()+-*/")
  return expression
    .replacingOccurrences(of: "/n", with: "")
    .filter({ set.contains($0) })
}
Solving the expression
Now to the fun part — the math 😀. To solve this expression, we’ll need to use Reverse Polish notation. According to wikipedia,
Reverse Polish notation (RPN), also known as Polish postfix notation or simply postfix notation, is a mathematical notation in which operators follow their operands, in contrast to Polish notation (PN), in which operators precede their operands.
Basically, an infix expression like (1+2)*3 needs to be transformed to a postfix expression, which would be 12+3* . Below is the pseudo-code:
The algorithm is pretty straightforward. Starting from the beginning of the string 12+3* , we first push 1 and 2 to the stack. Then we encounter the operator +, pop 1 and 2 from the stack, and evaluate as 1+2. The result 3 is pushed back to the stack. We then push the next operand 3 to the stack. Finally, when we traverse to operator * , we pop the 2 operands of value 3 from the stack, evaluate 3*3, and we get 9 as the result.
But how do we convert an infix expression to a postfix expression? There’s an algorithm called Shunting-yard for that.
For now, let’s use a snippet from NSString-Reverse-Polish-Notation. It’s in Objective C, but we only need to add a MathSolver-Bridging-Header.h, since Swift and Objective C are compatible.
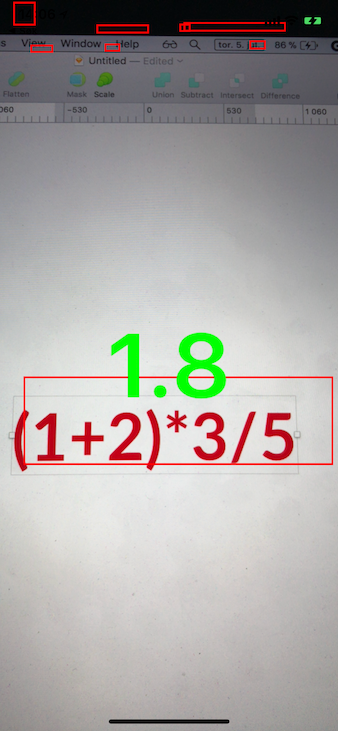
When we run the app, it recognizes all possible texts on the screen, but we only need to focus on our expression, which is the biggest text. Point the camera at the expression, and the app should be able to detect, recognize, and solve the expression. In case you’re still in doubt, the result of the expression (1+2)*3/5 is 1.8
We can of course add support for more operators such as power, sine, cosine, sigma, or even predefined functions.
While this particular app is used to demonstrate how this procedure is done, it could be modified to more practical usage, like checking meeting room availability, phone number tracing, order scanning at the post office.
Where to go from here
I hope this tutorial has provided some valuable insights about Vision and Tesseract. Here are a few more links to help you get started with your text detection journey on iOS:
- Tesseract OCR Tutorial for iOS: Learn how to use Tesseract framework in iOS, detailing with some issues that you may encounter when using it.
- Utilizing Machine Learning in the Palm of Your Hand With iOS’s ML Frameworks: How to use Vision with SwiftOCR.
- tesseract.js: Tesseract implemented in Javascript. It is not related to iOS, but it’s good to have the importance of Tesseract in some other platforms.
- Object Tracking in Vision: Interesting changes coming to Vision in iOS at WWDC 2018. There are lot of improvements in object tracking and custom model training.
- Detecting Objects in Still Images: Official Apple sample code to locate and demarcate rectangles, faces, barcodes, and text in images using the Vision framework.
- Integrating Google ML Kit in iOS for Face Detection, Text Recognition and Many More: Google introduced ML Kit at Google IO this year, and it’s also good at text recognition. The framework supports both iOS and Android.
- Why AVCaptureSession output a wrong orientation?
- Recognizing Objects in Live Capture: enhancement for Vision in iOS 12
Discuss this post on Hacker News and Reddit.

Comments 0 Responses