
In this tutorial, I’ll walk through how to start building an Augmented Reality Android application using Google’s new Sceneform SDK. First off, I’ll cover some quick concepts and then jump into project setup and some code. If you just want to dive in straight away, you can check out my GitHub repo below!
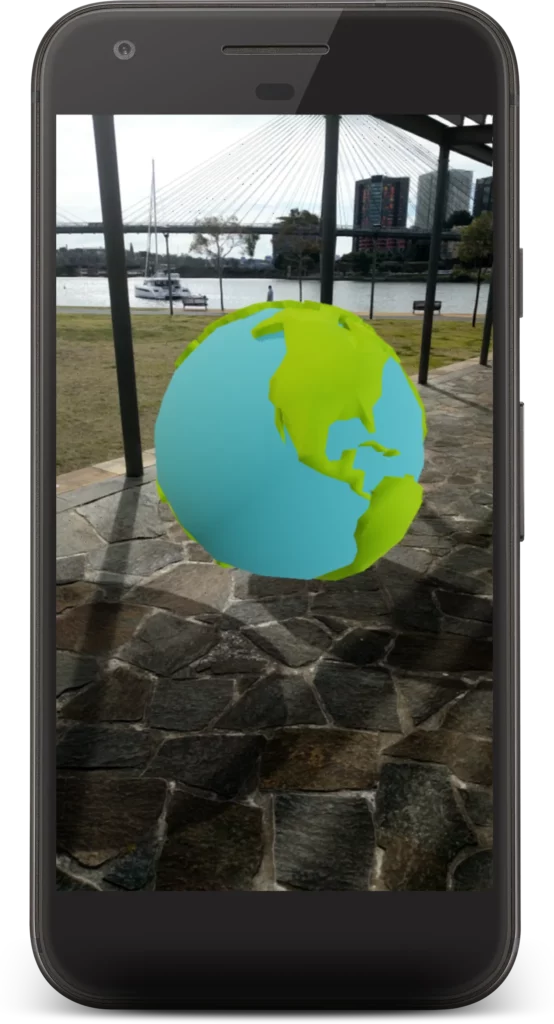
The screenshot below shows what we’ll build today!
Core Concepts
ARCore is Google’s platform for building Augmented Reality experiences. It uses your mobile device for motion tracking, environmental understanding, and light estimation. With these three capabilities, ARCore can build an understanding of the real world around the device. With the mobile device’s position, we as developers can then augment the real world with information, 3D objects, or anything else!

Sceneform is a new SDK built to empower developers to work with ARCore without having to learn the intricacies of 3D graphics programming and OpenGL. ARCore was initially released with OpenGL samples, and as someone with very basic graphics programming knowledge, I found the learning curve to be super steep. With Sceneform, you can easily write in Java (or Kotlin) just like you would when building a normal Android app. The official samples for ARCore and Sceneform further illustrate this.

Getting Started
To get started, you’ll need Android Studio 3.1 or higher. We want to create a new project with Kotlin support targeting API 24: Android 7.0, so let’s start with an empty activity for now.

In our app/build.gradle file, we can add the dependency for Sceneform— remember to click “Sync Now” to update the project. Although we’ll be writing this tutorial in Kotlin, Sceneform uses some language constructs from Java 8, so we’ll need to explicitly add support since our minimum API is less than 26.
Since this is an augmented reality app, we’re going to have to ask the user for access to the camera. We also need an AR permission, which designates that this app requires ARCore. Finally, there’s a specific AR meta tag used by the Play Store to filter out applications for users who do not have an ARCore-enabled device.
<?xml version="1.0" encoding="utf-8"?>
<manifest xmlns:android="http://schemas.android.com/apk/res/android"
    package="com.gathergood.calum.ardemo">

    <uses-permission android:name="android.permission.CAMERA" />
    <uses-feature
        android:name="android.hardware.camera.ar"
        android:required="true" />

    <application
        android:allowBackup="true"
        android:icon="@mipmap/ic_launcher"
        android:label="@string/app_name"
        android:roundIcon="@mipmap/ic_launcher_round"
        android:supportsRtl="true"
        android:theme="@style/AppTheme">

        <meta-data
            android:name="com.google.ar.core"
            android:value="required" />

        <activity android:name=".MainActivity">
            <intent-filter>
                <action android:name="android.intent.action.MAIN" />

                <category android:name="android.intent.category.LAUNCHER" />
            </intent-filter>
        </activity>
    </application>

</manifest>
Adding our Model
To make life easier, and to allow us to import our own 3D assets, we’ll also include the Sceneform plugin for Android Studio. You can install this by selecting preferences, plugins, browse repositories, and search for Google Sceneform Tools (Beta)

The first thing we want to do is get a 3D model to use—if you don’t want to make your own, you can head on over to Poly and grab one for free (just remember to credit the creator!). The Sceneform plugin supports OBJ, FBX and glTF file formats. Then, it’s just a case of creating a sampledata/ directory within your app and adding your object file.
Note that the purpose of this folder is for design time only, and these resources won’t be added to the final APK. The next step is right clicking your downloaded object and selecting “Import Sceneform Assert”. For this app, I’m going to pick the Earth asset created by Google.

After this gradle task has finished, you’ll find a reference to your object in the app level gradle file and a .sfb file inside the assets directory. This Sceneform Binary asset is what we’ll use inside our app. The Sceneform Android Studio plugin lets us view a realtime preview of our newly created asset.

Time to Code
The next step is to add the Sceneform fragment to our layout. You can just replace the default textview with this element. We’ll also add a Floating Action Button (FAB) to enable us to add our model to the real word.
<?xml version="1.0" encoding="utf-8"?>
<android.support.constraint.ConstraintLayout xmlns:android="http://schemas.android.com/apk/res/android"
    xmlns:app="http://schemas.android.com/apk/res-auto"
    xmlns:tools="http://schemas.android.com/tools"
    android:layout_width="match_parent"
    android:layout_height="match_parent"
    tools:context=".MainActivity">

    <fragment
        android:id="@+id/sceneform_fragment"
        android:name="com.google.ar.sceneform.ux.ArFragment"
        android:layout_width="match_parent"
        android:layout_height="match_parent"
        app:layout_constraintBottom_toBottomOf="parent"
        app:layout_constraintEnd_toEndOf="parent"
        app:layout_constraintStart_toStartOf="parent"
        app:layout_constraintTop_toTopOf="parent" />

    <android.support.design.widget.FloatingActionButton
        android:id="@+id/floatingActionButton"
        android:layout_width="wrap_content"
        android:layout_height="wrap_content"
        android:layout_marginBottom="8dp"
        android:layout_marginEnd="8dp"
        android:layout_marginStart="8dp"
        app:layout_constraintBottom_toBottomOf="@+id/sceneform_fragment"
        app:layout_constraintEnd_toEndOf="parent"
        app:layout_constraintStart_toStartOf="parent"
        app:srcCompat="@drawable/ic_explore_white_24dp" />

</android.support.constraint.ConstraintLayout>
We want our users to be able to add a model only when ARCore has detected a scene. In order to do this, we’ll only display the FAB when a suitable plane has been detected. In the official Google Codelab, they achieve something similar by drawing a custom Pointer on the screen when a model can be added to the scene.
The structure of our main activity is as follows:
- Detect a suitable plane using ARCore onUpdate
- Show the user the Floating Action Button (FAB)showFab
- On click of the button load in our model addObject
- Use the .sfb file to create a renderable object placeModel
- Attach our renderable to the scene and display to the user addNodeToScene
class MainActivity : AppCompatActivity() {

    private lateinit var arFragment: ArFragment

    private var isTracking: Boolean = false
    private var isHitting: Boolean = false

    override fun onCreate(savedInstanceState: Bundle?) {
        super.onCreate(savedInstanceState)
        setContentView(R.layout.activity_main)

        arFragment = sceneform_fragment as ArFragment

        // Adds a listener to the ARSceneView
        // Called before processing each frame
        arFragment.arSceneView.scene.addOnUpdateListener { frameTime ->
            arFragment.onUpdate(frameTime)
            onUpdate()
        }

        // Set the onclick lister for our button
        // Change this string to point to the .sfb file of your choice :)
        floatingActionButton.setOnClickListener { addObject(Uri.parse("NOVELO_EARTH.sfb")) }
        showFab(false)

    }

    // Simple function to show/hide our FAB
    private fun showFab(enabled: Boolean) {
        if (enabled) {
            floatingActionButton.isEnabled = true
            floatingActionButton.visibility = View.VISIBLE
        } else {
            floatingActionButton.isEnabled = false
            floatingActionButton.visibility = View.GONE
        }
    }

    // Updates the tracking state
    private fun onUpdate() {
        updateTracking()
        // Check if the devices gaze is hitting a plane detected by ARCore
        if (isTracking) {
            val hitTestChanged = updateHitTest()
            if (hitTestChanged) {
                showFab(isHitting)
            }
        }

    }

    // Performs frame.HitTest and returns if a hit is detected
    private fun updateHitTest(): Boolean {
        val frame = arFragment.arSceneView.arFrame
        val point = getScreenCenter()
        val hits: List<HitResult>
        val wasHitting = isHitting
        isHitting = false
        if (frame != null) {
            hits = frame.hitTest(point.x.toFloat(), point.y.toFloat())
            for (hit in hits) {
                val trackable = hit.trackable
                if (trackable is Plane && trackable.isPoseInPolygon(hit.hitPose)) {
                    isHitting = true
                    break
                }
            }
        }
        return wasHitting != isHitting
    }

    // Makes use of ARCore's camera state and returns true if the tracking state has changed
    private fun updateTracking(): Boolean {
        val frame = arFragment.arSceneView.arFrame
        val wasTracking = isTracking
        isTracking = frame.camera.trackingState == TrackingState.TRACKING
        return isTracking != wasTracking
    }

    // Simply returns the center of the screen
    private fun getScreenCenter(): Point {
        val view = findViewById<View>(android.R.id.content)
        return Point(view.width / 2, view.height / 2)
    }

    /**
     * @param model The Uri of our 3D sfb file
     *
     * This method takes in our 3D model and performs a hit test to determine where to place it
     */
    private fun addObject(model: Uri) {
        val frame = arFragment.arSceneView.arFrame
        val point = getScreenCenter()
        if (frame != null) {
            val hits = frame.hitTest(point.x.toFloat(), point.y.toFloat())
            for (hit in hits) {
                val trackable = hit.trackable
                if (trackable is Plane && trackable.isPoseInPolygon(hit.hitPose)) {
                    placeObject(arFragment, hit.createAnchor(), model)
                    break
                }
            }
        }
    }

    /**
     * @param fragment our fragment
     * @param anchor ARCore anchor from the hit test
     * @param model our 3D model of choice
     *
     * Uses the ARCore anchor from the hitTest result and builds the Sceneform nodes.
     * It starts the asynchronous loading of the 3D model using the ModelRenderable builder.
     */
    private fun placeObject(fragment: ArFragment, anchor: Anchor, model: Uri) {
        ModelRenderable.builder()
                .setSource(fragment.context, model)
                .build()
                .thenAccept {
                    addNodeToScene(fragment, anchor, it)
                }
                .exceptionally {
                    Toast.makeText(this@MainActivity, "Error", Toast.LENGTH_SHORT).show()
                    return@exceptionally null
                }
    }

    /**
     * @param fragment our fragment
     * @param anchor ARCore anchor
     * @param renderable our model created as a Sceneform Renderable
     *
     * This method builds two nodes and attaches them to our scene
     * The Anchor nodes is positioned based on the pose of an ARCore Anchor. They stay positioned in the sample place relative to the real world.
     * The Transformable node is our Model
     * Once the nodes are connected we select the TransformableNode so it is available for interactions
     */
    private fun addNodeToScene(fragment: ArFragment, anchor: Anchor, renderable: ModelRenderable) {
        val anchorNode = AnchorNode(anchor)
        // TransformableNode means the user to move, scale and rotate the model
        val transformableNode = TransformableNode(fragment.transformationSystem)
        transformableNode.renderable = renderable
        transformableNode.setParent(anchorNode)
        fragment.arSceneView.scene.addChild(anchorNode)
        transformableNode.select()
    }
}
Final Product
And that’s it! In less than 150 lines of code, we have our very first augmented reality app. I’ve added comments where applicable in the MainActivity.kt. Please feel free to get in touch with me if you have any questions whatsoever. Hopefully you can use this as a starting point for your AR experience on Android. Thanks for reading!
Further reading
If this quick tutorial has piqued your interest, I’d recommend reading the below links to find out more about Android and AR.
Announcing ARCore 1.0 and new updates to Google Lens
Building ARCore apps using Sceneform – Hari Vignesh Jayapalan
Augmented Images with ARCore and Sceneform – Calum Gathergood
Discuss this post on Hacker News and Reddit.

Comments 0 Responses