
Today, we’re going to be building a RESTFUL API that takes in an image and make predictions using a TensorFlow MobileNet pre-trained model.
TensorFlow.js has many pre-trained models that can be used in projects out of the box. This saves developers the task of training a model from scratch. Here we’re going to explore the MobileNet pre-trained architecture
Development
If you haven’t already setup NodeJs on your computer, follow this link to download and install.
Open your terminal and follow the steps below.
- Paste and run the command below to:
- Create a folder.
- Navigate into the folder.
- And initialize a new project which creates a package.json file.
2. Still in the terminal, run the following command to install dependencies:
3. Open the newly created folder in any code editor of your choice.
4. Create a file called app.js in the root of the folder and paste the following code:
The above code creates a new node server to run our application.
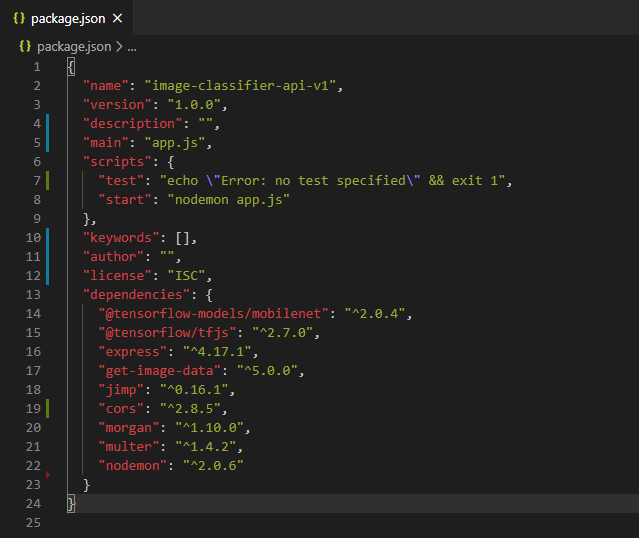
5. Open the package.json file and add this task to the script property:
Also change the main script to app.js.
The package.json file should look like this:
6. On your terminal, run npm start. This will start the server, you should see the console message “Running server at http://localhost:3000.”
7. Let’s create some directories. Back in the terminal in the project root, run the following commands:
8. Navigate into the controllers folder and create a new file called predict.controller.js. Also navigate into the routes folder an create a new file called predict.route.js.
9. In the predict.route.js file paste in the following code:
In the above code, we configure multer to handle the input image and store it in the /image folder. The image is renamed “test-image.png” for easy read in our controller file. We then create an express router to include the multer middleware and call the makePredictions function we’ll be creating next.
9. Now, we’re going to do three things:
- Load the MobileNet model.
- Read the raw image file and convert its pixel data into Tensor.
- Delete the file to clear up space.
Open predict.controller.js file and paste in the following code:
The above code first creates a makePrediction function, which includes a function that loads the MobileNet model and output predictions on an image parameter. Next, we read and decode the image data with the get-image-data package. This package decodes the width, height, and binary data from the image. Following that, we extract the pixel values of the image and convert into a tensor. We then call the loadModel function and pass the image tensor data to make predictions. After this, we delete the image file from memory.
10. Finally, let’s update the app.js file by including the following code directly above the line that reads PORT = process.env.PORT || 3000;
Here, we import the predict route and expose it in the /predict endpoint.
To test the API, we’ll make use of postman, download here. Make sure your server is running, run npm start to start the server.
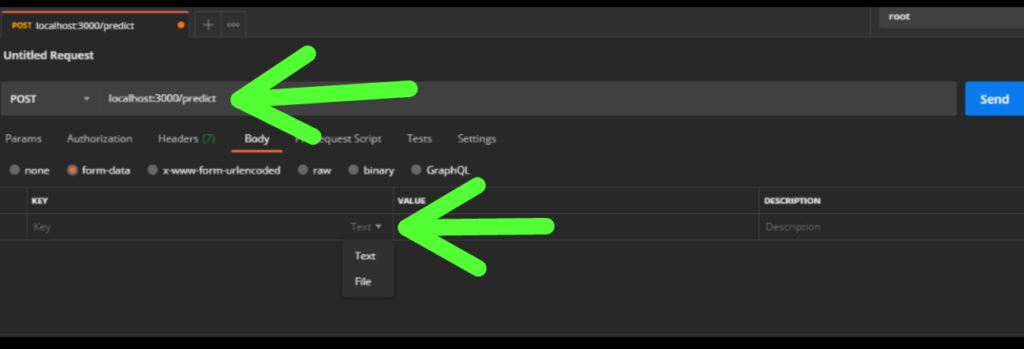
Open postman and type http://localhost:3000/predict into the request URL section, change the method to POST, click Body tab and select “form-data.” Click on the drop-down button in the key section and select File.
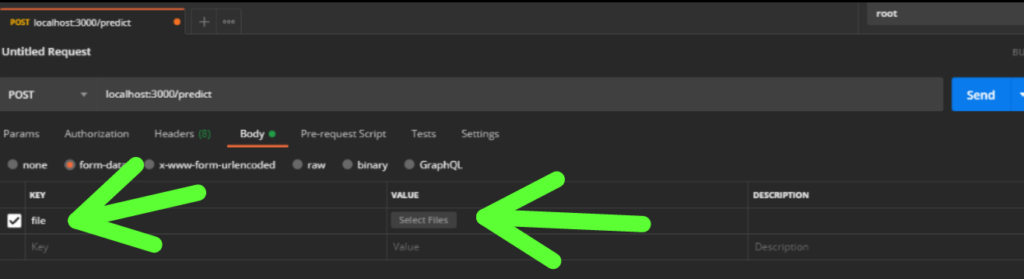
Input the value ‘file’ as the key and click on ‘Select Files’ to upload an image file as the Value.
Click the Send button. You should see the following console message after awhile:
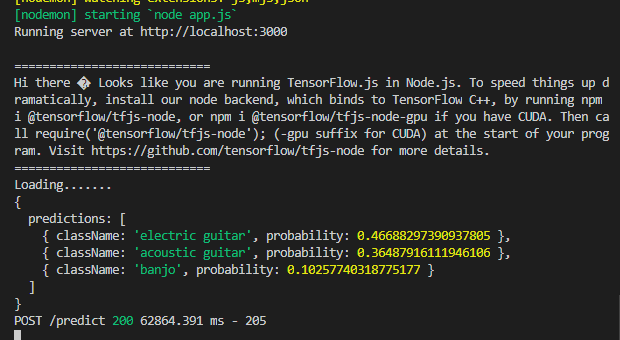
I selected an image containing a guitar, hence the output.
NOTE: The whole process happens in approximately 63 seconds and gives the top three predictions by default. We can change this by passing a parameter called topk with a number value when calling the classify method of the model.
Also you’ll notice a message in the console, this is because I used the TensorFlow tfjs package, which now have an alternate package for NodeJS here. Unfortunately, it does not support 32-bit machines, according to TensorFlow.
If you run on a 64-bit machine, you’ll have to make some changes, first in terminal run npm i @tensorflow/tfjs-node. Then, in a predict.controller.js file, update the tf variable to const tf = require(‘@tensorflow/tfjs-node’).
Deployment
Our API is now ready for deployment! Refer to the complete project on my github here
I’ll be deploying the project on Heroku. You can follow the steps below.
- If you don’t have a Heroku account sign up here.
- Follow the article here to install and configure Heroku CLI.
- Clone the project repo, because I added a few changes like a .gitignore file and a README.md file to keep the empty /images folder when staging.
- Open terminal and navigate into the cloned project folder.
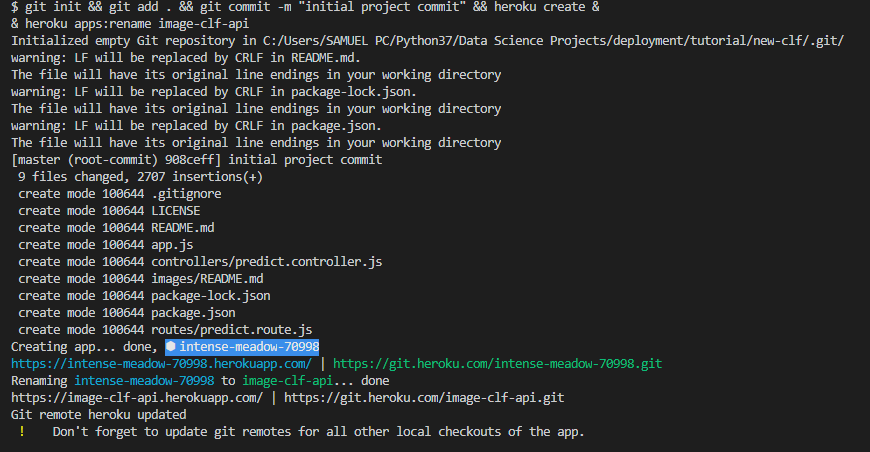
- Paste the following command and run.
The command initializes an empty local git repo, where you can add all project files and commit. It then creates a new Heroku app and renames the app to “image-clf-api.”
You should have an output similar to the below image:
Finally, let’s run the command below to deploy to Heroku:
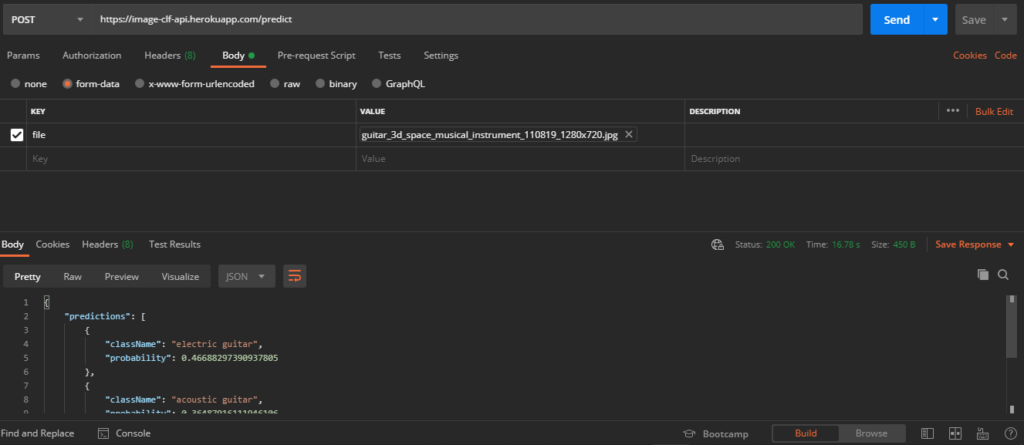
Now to test our live API in postman.
From the previous postman window, replace the URL with https://image-clf-api.herokuapp.com/predict and hit send. You should get the predictions in less time now. Approximately 17 seconds here.
We can also test it out in a web environment. Create an index.html file in any directory and pasting the code below.
Open the file in any browser, upload an image, and hit Submit.

Conclusion
I hope this article served the purpose of giving you a head start in understanding how to implement Tensorflow.js models in NodeJS. The API can be tailored for use on any client applications and for any TensorFlow hub models.
Connect with me on Twitter here.

Comments 0 Responses