

I recently came across an excellent article from Signal where they introduced a new feature that gives users the ability to automatically blur faces—incredibly useful in a time when protestors and demonstrators need to communicate while protecting their identities.
In the article, Signal also hinted at technologies they’re using, which are strictly platform-level libraries. For iOS, I would guess they have used Vision , an API made by Apple to perform a variety of image and video processing.
In this article, I’ll use Apple’s native library to create an iOS application that will pixelate faces on any given image.
In this article:
This is a look at the final result:

I have included code in this article where it’s most instructive. Full code and data can be found on my GitHub page. Let’s get started.
Why the built-in/on-device solution
- On-device: The most powerful argument for on-device solutions is the latency—the whole process is performed on the phone and doesn’t necessitate communication with an external/remote API. There is also the argument of privacy. Since everything happens on-device, there is no data transferred from the phone to a remote server. A cloud-based API can be risky in terms of an entity being in the middle of the communication, or the service provided being able to literally store images for other reasons than the advertised intent.
- Built-in: They are many ways to use/create on-device models that can be, in some cases, better than Apple’s built-in solution. Google’s ML Kit provides an on-device solution on iOS for Face Detection (in my experience, similar to Apple’s in terms of accuracy), which is free and has more features than Apple’s solution. But for our use case, we just need to detect faces and draw bounding boxes. You can also build your own model using Turi Create’s object detection API or any other framework of your choice. Either way, you still need a huge amount of diverse and annotated data to come even close to Apple’s or Google’s accuracy and performance.
Apple has been active in providing iOS developers with powerful APIs centered on computer vision and even other AI disciplines (i.e. NLP). They have continuously improved them by trying to represent the complex spectrum of use cases, from gender differences to racial diversity.
I remember the first version of the Face Detection API being very bad at detecting darker skinned faces. They have since improved it, but there is no perfect system so far, and detection is not 100% accurate.
Create Face Detection Helpers
To get us started, we first need to create a helper class that handles multiple use cases for face detection. This helper class could be reused in any project that is using Apple’s built-in API for the same. My approach with this class is to create a series of static functions capable of returning specific values for different scenarios.
I started by creating an enum Faces variable that would be helpful to store whether there are no faces, one face, or multiple faces. This could become handy when you perform different actions depending on the number of faces in an image.
enum Faces: String {
    case zero
    case one
    case multiple
    var description: String {
        get { return self.rawValue }
    }
}
AppleFaceDetection Class
This will be our main class for everything related to Apple’s Face Detection Vision API. The class contains three static functions:
- GetNumberOfFaces: Function that calculates the number of faces in a given image.
static func GetNumberOfFaces(image: UIImage, completion: @escaping (_ count: Int?) -> ()) {
    let request = VNDetectFaceRectanglesRequest { (req, err) in
        if let err = err {
            print("Failed to detect faces:", err)
            return
        }
        if let results = req.results {
            completion(results.count)
        }
    }
    guard let cgImage = image.cgImage else { return }
    DispatchQueue.global(qos: .background).async {
        let handler = VNImageRequestHandler(cgImage: cgImage, options: [:])
        do {
            try handler.perform([request])
        } catch let reqErr {
            print("Failed to perform request:", reqErr)
        }
    }
}- GetTheFaces: Function that returns a Faces object
static func GetTheFaces(image: UIImage, completion: @escaping (Faces?) -> ()) {
    var faces: Faces?
    self.GetNumberOfFaces(image: image) { (count) in
        if let numberOfFaces = count {
            if numberOfFaces == 0 {
                faces = Faces.zero
                completion(faces)
            } else if numberOfFaces > 1 {
                faces = Faces.multiple
                completion(faces)
            } else if numberOfFaces == 1 {
                faces = Faces.one
                completion(faces)
            }
        }
    }
}- GetFaceBoundingBoxes: Function that returns an array of VNFaceObservation objects. This object contains various information, such as confidence, landmarks, or the bounding box. This is the main function used in this project to blur faces.
static func GetFaceBoundingBoxes(image: UIImage, completion: @escaping ([Any]?) -> ()) {
    let request = VNDetectFaceRectanglesRequest { (req, err) in
        if let err = err {
            print("Failed to detect faces:", err)
            return
        }
        if let results = req.results {
            completion(results)
        }
    }
    guard let cgImage = image.cgImage else { return }
    DispatchQueue.global(qos: .background).async {
        let handler = VNImageRequestHandler(cgImage: cgImage, options: [:])
        do {
            try handler.perform([request])
        } catch let reqErr {
            print("Failed to perform request:", reqErr)
        }
    }
}Create the iOS Application

Now we have the ML side of our project ready to go. I don’t like using storyboards myself, so the app in this tutorial is built programmatically, which means no buttons or switches to toggle — just pure code.
To follow this method, you’ll have to delete the main.storyboard file and set your SceneDelegate.swift file (Xcode 11 & 12 only).
With Xcode 11 & 12, you’ll have to change the Info.plist file like so:

You need to delete the “Storyboard Name” in the file, and that’s about it.
Change the SceneDelegate with the following code:
var window: UIWindow?

func scene(_ scene: UIScene, willConnectTo session: UISceneSession, options connectionOptions: UIScene.ConnectionOptions) {
    guard let windowScene = (scene as? UIWindowScene) else { return }
    window = UIWindow(frame: windowScene.coordinateSpace.bounds)
    window?.windowScene = windowScene
    window?.rootViewController = ViewController()
    window?.makeKeyAndVisible()
}
Create View Controllers
We need two ViewControllers:
- ViewController():
This is where we’ll set our application entry point where you can upload an image from the photo library or open the camera and take a picture.
- FaceBoxViewController() :
This is where we’ll show the final result and download the image with blurred faces.
Setup ViewController():
Instantiate the controller’s properties:
- The logo: A simple UIImageView that will store the logo image.
- Upload button: A button that will trigger the UIImagePickerController with the option to open the photo library. The button is of type CustomButton (in the GitHub repo) that I’ve created to have a nice looking button that’s dark mode-ready.
- Camera button: A button that will trigger the UIImagePickerController with the option to open the camera. This button is also of type CustomButton.
let logo: UIImageView = {
    let image = UIImageView(image: #imageLiteral(resourceName: "face_detection").resized(newSize: CGSize(width: screenWidth - 120, height: screenWidth - 120)))
    let tintedImage = image.image?.withRenderingMode(.alwaysTemplate)
    image.image = tintedImage
    image.tintColor = .label
    image.translatesAutoresizingMaskIntoConstraints = false
   return image
}()

lazy var openCameraBtn : CustomButton = {
   let btn = CustomButton()
    btn.translatesAutoresizingMaskIntoConstraints = false
    btn.setTitle("Camera", for: .normal)
    let icon = UIImage(named: "camera")?.resized(newSize: CGSize(width: 45, height: 45))
    let tintedImage = icon?.withRenderingMode(.alwaysTemplate)
    btn.setImage(tintedImage, for: .normal)
    btn.tintColor = .label
    btn.addTarget(self, action: #selector(buttonToOpenCamera(_:)), for: .touchUpInside)
    return btn
}()

lazy var openToUploadBtn : CustomButton = {
   let btn = CustomButton()
    btn.addTarget(self, action: #selector(buttonToUpload(_:)), for: .touchUpInside)
    btn.translatesAutoresizingMaskIntoConstraints = false
    return btn
}()
Setup UIPickerViewController
- Get the editedImage
- Instantiate an object of type FaceBoxViewController()
- Dismiss the UIImagePickerController and present FaceBoxViewController()
func imagePickerController(_ picker: UIImagePickerController, didFinishPickingMediaWithInfo info: [UIImagePickerController.InfoKey : Any]) {
    if let image = info[.originalImage] as? UIImage {

        let outputVC = FaceBoxViewController()
        outputVC.modalPresentationStyle = .fullScreen
        outputVC.inputImage.image = image
        dismiss(animated: true, completion: nil)
        self.present(outputVC, animated: true, completion: nil)
    }
}
Setup FaceBoxViewController():
Instantiate the controller’s properties:
- Blurred Image: An object of type UIImage that will host the final blurred image
- Original Image: An object of type UIImage that will host the original image
- Input Image: A UIImageView hosting the input image used by Vision to detect faces. It will also host the final post-processed image with pixelated faces.
- Download button: A button that will trigger a function responsible for saving the image in the photo library
- Dismiss button: A button to dismiss the View Controller and get back to ViewController()
var blurredImage: UIImage?
var originalImage: UIImage?

lazy var inputImage: UIImageView = {
    let image = UIImageView()
    image.translatesAutoresizingMaskIntoConstraints = false
    image.contentMode = .scaleAspectFit
    image.layer.masksToBounds = true
    image.clipsToBounds = false
}()

lazy var saveImage: CustomButton = {
    let button = CustomButton()
    button.translatesAutoresizingMaskIntoConstraints = false
    button.addTarget(self, action: #selector(buttonToSaveImage(_:)), for: .touchUpInside)
    button.setTitle("Download", for: .normal)
    let icon = UIImage(systemName: "square.and.arrow.down")?.resized(newSize: CGSize(width: 35, height: 35))
    let tintedImage = icon?.withRenderingMode(.alwaysTemplate)
    button.setImage(tintedImage, for: .normal)
    return button
}()

lazy var dissmissButton: CustomButton = {
    let button = CustomButton()
    button.translatesAutoresizingMaskIntoConstraints = false
    button.addTarget(self, action: #selector(buttonToDissmiss(_:)), for: .touchUpInside)
    button.setTitle("Dismiss", for: .normal)
    let icon = UIImage(systemName: "xmark.circle")?.resized(newSize: CGSize(width: 35, height: 35))
    let tintedImage = icon?.withRenderingMode(.alwaysTemplate)
    button.setImage(tintedImage, for: .normal)
    return button
}()Results
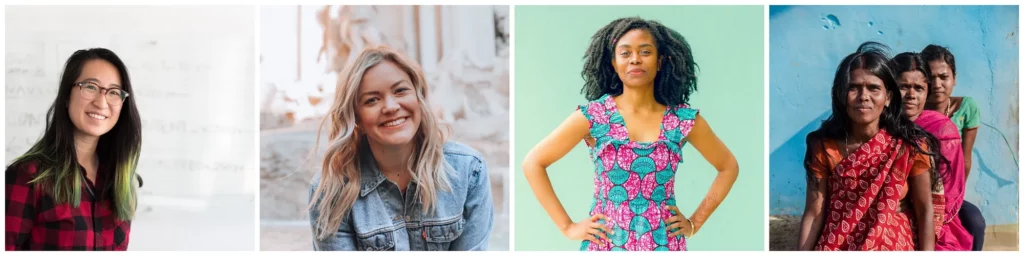
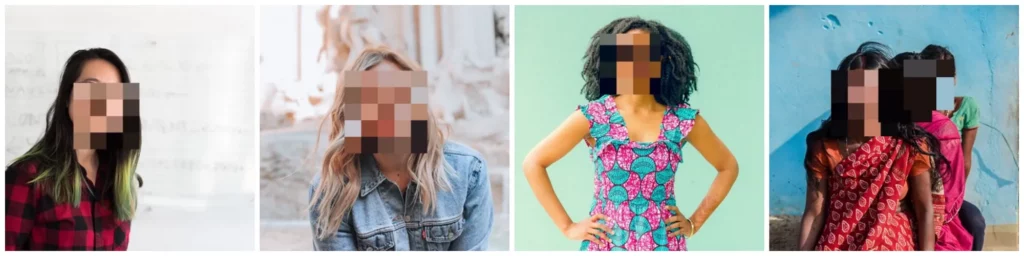
These test images don’t constitute a reference to determine the accuracy of the model or potential biases, they are just random images found on Unsplash. The idea is just to showcase some examples of images with a variety of genders and ethnicities.
Example of pixelated images on Women
Example of pixelated images on Men


There are few images where the model struggles—in my experience this is due to low contrast (background face in the right image in Figure 7) or how the face is angled with respect to the image (second image from the left in Figure 7).
Conclusion
This application is only intended to showcase how easy you can include a feature used in a popular application using the exact same technology that they have.
There are still some limitations to the built-in model used by Apple, and the results above demonstrate that some images are still hard to detect faces on. I won’t say that I’ve witnessed any particular bias in the model, because I have noticed false negatives in a few cases, especially when the light condition is hard or the view angle is imaginative.
Nonetheless, Signal did also witness some of those limitations, whether in iOS or Android, and decided to add the possibility to draw with a blur brush to manually correct areas in a photo.
Thank you for reading this article. If you have any questions, don’t hesitate to send me an email at [email protected].

Comments 0 Responses