
With augmented reality rocking every corner of the App Store and touching every category from gaming to healthcare, now is a better time than ever to jump in and start building your own AR experiences. In this tutorial, you’ll learn to set up and use Reality Composer to bring Mars into your home using the power of augmented reality. Later, you can apply this knowledge to build more advanced AR experiences.
Introduction
In case you aren’t familiar with Apple’s Reality Composer, it’s a tool that allows developers to create and test augmented reality experiences without needing to hire professional CAD experts. In other words, it gives software developers the opportunity to produce professional, immersive, AR-based experiences on their own, without having to specialize in augmented reality or design.
Workflow
Reality Composer not only allows you to create scenes, it also allows you to animate them, make them interactive, and add gravity to make the experience even more immersive for the user, and admittedly, the developer, too. You can then export your experiences into Xcode for use in an iOS app. And, within Xcode, you can even make changes to your scene programmatically if you’re unhappy with the result!
Installation
If you have Xcode 11 installed on your Mac, Reality Composer comes bundled with it. If you don’t have it, or if you’d rather use your iPhone or iPad, you can still follow along with this tutorial. The macOS and iOS versions of Reality Composer are quite similar, and you can download it on your iPad or iPhone directly from the App Store.
Testing
When you create your augmented reality scenes, you’ll likely want to test them. Luckily, Reality Composer allows you to try your scenes without the overhead of developing an iOS app first. If you’re on a mobile device, you can do this directly with the built-in camera, and if you’re on your Mac, you can enable an option to preview it on your iPhone.
Setting Up
After you’ve installed Reality Composer, either on your Mac or iOS device, you’re ready to create a project with it. Similar to Xcode, creating a project with this software is not rocket science (no pun intended). Before you bring Mars into your living room, let’s get everything set up.
Create a Project
Start by opening Reality Composer and selecting where on your file system you’d like the project to be stored. It doesn’t really matter where you save the file, as long as you’ll remember where you’ve kept it. Then, click New Document.

Choose an Anchor
Next, the software will prompt you to choose your anchor. Since we’ll be using the floor or a table to run our demo, choose Horizontal as your Anchor.
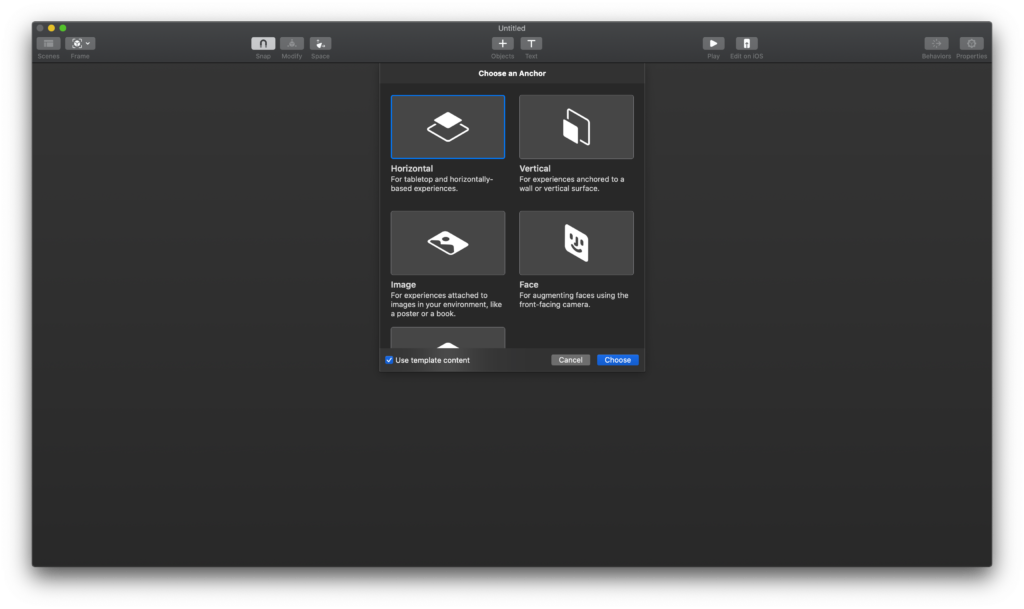
The anchor, as the name suggests, specifies what your virtual object will remain attached to. For example, if you’re mounting a virtual photo frame, you’d likely choose vertical, since walls are vertical surfaces. In this case, we’ll be placing our planet on the ground, which is a horizontal surface.
Download Mars
Now, it’s been a while since Apple released their USDZ file format in collaboration with Pixar, and because of that, many major organizations are now using it as the gold standard. For this reason, you don’t need to create your own Mars—you can download it from NASA.

In case you’re interested, NASA has a whole bunch of other planets to download, and if you’re able to get anything in a USDZ file format, you don’t need to convert it in order to use it with Reality Composer.
Adding Mars
Now that you have your project created and you have a USDZ version of Mars, you’re ready to create your scene. Make sure you have your project window open and that Mars is in a safe place on your file system.
Delete Boilerplate Objects
Head back to your Reality Composer window, and you’ll likely see something like below. It still has some boilerplate objects, such as a cube and a button, which we’d like to get rid of before we begin.

To remove these objects, click in your scene and press Command + A to select all of the objects in the scene. Then, press Delete to remove all of them. Great! You now have a blank canvas to work with.
Import USDZ
Finally, the moment you’ve been waiting for: importing Mars into your project. To do this, click the + icon in the toolbar at the top, then click the Import button in the top right of the dialog that appears.
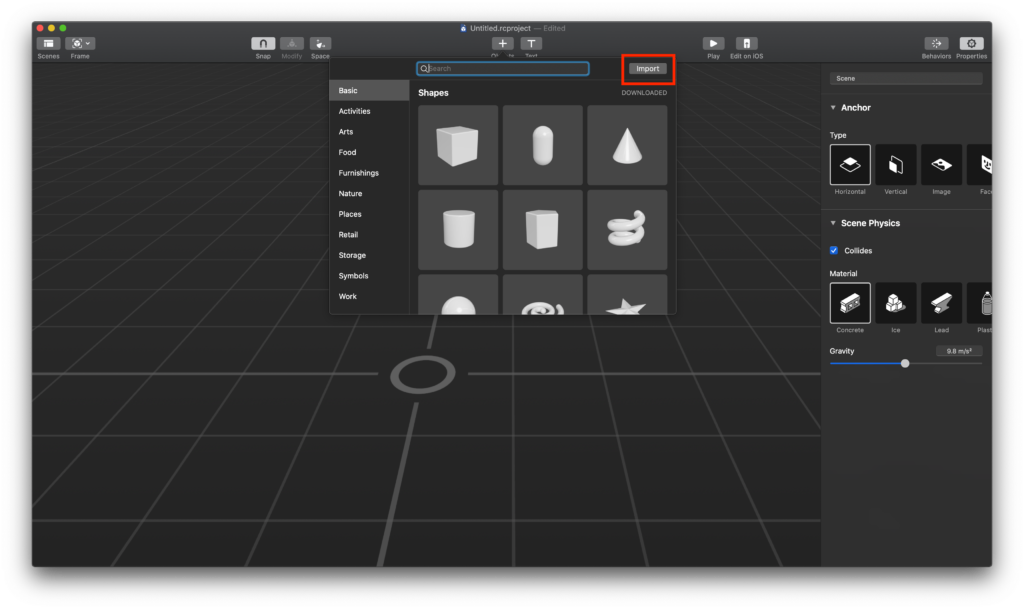
Then, select the USDZ file you downloaded from NASA earlier. Within a few seconds, Mars should appear somewhere on your screen and will most likely be oversized, so you won’t be able to see it. To see Mars, pinch out on your trackpad to zoom out of your scene.
Move and Shrink Mars
Mars is massive in real-life, and it’s proven to be massive on our screens as well. Let’s shrink it down so that it’s easier to manage in your scene. To do this, start by selecting Mars. If the right panel isn’t visible, tap the Properties button in the upper-right to enable it.
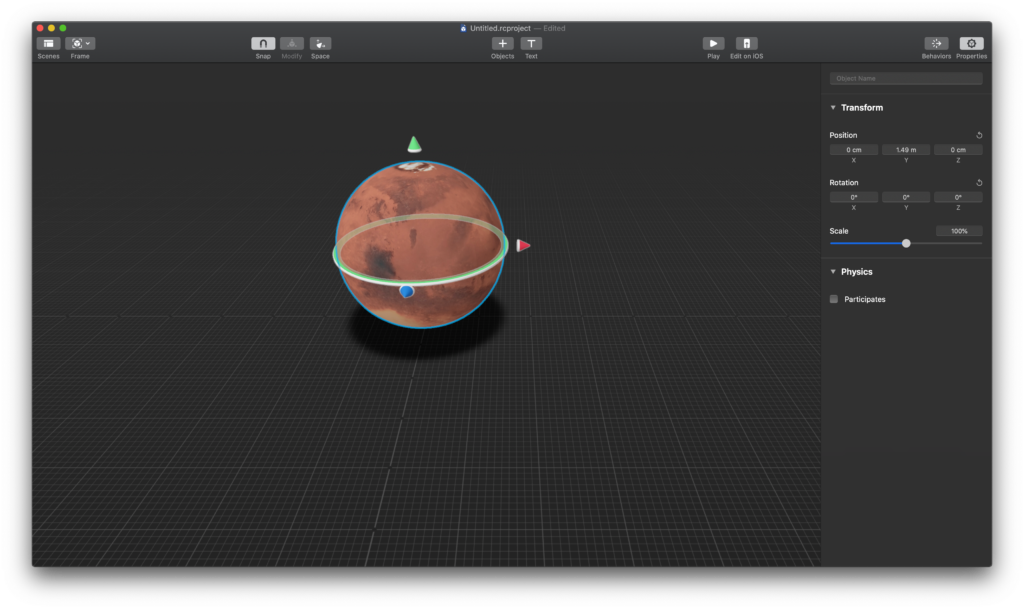
Change the Z Position to 0 to make Mars move to the center of the screen and ensure that X Position is also set to 0. You can leave the Y Position as-is for now, since we’ll change it later. Then, change the scale to 50% to reduce the size of the planet.
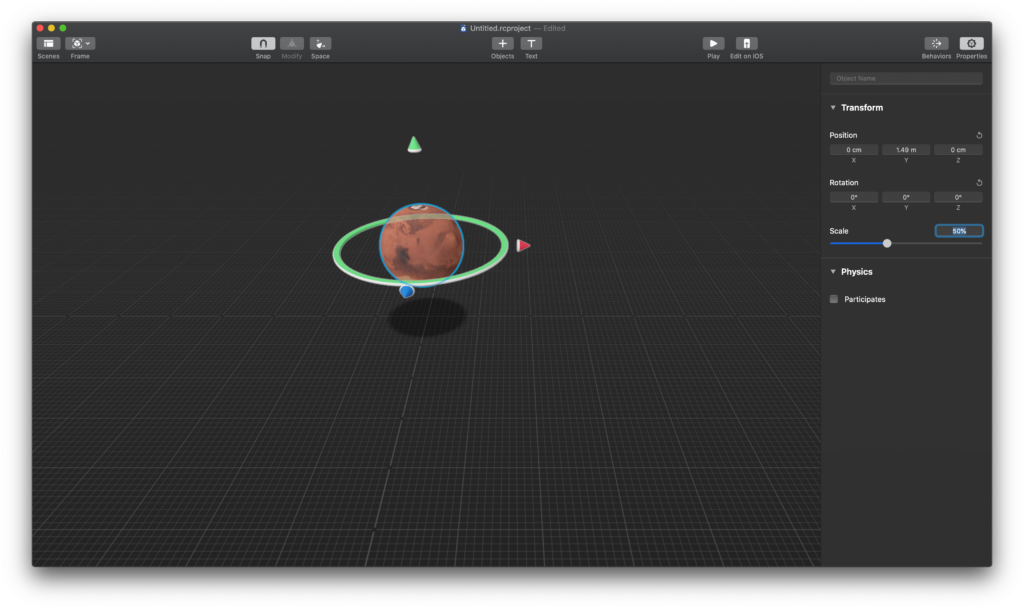
Great! The once enormous and out-of-place planet Mars is now small enough to control and is centered on your scene. Time to make it do something.
Making Mars Move
Finally, planet Mars is in your augmented reality scene; however, a stationary planet isn’t very entertaining to look at. Let’s get a glimpse at how to make Mars more interactive using animations and user input.
Dropping Mars
The first and arguably the most entertaining way to make Mars interesting is to drop it. Using the physics engine built into the software, you can ask your virtual objects to behave like plastic, wood, or rubber, among other materials.
To do this, open the Properties panel by using the gear icon in the upper right. Then, check the Participates checkbox under the Physics subheading. This will allow the planet to respond to gravity (which is set to Earth’s gravity by default). Finally, change the Motion Type to Dynamic using the dropdown menu and choose a material.
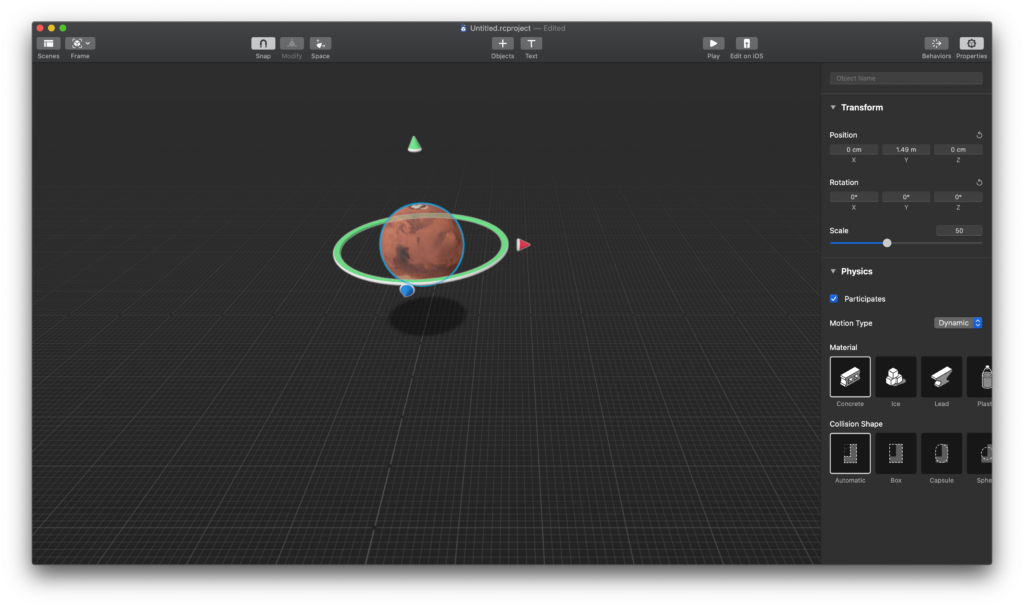
Right now, you can leave the Collision Shape as Automatic, but if you’d like, you can experiment with the different types. In essence, collision shapes change the way Mars will respond when it hits the “ground.”
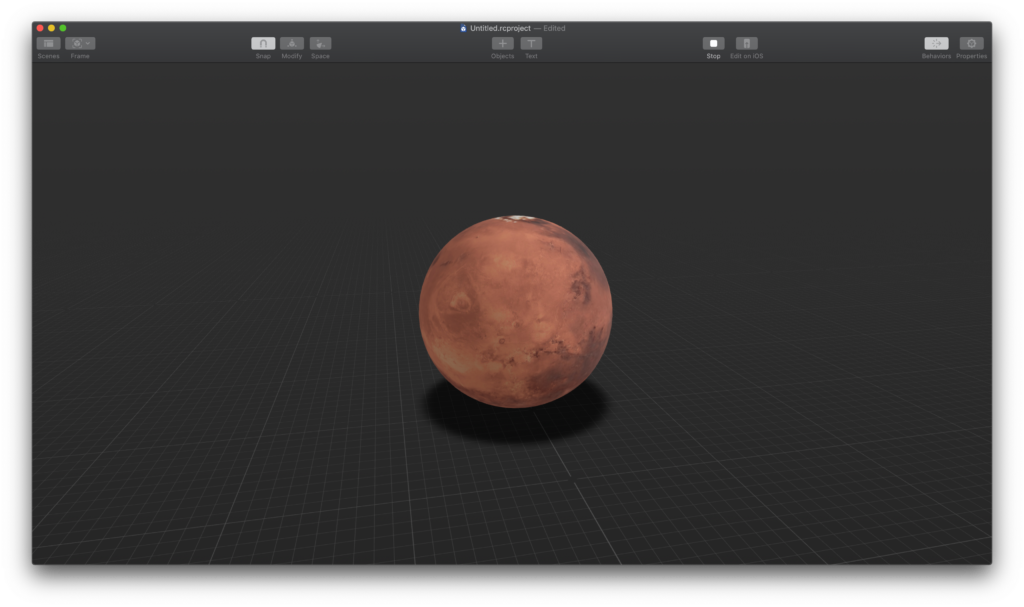
If you click the Play button in the toolbar, you’ll be able to see Mars hit the ground in a realistic way. After that’s happened, go ahead and click the Stop button in the same place.

Pushing Mars
Next, let’s interact directly with Mars by pushing it around. To do this, you’ll need to program a behavior using the Behaviors inspector, second from the top left corner in the toolbar. Making sure that Mars is selected, click on the Behaviors icon.
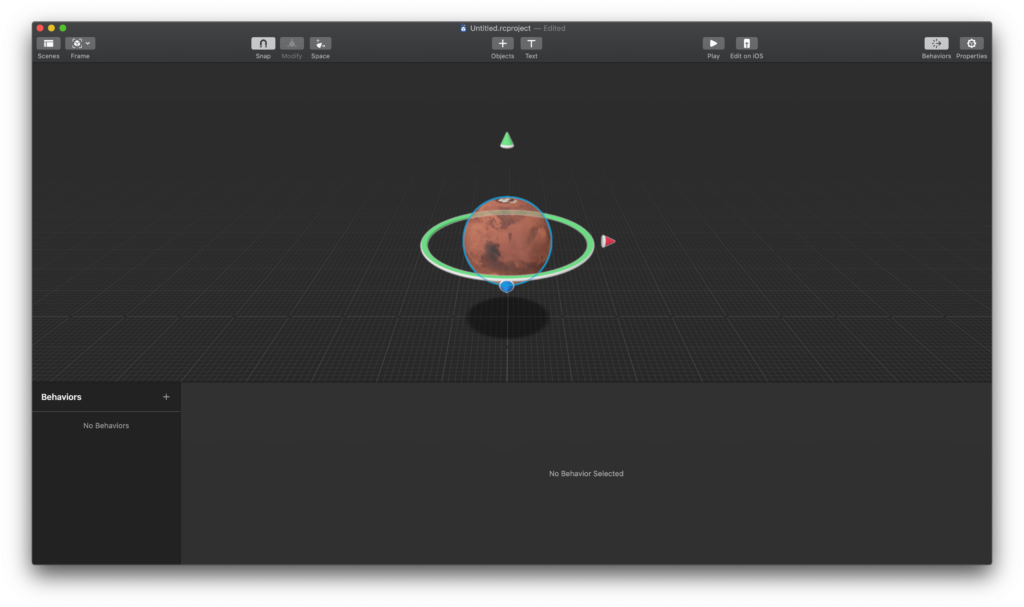
To add a new behavior, click the + button near the lower left part of the screen. This will open a popup with a bunch of options. For now, we’ll use the Tap & Add Force option. This way, we’ll be able to perform the Herculean task of tapping Mars and making it move around.
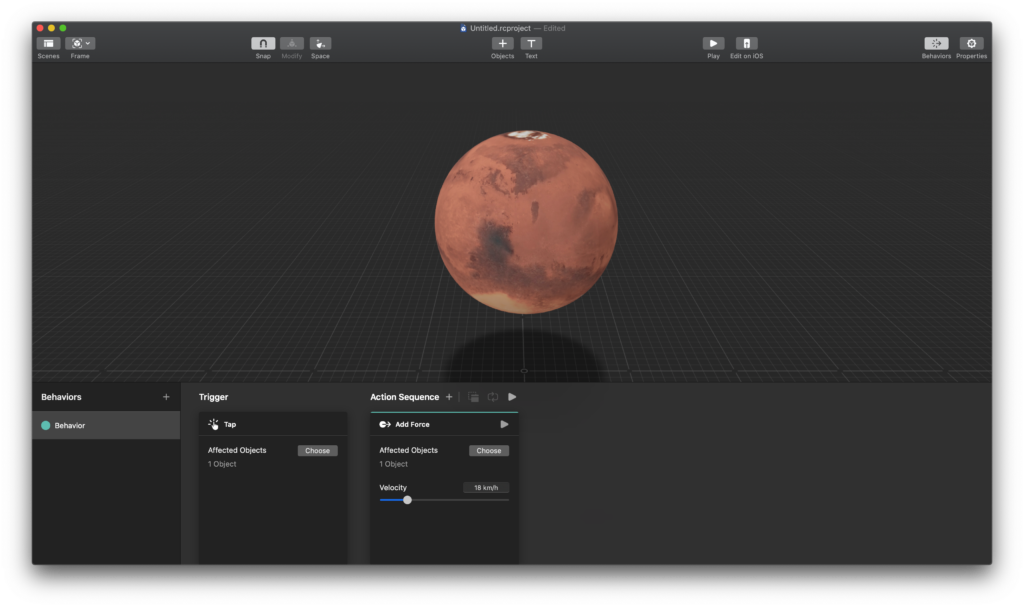
Now, we need to tell Reality Composer which object(s) we’re dealing with. In this case, Mars is the only object in the scene, and hence, you can click the Choose button next to Affected Objects and click on Mars for both the Trigger and Action Sequence boxes.
When you click Play again, you’ll be able to tap Mars and make it move around, based on where and how many times you tap the planet. All done here!
Conclusion
Excellent work! You successfully brought Mars into an augmented reality scene and programmed some basic behaviors and interactions into it. You also learned about the USDZ file format and how to import pre-made models into your AR experiences within Reality Composer.
To see Mars actually appear in your living room, you can do it directly if you’re using an iOS device. If you’re on a Mac, simply send your file to your iPhone or iPad using the Edit on iOS button next to the Play button. Hopefully, your first experience with Reality Composer helped inspire you to create your own awesome augmented reality experiences. Onward!
Be sure to smash that “clap” button as many times as you can, share this tutorial on social media, and follow me on Twitter.

Comments 0 Responses