
Hair simulation is a great way to simulate different but realistic hairstyles. The Hair Simulation effect lets you know which hairstyle suits your face, and it’s quite a lot of fun. We can simulate short, long, and different color hairstyles in Lens Studio.
In Snapchat’s Lens Studio, we will use the Hair Simulation template to try and simulate some beautiful hairstyles.
In this article, we will learn to simulate a wide range of beautiful and unique hairstyles that will give you a realistic experience. Let’s get started!
Table of contents
Step 1: Set up a New Project in Lens Studio
Open Lens Studio. You will see many recommended templates. Here, we need to click on the Hair Simulation template.
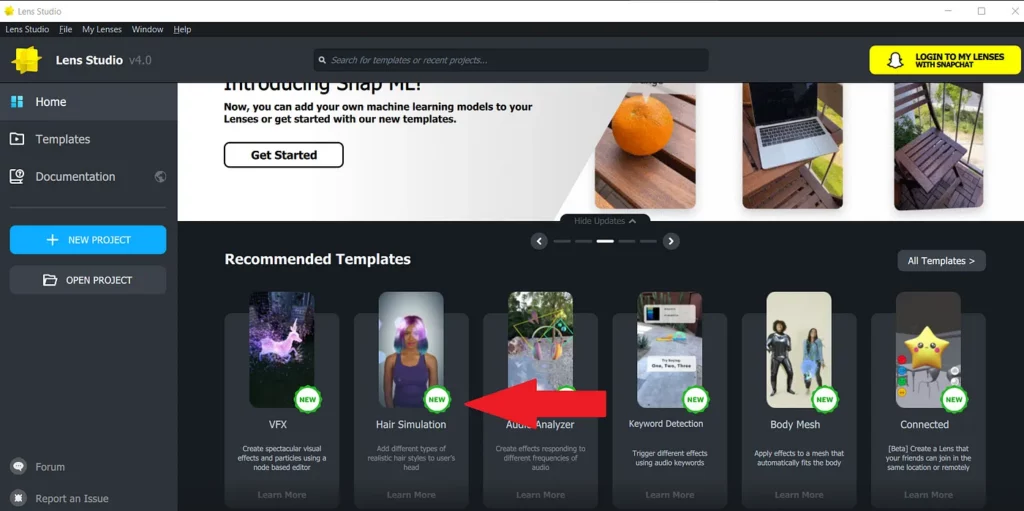
If the template is not available in the recommended templates, you can search for it in the above search bar.
Now, on the left side, go to Back Orthographic Camera > Full Frame Region 0 > ML Bald Layer. By clicking on the ML Bald Layer button, you can enable the bald filter on your image.
This Bald Layer is created using the machine learning bald model. This bald layer creates a smooth look when combined with the hair component.
Step 2: Choose a Hairstyle to Try Simulation
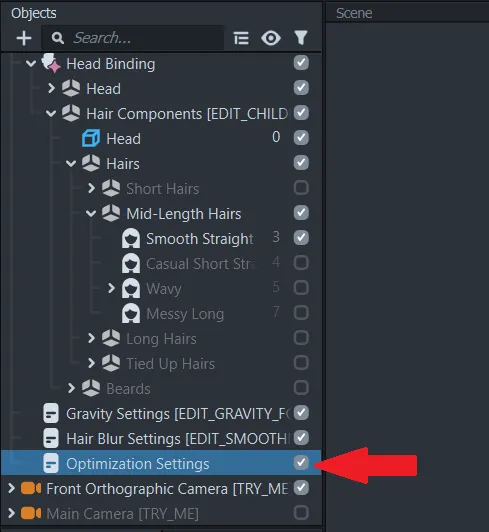
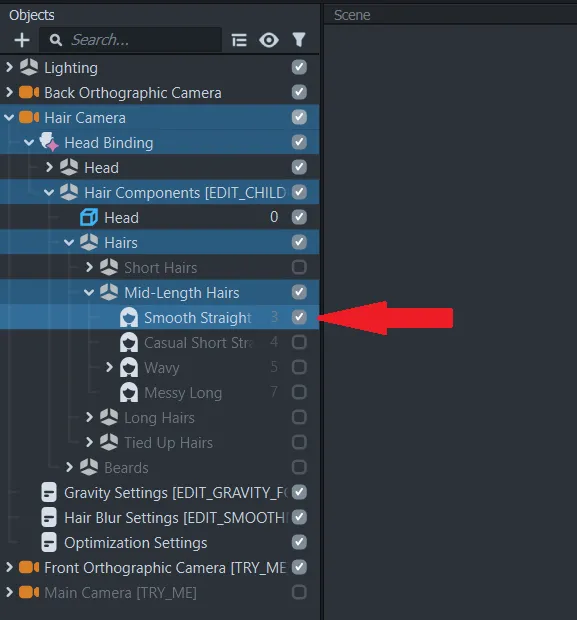
On the left side, click on Hair Camera. Go to Hair Camera > Head Binding > Hair Components. In the hair components, you can choose and select different hairstyles of your choice.
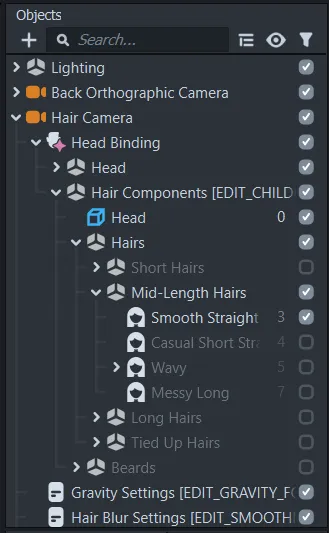
Select and click on the type of hairstyle that you want to simulate. You can toggle between different hairstyles and explore them.
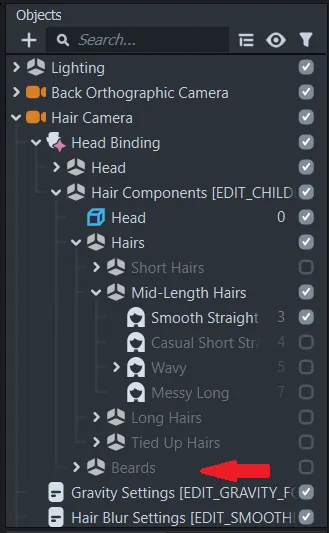
Some beard styles are also included in the template that you can simulate along with hairstyles.
Step 3: Setting up Hair Blur Controller
In the left panel, click on Hair Blur Setting to access Hair Blur Controller. We need to click on the button and it will be displayed as marked checked.

Hair Blur Controller is used to simulate smoothness in different hairstyles. Most hairstyles will not look good without smoothness. Therefore this HairBlurController script is needed.
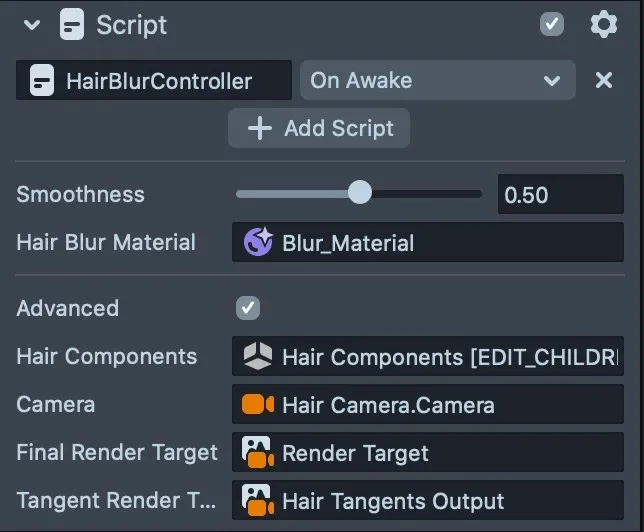
Adjust the smoothness parameter by dragging the Smoothness slider, or you can also enter a number in a range between 0–1 to set the value of the smoothness parameter.
Here you can see how smoothness provides a better look to the hairstyle:
Step 4: Optimize the Simulation
OptimizationController script is used to set up optimization levels for different devices.
In the left panel, go to Hair Camera > Head Binding > Optimization Settings and then click on Optimization Settings to access OptimizationController.
On the right side, you will see this OptimizationController panel.
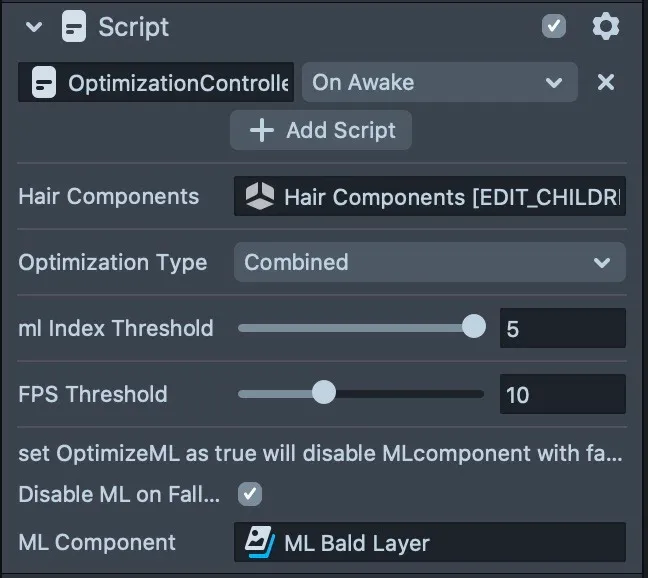
Here, the Optimization Type parameter determines the optimization method being used.
This template has three types of Optimization mode:
- ML Device Index: This optimization type turns on fallback mode and disables bald ML script. A higher value of ML Index Threshold means that fewer devices would have fallback mode turned on when the lens is public.
- FPS Threshold: Regardless of the device, the lens would turn on fallback mode if fps is lower than the FPSThreshold.
- Combined: This type uses both the above methods in a way that when a device’s ml performance index higher than ML Index Threshold and fps is higher than fps threshold.
Optimization Tips
The hair component is quite heavy in terms of its performance and also can make your device slower. To run this Lens smoothly on your device, here are some performance optimization tips:
- Keep the resolution lower for hair texture
Go to Resources > Hair Resources > Textures > Alpha and select a texture of your choice.
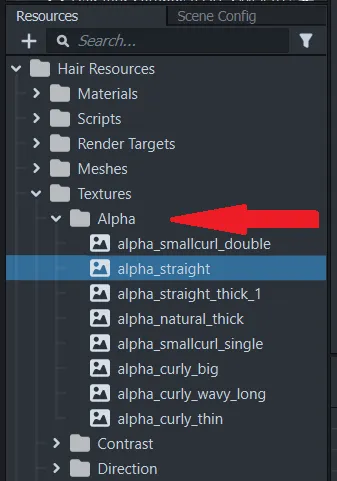
Here you can change the resolution of the texture according to the configuration of your device. Keep the resolution not very high to easily render the hair simulation effect and optimize the texture.
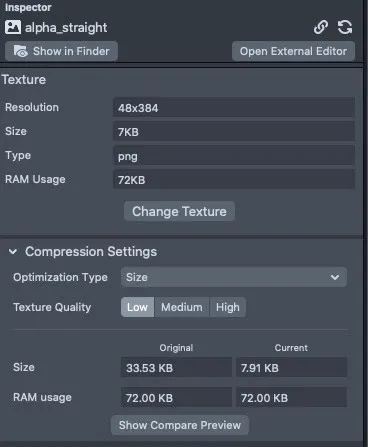
A minimum of 34 x 34 px resolution can be used in order to achieve a standard visual effect.
2. Keep hair resolution in a range of 5 to 20
Go to the Hair Camera object and select the hairstyle that you want to simulate on the lens.
After clicking, you will see this panel on the right side.
Here you can change the hair resolution by number. It’s better to keep the hair resolution number in the range from 5 to 20.
A higher hair resolution may cause lagging performance on some low-end devices. Set the hair resolution according to your device.
Conclusion
In this article, we have covered step-by-step process of adding hair simulation effect in lens using Lens Studio.
Thanks for reading!

Comments 0 Responses