
🔋 Low-power consumption is indispensable for autonomous/unmanned vehicles and IoT (Internet of Things) devices and appliances. In order to develop deep learning inference applications at the edge, we can use Intel’s energy-efficient and low-cost Movidius USB stick!
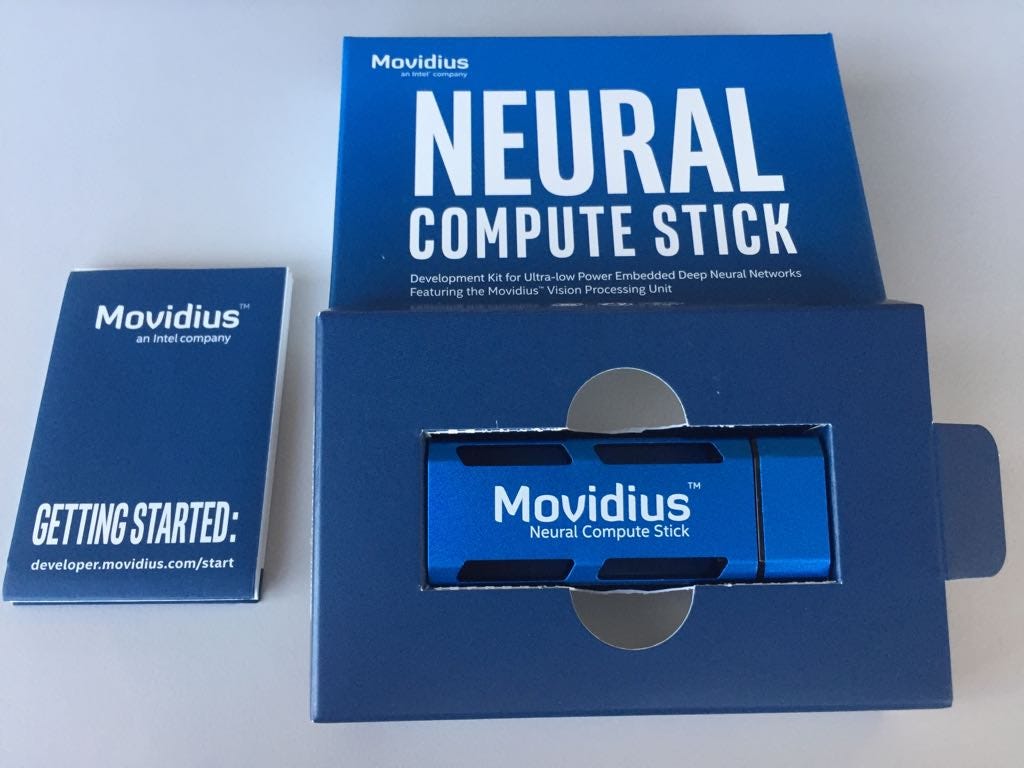
💎 The Movidius Neural Compute Stick (NCS) is produced by Intel and can be run without an Internet connection. The Movidius NCS’ compute capability comes from its Myriad 2 VPU (Vision Processing Unit).
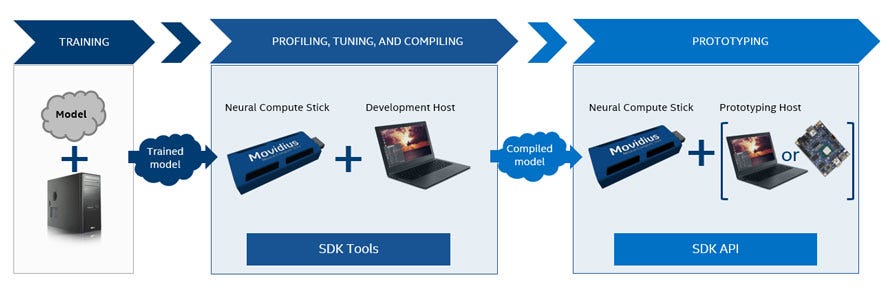
Profiling, tuning, and compiling a DNN on a development computer with the tools are provided in the Intel Movidius Neural Compute SDK. This software development kit enables rapid prototyping, validation, and deployment of deep neural networks.

Running deep learning models efficiently on low capacity graph processors is very painful. Movidius allows us to optimize the operation of large models such as GoogLeNet (thanks to Yann LeCun) with multi-use support. It’s an easy-to-use kit that allows you to design and implement applications such as classification and object recognition on physical products.
We can simply think of Movidius NCS as a GPU (Graphics Processing Unit) running on a USB. Model training isn’t performed on-device, but a trained model can work optimally on the unit, which is intended to be used in physical environments for testing purposes:
🔹 We can use it with Ubuntu 16.04 or Raspberry Pi 3 Raspbian Stretch.
🔹 It supports two DNN frameworks (TensorFlow and Caffe).
🔹 Movidius Myriad 2 VPU works with Caffe-based convolutional neural networks.
🔹 We can run complex deep learning models like SqueezeNet, GoogLeNet, and AlexNet on computers with low processing capability.
🏄 APPLICATION
It’s very simple to run inference on an image classification demo model. We can use the NC App Zoo repo for classifying an image. We need to take the graph file to activate the application of the Movidius NCS. It has a compiled GoogLeNet model for ready to run. This application needs some files.
The make command is used for creating the files that Movidius needs as a graph file. The graph file is a demo of image-classifier.
View the steps below for a quick application:
◼️ For using the property of the NCSDK API add (import) the mvnc library:
import mvnc.mvncapi as mvnc◼️ You can access the Movidius NCS using an API like any other USB device. Also, you can use parallel Movidius devices at once if you need more capacity to compute your model. For now, one kit is enough for this application. Select and open process:
# Look for enumerated Intel Movidius NCS device(s); quit program if none found.
devices = mvnc.EnumerateDevices()
if len(devices) == 0:
    print('No devices found')
    quit()
# Get a handle to the first enumerated device and open it
 device = mvnc.Device(devices[0])
 device.OpenDevice()
◼️ We’ll use a pre-trained GoogLeNet model for using a compiled graph file:
# Read the graph file into a buffer
 with open(GRAPH_PATH, mode='rb') as f:
   blob = f.read()
# Load the graph buffer into the NCS
graph = device.AllocateGraph(blob)
◼️ We also need to do some pre-processing before loading the image into our Movidius NCS:
# Read & resize image [Image size is defined during training]
img = print_img = skimage.io.imread( IMAGES_PATH )
img = skimage.transform.resize( img, IMAGE_DIM, preserve_range=True)
# Convert RGB to BGR [skimage reads image in RGB, but Caffe uses BGR]
img = img[:, :, ::-1]
# Mean subtraction & scaling [A common technique used to center the data]
img = img.astype( numpy.float32 )
img = ( img — IMAGE_MEAN ) * IMAGE_STDDEV
◼️ Use LoadTensor() to load the image into the Movidius NCS:
# Load the image as a half-precision floating point array
graph.LoadTensor( img.astype( numpy.float16 ), 'user object' )
◼️ Give the input image to the pre-trained model and get the output by using GetResult():
# Get the results from NCS
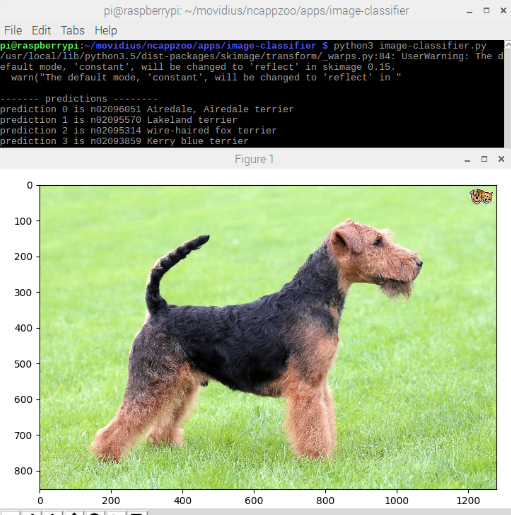
output, userobj = graph.GetResult()◼️ Print the prediction of the model’s output and corresponding labels. Here we also display the input image at the same time:
# Print the results
print('n — — — — predictions — — — — ')
labels = numpy.loadtxt(LABELS_FILE_PATH, str, delimiter = 't')
order = output.argsort()[::-1][:6]
for i in range( 0, 5 ):
print ('prediction ' + str(i) + ' is' + labels[order[i]])
# Display the image on which inference was performed
skimage.io.imshow(IMAGES_PATH)
skimage.io.show()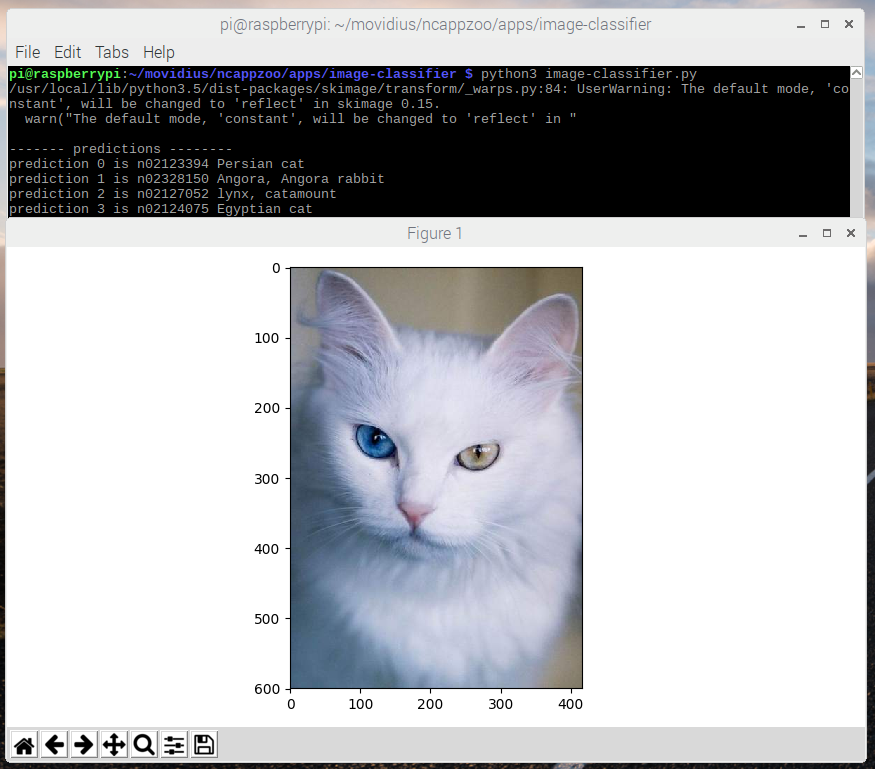
◼️ For the last step, we clear and shutdown the Movidius NCS device for use it again:
graph.DeallocateGraph()
device.CloseDevice()
THANKS 👽
I‘d like to thank Intel Türkiye and Mustafa Aldemir for kindly donating a Movidius Neural Compute Stick to support my Deep Learning Research.
Also thanks to Yavuz Kömeçoğlu for the feedback.
References:
- https://developer.movidius.com/
- https://www.movidius.com/news/movidius-and-dji-bring-vision-based-autonomy-to-dji-phantom-4
- https://github.com/movidius/ncappzoo
- https://software.intel.com/en-us/articles/build-an-image-classifier-in-5-steps-on-the-intel-movidius-neural-compute-stick
- https://towardsdatascience.com/getting-started-with-intel-movidius-d8ba13e7d3ae

Comments 0 Responses