
Introduction
Computer vision is a field in artificial intelligence based on giving machines an understanding of data from images, video frames, pixel manipulations, and others. In this article, we will look into four commonly used annotation tools for object detection/tracking. To demonstrate these, we will be annotating team players on the football pitch.
The following is an outline on what we will be looking into:
- Labellmg
- Computer Vision Annotation Tool (CVAT)
- Visual Object Tagging Tool (VOTT)
- LabelMe
labellmg
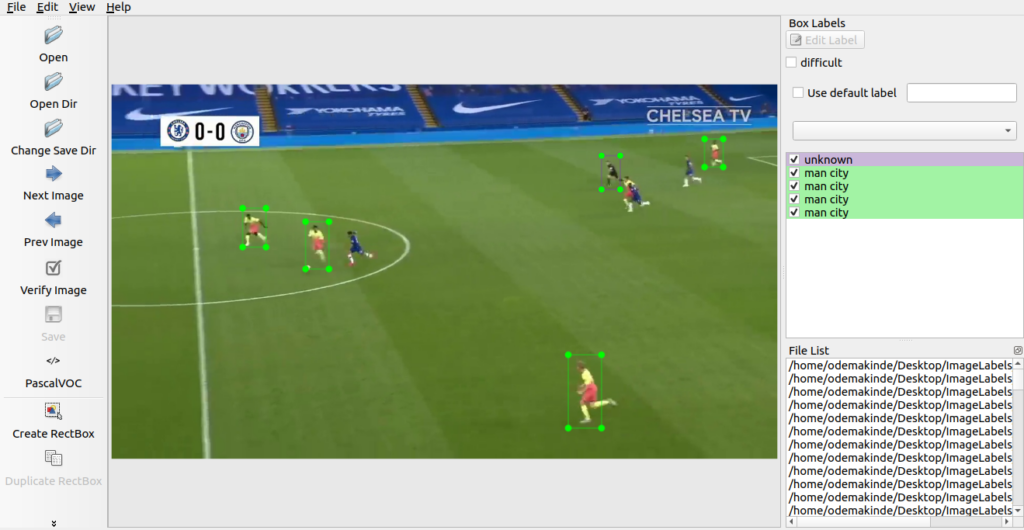
Labellmg is an open-sourced graphical labeling tool for image processing and annotations. Source code on how to use it locally can be found here.
To get started, follow the instructions below:
- Build and launch using the instructions specified here.
- Click ‘Change default saved annotation folder’ in Menu/File.
- Click ‘Open Dir.’
- Click ‘Create RectBox.’
- Click and release left mouse to select a region to annotate the rect box.
- You can use right mouse to drag the rect box to copy or move it.
The annotation will be saved to the folder you specify.
The image below, illustrates all outlined processes specified above.
If this still seems confusing to you, you may want to check out a detailed breakdown of how I used LabelImg to annotate onions from peppers.
Computer Vision Annotation Tool — CVAT
CVAT is termed computer vision annotation tool. It is a free tool for labeling images. It was developed and open-sourced by Intel. It is easy to use and helps to create bounding boxes and prepare your computer vision dataset for modeling. To get started, visit CVAT here. Create an account then proceed with the following steps on how to label the data.
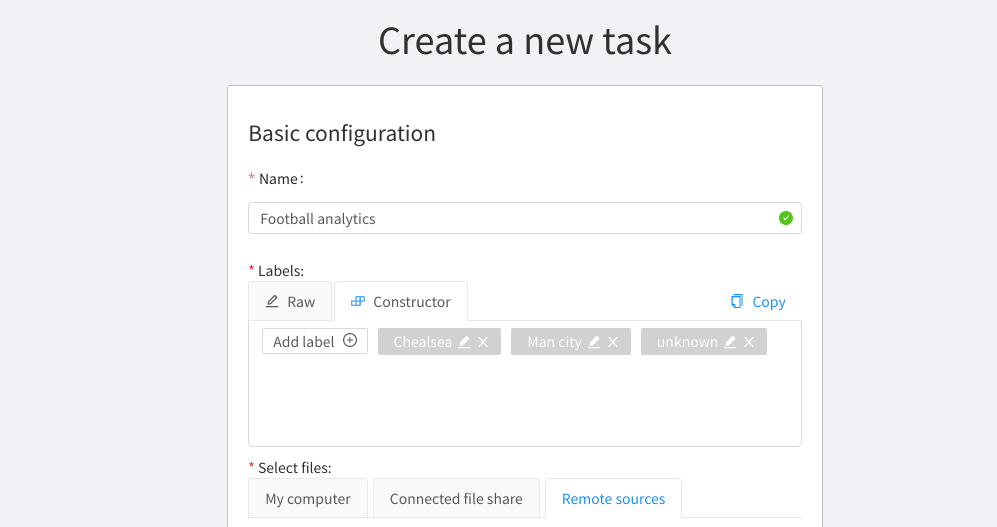
First and foremost, click on ‘Create a New Task’ then complete the pop up fields. You should have something that looks like this:
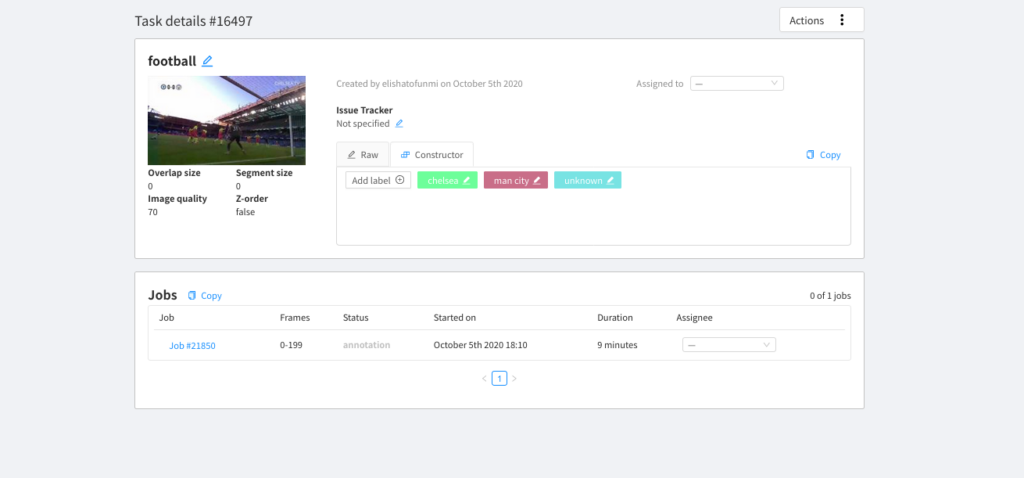
Having created a new task, click on ‘My Tasks,’ you should have something that looks like the below.
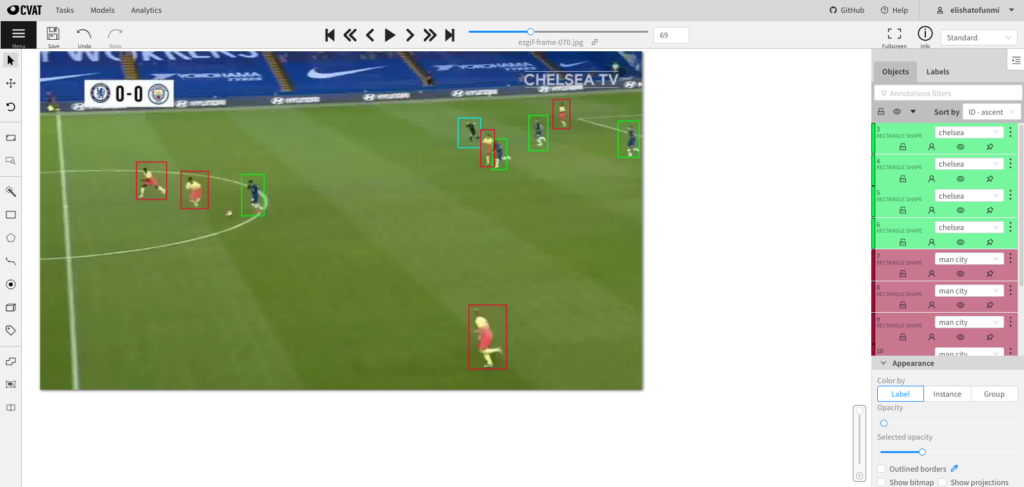
The task you recently created can be found in the ‘Job’ cell, click on the link, and you should have something that looks like the below (un-annotated). Now, go ahead to select the rectangular icon by the left pane (you could also select a polygon, depending on the project).
When you click on this, there will be a pop up, select the label of your choice. You can now go ahead and draw the bounding box across each object for the selected label. Do this for all objects in the image.
Once you are done with an image, go ahead to label the next. You can click on the left or right arrow as shown at the top of the image below (always do this after saving each image).
Now that you are done with all labelling, you can go ahead and export the data by returning to your tasks as shown below. Always ensure you have saved your annotations before doing this.
Go ahead to click on the three dots beside ‘Actions,’ then select dump annotations: This will export the data in your preferred choice (TensorFlow records).
Here are the following you can do after annotating:
- Coco 1.0
- CVAT for images.
- CVAT for Videos.
- Datumaro.
- Labelme.
- MOT.
- Pascal VOC.
- Segmentation mask.
- Tfrcords.
- Yolo 1.1
Other things you could do from selecting action is:
- Upload annotations.
- Export as datasets.
- Automatic annotations and others.
For more information on how to label images using CVAT, do check out this video by roboflow.ai
Visual Object Tagging Tool — VOTT
VOTT is an acronym for visual object tagging tool. VOTT was developed by the Microsoft team for computer vision labelling/annotation of videos and images. Check out the source code here.
Note there are two ways to run this process:
- Using web browser — https://vott.z22.web.core.windows.net/#/
- Building from source.
It is cool to use the source version because, when running locally with npm (on linux), both the electron and the browser versions of the application will start. One major difference is that the electron version can access the local file system. For the sake of this tutorial, this will be implemented from source.
To use the web browser, kindly visit this link. Do take note that, currently, VOTT supports:
- Azure Blob Storage
- Bing Image Search
- Local File System
The web version only supports Azure Blob Cloud storage and Bing Image Search, it doesn’t support image annotation from local file system, unless you build from source.
The following process demonstrates how to annotate images from your local file system on Windows. Kindly check out the recent release here from the VOTT team and install the version that suites your operating system.
Go ahead to download the .exe file from the release link, then launch. You should have an interface that looks like this:
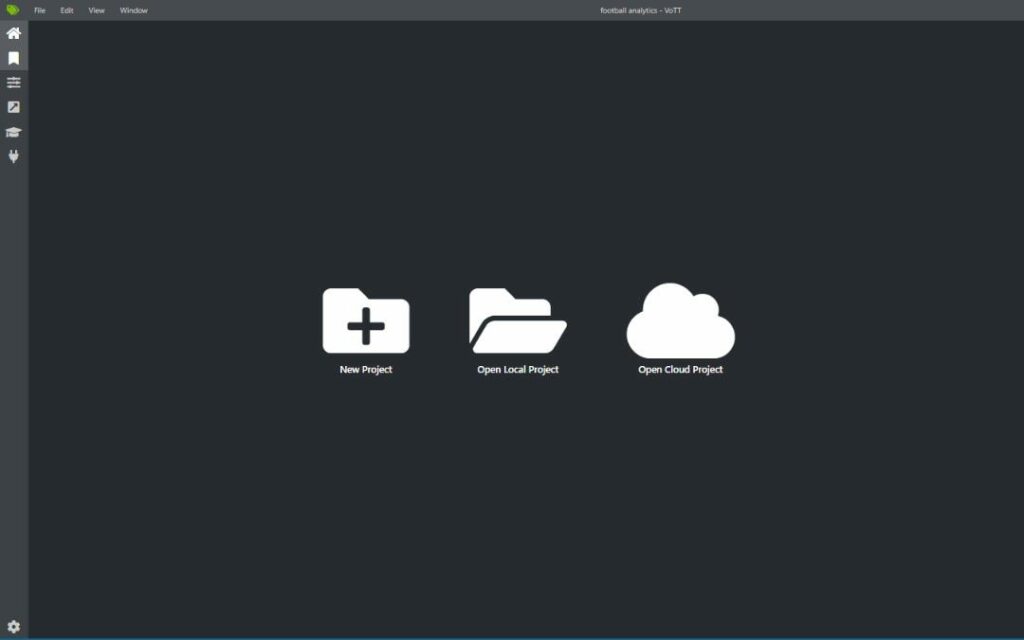
Next is to click on ‘new project,’ then you have an interface as shown below.
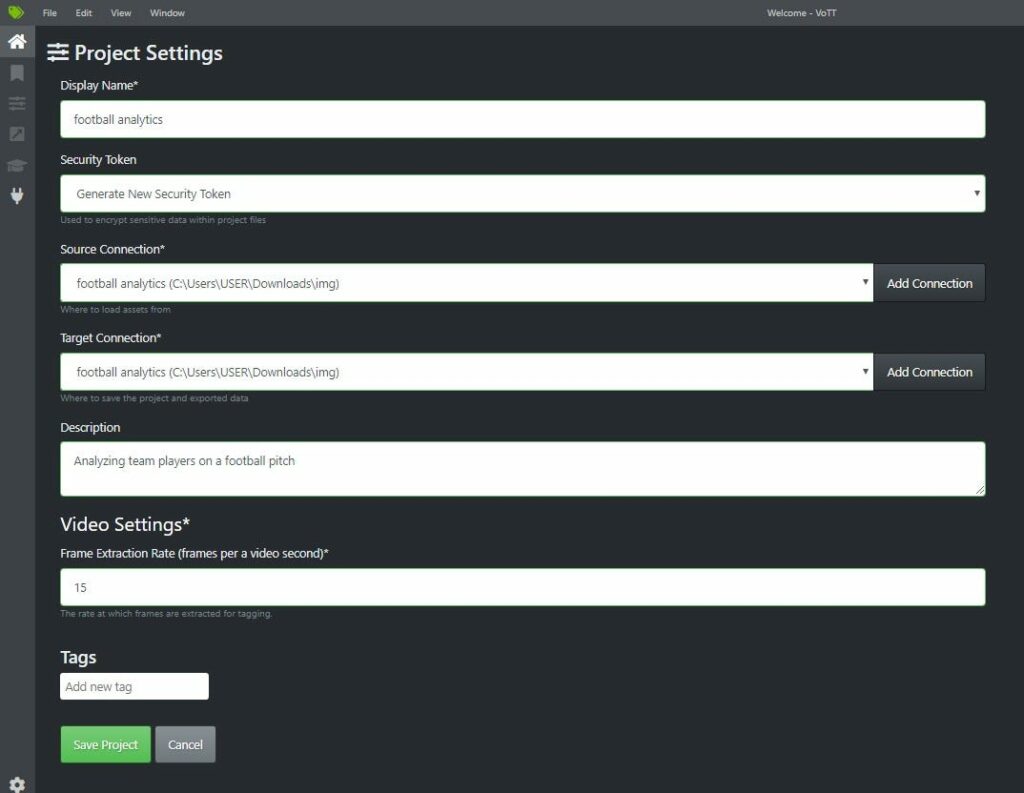
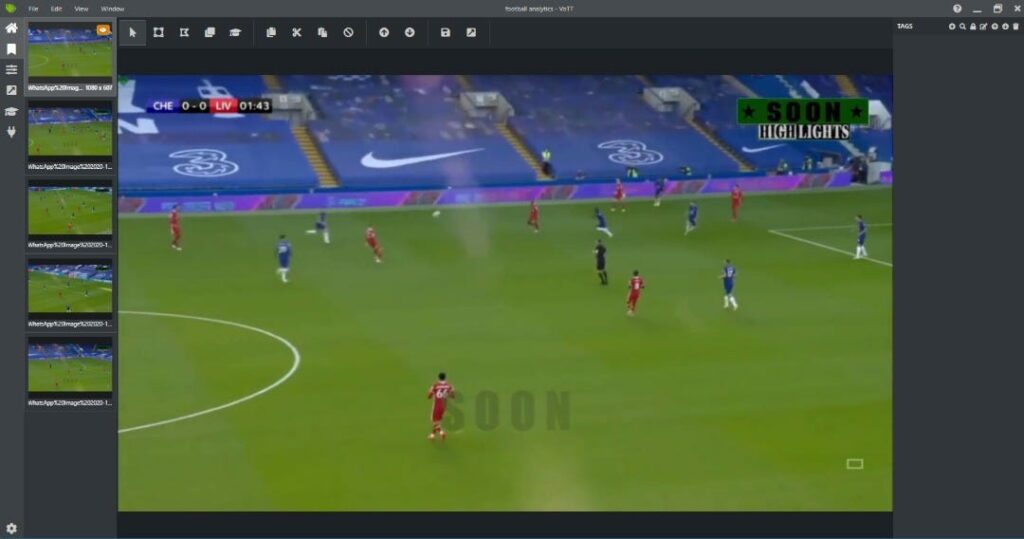
Having created a new project, the next step is to fill in the fields as shown above. Do take note of the pop up when you click on add connection — make sure you select local file system by specifying the directory to where the images to be annotated are. Do likewise to the target connection. Once you are done, you can save the project. You should have a pop up window that looks like this. You would see all images in the directory specified on your left panel.
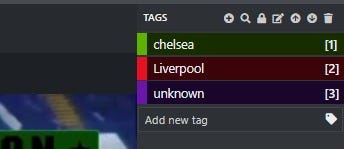
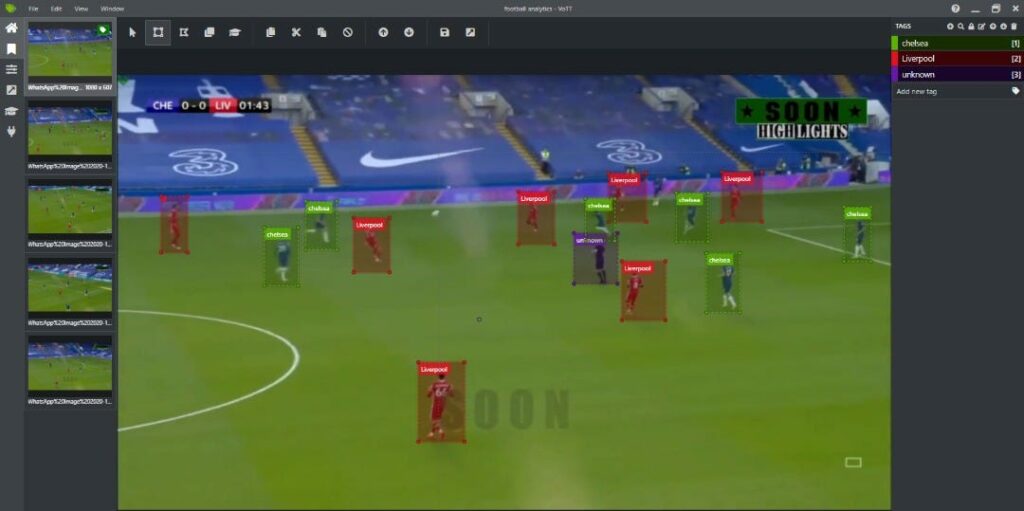
Next is to go ahead to annotate the images. Before doing this, let’s go ahead and specify the labels first. To do this, select the ‘+’ icon at the topmost right and add the various labels. In my own case, I have Chelsea, Liverpool, and the unknown class. You should have something like the image below. Do take note of the numbers attached to each label.
Now, let’s move on to drawing bounding box across each object in the image. Select the icon as shown below at the top menus. This will enable you to draw a bounding box across every object you want to label in the image.

Next is to draw the bounding boxes. Go ahead and select each object in your image, while taking note of the number attached to each label. Draw the boundary box and type the number associated with that object so that the class can appear on such object. Repeat the same process for all. You should have something that looks like the below.
The next step is to export the data. Among the icons on the left panel, select the icon pointing in the upward direction, you should have a pop up that looks like this below.
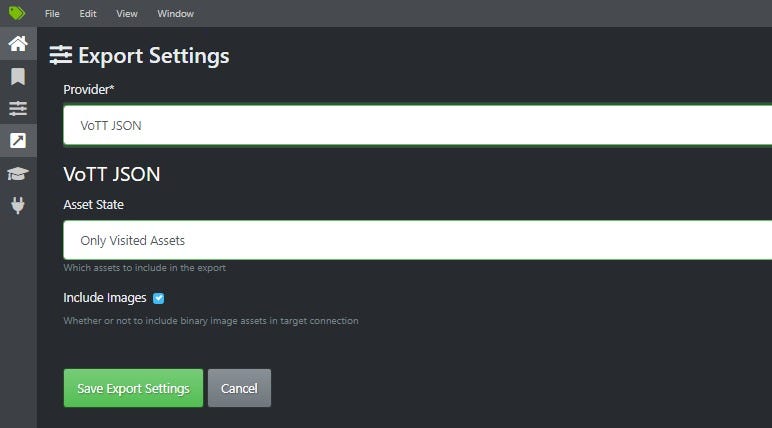
Kindly select from the list of providers (you could select TensorFlow records, so as to export the data as TensorFlow records). You can select the asset state of your choice which applies to your project. Go ahead and save by clicking on the save export setting.
To finally proceed with exporting your data in your preferred format, click on the export icon (this can be found among the icons present above the image). The icon to select has been labelled for you below. This will export the data to the target destination (this has been specified in your target connection).

For more information on how to label images using VOTT, do check out this video by roboflow.ai
LabelMe
Labelme is an open sourced annotation library created by the MIT Computer Science and Artificial Intelligence Laboratory which helps to annotate digital images. More about LabelMe can be found here. One unique thing about Labelme is that it gives you the flexibility of labelling objects using any polygon of your choice. This includes:
- Circle
- Triangle
- Rectangle
- Line
- Point
- Linestrip, and others
To use LabelMe, visit the link here to install and launch. This is a similar process to LabelImg.
- Click ‘Open Dir’ to load in the source images.
- Click ‘Create RectBox.’
- Click and draw bounding rectangles across the label of your choice.
- End the box from the point you started from, this will bring up a pop up asking for the label to that annotated object. Enter the label.
- Repeat the same process for all images (always ensure you save an image before you move to the next). The annotation will be saved to the folder you specify.
The image below illustrates all outlined processes specified above.

You can go ahead to export as TensorFlow records using roboflow.ai platform. The following process gives an outline on how to go about this:
- After creating an account with roboflow.ai, go ahead and click on ‘create a dataset.’
- Fill in your dataset details, upload the data (images and .xml files). Make sure you select object detection when selecting the type of data for your computer vision modeling.
- You can go ahead to add pre-processing steps and augmentation steps if need be.
- Finally, in the topmost right corner, after uploading, click on ‘generate TensorFlow records.’ Go ahead to select ‘generate as code,’ this will give you a link for you to download the TensorFlow record data of your trained data.
Conclusion
In conclusion, image labeling is an essential process for your model building pipeline. Knowing how to use annotation tools effectively helps to enhance proper modeling practices and achieve better prediction results.

Comments 0 Responses